Show us your brewrig

Australia & New Zealand Homebrewing Forum

Help Support Australia & New Zealand Homebrewing Forum:

This site may earn a commission from merchant affiliate links, including eBay, Amazon, and others.
nice DB what I like all practical without the wank factor :p

BD rig makes me sick I just think how much cocko faps to it :lol: Very nice setup though wish I had more then -$300 to build something like that lol
 
Doing a maiden voyage on the new rig this morning.
Controller is Matho's braudruino that has been edited to work on a 3v system.
(Has the hand held box to manually control the pump and element separately)

Still need to add the wooden bottom layer and get water plumbed in.
But the kegs are empty, beer needs to be brewed!

121114.jpg
 
Done quite a few brews on my 98/50L BIAB+Sparge 'rig' now, so perhaps I should post a few pics :)

I aim for 65L into the cube, and 60L into the fermenter for 3 kegs (57L) at the end of the day,

My goal has been simplicity/minimalism with simple cleanup/packup/storage requirements, yet being able to actually produce enough beer to keep supply up.

Knocking up the temp to strike...
biab_1_striketemp.jpg

13.7KG of DSGA
biab_2_13.7KG.jpg

Dump it all in, my Mash Weapon of choice is a 60cm Stainless Masher
biab_3_doughin.jpg

Break up any doughballs and get a good flow in the mash
biab_4_doughin2.jpg

Bingo, 66C pretty exactly.
biab_5_bang_on_mashtemp.jpg

And we wait for the mash.... I've begun bringing up 20-25L of hot water to the boil in the small pot on a tiny 2 ring burner. It'll take a good long time, but I'll cut the gas when it boils and it'll drop to about 80C by the time it comes to dunk-sparge.

biab_6_mashing.jpg
 
Pull the bag. I use a 2:1 simple pulley system. Bag was made by SWMBO with extra re-inforcement for the 25+KG load etc... I'll let this drain, then I'll swing it into the little pot, and essentially re-biab with the 25L of hot water. at a very low L:G

biab_7_mashout.jpg

I've been remashing the bag in the little pot for about 10 minutes, agitated, and I'll pull the bag now and let drain. I get about 95% efficiency in the sparge this way. Contents will be added back to the boil which is just about to start.... (picture from a different day)
biab_8_dunksparge_drain.jpg

Unfortunately, things get crazy with the mashout, sparge, boil all happening at the same time, so invariably I don't take any pictures ;)

Burner Pr0n
biab_9_flames.jpg

Whirlpool
biab_10_whirlpool.jpg

Trub Cone - Just a stainless jiggler on some heavy duty silicon hose. Simple, easy to clean, and a totally unmodified pot.
biab_11_trub_cone1.jpg

4 little soldiers. Picture from a different brew, I tend to fill the cubes to the brim these days, so I can leave behind more trub. The cubes hold about 17L of wort each, so 68L total, and I plan to leave 1-2L per cube.
biab_12_4_little_babies.jpg

Franken Fermenter. 60L inside a 400L fridge, with TempMate. I use a blow-off tube and fermowell to measure wort temperature. There's a heatbelt to bump the temp up, and the fridge knocks it down. These days I use fermenter bags to make cleanup easier, which means I have to syphon out instead of using the tap.
cold_1fermenter.jpg
 
Bung makes it easy to add hop-tea etc during fermentation. Also means I can siphon easily, etc. Fermowell is used to ensure even temperatures without wild swings/fluctutations, and most importantly prevents the tempmate from bouncing between heat/cool

cold_2fermowell.jpg

SS Perlicks + Flow Controllers
cold_3key_fridge.jpg

I really need to install a better light for viewing beer. Foam is not very dense on this one
cold_4_glass.jpg
 
That is bloody awesome Stux!

You must drink a shirt load of beer!
 
Had some questions via PM so figured I'd answer them here :

I use a caketray to prevent the bag melting. Here's a photo using the smaller port, but I use the same cake tray in the big pot. After a bunch of brews I'm probably going to have to upgrade to a stronger tray of some sort purely because the welds on the current one are breaking.

caketray1.jpg

caketray2.jpg

The 2:1 pulley is quite simple (photo recycling)

Pulley1_labels.jpg

Pulley3_assembly.jpg


And look what I found while digging out those photos, all the misc 'tools' I use during a brew day. Still accurate, except I use a refractometer instead of a hydro...
extra1_tools.jpg
 
Alright so firstly i should probably start out with a bit about me, i live in brisbane im 22 and am pretty keen on awesome beer. I have never brewed at home myself before but have run through a few ag brews with a couple of friends of mine which has sparked me to get moving on putting my own rig together. I've decided to just jump in and go straight for all grain as I know even if I didn't start here it's where I would want to end up and also along with having read pretty much all of the wikis and other posts on here I think I have a pretty solid knowledge of the process.
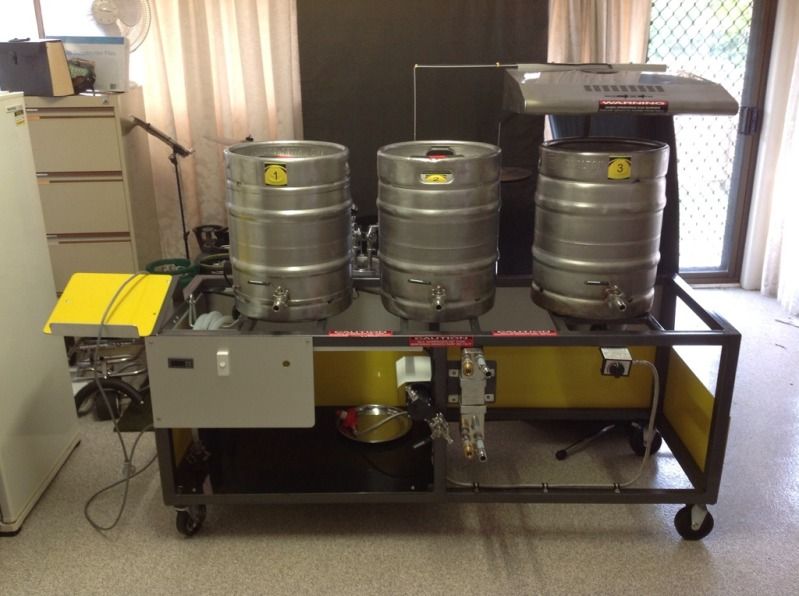
Anyhow finally I have my new brew rig together and in my hands. Admittedly it was a combined effort between my old man and I. I live in Brisbane and he lives in northern nsw so seeing as he had all the tools know how and mates to help out, some of the build was through correspondence which led to him taking some liberties but all in all it has come out pretty sweet and am just waiting to get a sparky around to wire up a 15amp socket.
So here goes
E09472D0-AA96-4A1C-9401-800A7B7D6556-921-000001B542A94FED.jpg


My dad is a sign writer and has a whole heap of stuff lying around and a whole heap of favors which I am very grateful for. As you can see its a 3v rig with the hlt run by an stc 1000 controlling one of the 2200w craft brewer probe elements. Probably the most notable peculiarity here is the range hood above the kettle. This was dads idea in case I wanted to brew inside which I'm terrified of because of how much heat and gas the Rambo churns out.
Everything has cam locks and 3 piece ss ball valves. Also a stand for my laptop/ iPad on brew day. Another liberty he took was to put stickers everywhere warning me that the burner gets hot ... <_<
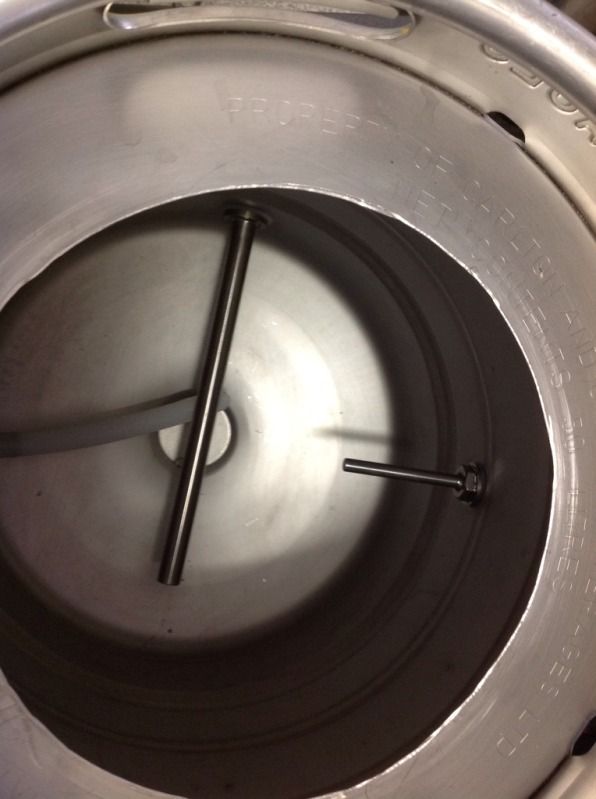
Planning to fly sparge by placing the kettle on the ground and running a hose from the MT into it as I use the pump to sparge from the hlt. One thing I worry about was that he may have put the thermowell for the Stc a little high. Will have to wait and see
31EDD17B-E18D-4E27-95C6-9A2AD192DB1F-921-000001B53C61E99A.jpg


Hlt. MT just has a 9 inch False bottom and the kettle has a Beer belly hop blocker
C94202BA-42DD-4D97-816F-040594239627-921-000001B54E95886C.jpg


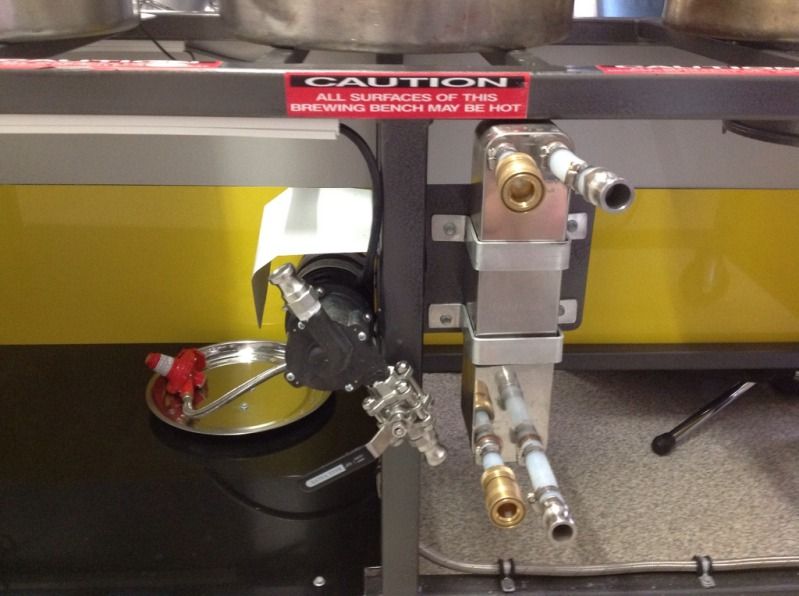
March pump and mash master plate chiller with a bit of hose and a fitting to convert the barb. Brass is simply to connect to garden hose.
394C7D0D-3F7F-4966-89A8-4F63BF004AD3-921-000001B5598AC39C.jpg

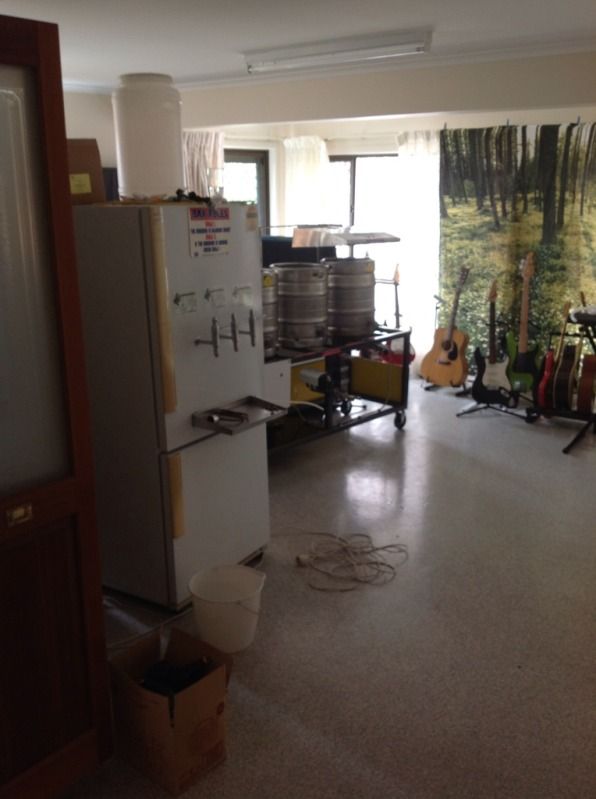
Music/brewcave. Used to be a garage before I lived here so floor is actually concrete which helps. Also in the pic is a keg fridge that is mostly put together that I got from a fellow ahb'er. Fermenting fridge is beside it with another stc controlling.
Now to brew some beer!
 
So much virgin stainless just waiting to be broken in! You must be stoked with that set up, Brocksmith! When's the big day?
 
Work has begun on a much needed face lift for the brewery.. those that have seen it will know that it was overdue in the 60's ;)

First step was to get a new roof put on it and get the old asbestos one removed. Done. all shiny and new, love it.

everything in the brewery is going to get moved about but I thought Id start the monumental task with the brew frame.

My idea is to still keep it tiered so that in the case of power failure I can still brew. Time will tell if it stays like that or I go single level.

The steel cost me nothing, a couple of vertical file frames from work. (throwing out)

1.JPG

2.JPG

Base Prep

3.JPG

Bit of leftover sand from another job we had done

4.JPG

Edging.. feck me, I had forgotten how shit it is to mix mortar/concrete by hand in 30'c heat

5.JPG

almost complete, still isnt quite level but will fix that tmoz.

6.JPG

Yet to weld it all up and fit the extras but will crack on with that in due course over the next week or so.. I only have 4 cubes left to ferment so it will have to be up and going within a 3 week period, it 'should' come together easily enough.

Oh how I love a good tinker.

:icon_cheers:
 
Once again a work in progress, but i thought i would post a few quick pics of my Brau Clone attempt........ :p.

I put my first brew through it last weekend and it ran reasonably smoothly touch wood. Had a small wort fountain as i think the grind was just a bit fine and compacted the mash initially against the top filter plate. (Pic of malt pipe and wort is right at the beginning of the brew and hence not very clear) A pump break of 30 secs every 10 mins for the rest of the brew process corrected this.

As per pics, the controller is not a Matho level set up (this may come in the future) however serves the purpose at this point in time. (uses a STC 1000 type equivalent to manage temp control)

I can't take credit for the fittings to the keg etc which a mate who has the kit to drill / cut / weld stainless took care of and did a fine job of.

Element was fitted by a company on the south side of Brisbane called Helios.

Not included in the pics is the lid. I found that with the low watt density element, unless the lid (with vents) is used, that it struggles to maintain a vigorous boil. (It does boil but very slowly )(Also not pictured is a camping mat for insulation, that i fitted mid way to assist with temp control) (have now also insulated all plumbing underneath from the tun back to the march pump housing.)

March pump performed excellently for the recirculation and also had no dramas digesting / continuing to work when some particles escaped with the wort fountain to the wrong side of the filter plates. In the plumbing underneath and maybe not clear in the attached photo, i put two taps, one allows the output flow of the pump to be varied and second allows the pump to used to empty the tun under pressure as an alternative to the main tap on the front of the tun.

IMG_v1.jpg


IMG_v2.jpg


IMG_v3.jpg


IMG_v4.jpg
 
Once again a work in progress, but i thought i would post a few quick pics of my Brau Clone attempt........ :p.

I put my first brew through it last weekend and it ran reasonably smoothly touch wood. Had a small wort fountain as i think the grind was just a bit fine and compacted the mash initially against the top filter plate. (Pic of malt pipe and wort is right at the beginning of the brew and hence not very clear) A pump break of 30 secs every 10 mins for the rest of the brew process corrected this.

As per pics, the controller is not a Matho level set up (this may come in the future) however serves the purpose at this point in time. (uses a STC 1000 type equivalent to manage temp control)

I can't take credit for the fittings to the keg etc which a mate who has the kit to drill / cut / weld stainless took care of and did a fine job of.

Element was fitted by a company on the south side of Brisbane called Helios.

Not included in the pics is the lid. I found that with the low watt density element, unless the lid (with vents) is used, that it struggles to maintain a vigorous boil. (It does boil but very slowly )(Also not pictured is a camping mat for insulation, that i fitted mid way to assist with temp control) (have now also insulated all plumbing underneath from the tun back to the march pump housing.)

March pump performed excellently for the recirculation and also had no dramas digesting / continuing to work when some particles escaped with the wort fountain to the wrong side of the filter plates. In the plumbing underneath and maybe not clear in the attached photo, i put two taps, one allows the output flow of the pump to be varied and second allows the pump to used to empty the tun under pressure as an alternative to the main tap on the front of the tun.

Shit man, nice rig!

that'll turn out some nice beer for sure. Very compact and tidy build too, love it.
 
Once again a work in progress, but i thought i would post a few quick pics of my Brau Clone attempt........ :p.

I put my first brew through it last weekend and it ran reasonably smoothly touch wood. Had a small wort fountain as i think the grind was just a bit fine and compacted the mash initially against the top filter plate. (Pic of malt pipe and wort is right at the beginning of the brew and hence not very clear) A pump break of 30 secs every 10 mins for the rest of the brew process corrected this.

As per pics, the controller is not a Matho level set up (this may come in the future) however serves the purpose at this point in time. (uses a STC 1000 type equivalent to manage temp control)

I can't take credit for the fittings to the keg etc which a mate who has the kit to drill / cut / weld stainless took care of and did a fine job of.

Element was fitted by a company on the south side of Brisbane called Helios.

Not included in the pics is the lid. I found that with the low watt density element, unless the lid (with vents) is used, that it struggles to maintain a vigorous boil. (It does boil but very slowly )(Also not pictured is a camping mat for insulation, that i fitted mid way to assist with temp control) (have now also insulated all plumbing underneath from the tun back to the march pump housing.)

March pump performed excellently for the recirculation and also had no dramas digesting / continuing to work when some particles escaped with the wort fountain to the wrong side of the filter plates. In the plumbing underneath and maybe not clear in the attached photo, i put two taps, one allows the output flow of the pump to be varied and second allows the pump to used to empty the tun under pressure as an alternative to the main tap on the front of the tun.

thats freaking brilliant, well done. you should post this with more photos into the single vessel brewing thread. Impressive, whats the volume?
 
...continued..

1.JPG

A bit of cutting and welding later

2.JPG

in operation mode

3.JPG

CIP mode

4.JPG

Fly/run off mode

5.JPG

Packed away mode (there is room to store most of it inside the frame)

6.JPG

Where it's going to live.

All in all I'm quite happy with the idea and think that it's a much better setup than what I was using.. still need to decide where to mount the controller/s and add a few other bits and pieces to it but really looking forward to giving it a run.

:super:
 
Back
Top