You are using an out of date browser. It may not display this or other websites correctly.
You should upgrade or use an alternative browser.
You should upgrade or use an alternative browser.
Show us your brewrig
- Thread starter stew.w
- Start date

Help Support Australia & New Zealand Homebrewing Forum:
This site may earn a commission from merchant affiliate
links, including eBay, Amazon, and others.
nathan_madness
Well-Known Member
- Joined
- 7/5/12
- Messages
- 385
- Reaction score
- 104
mckenry
Brummagem
- Joined
- 31/8/06
- Messages
- 2,350
- Reaction score
- 671
Looks nice and all that but I gotta say it always scares the **** out of me when I see people build rigs where the bottle sits really close to the burner. Please tell me that ali shield has a bottom plate on it at least.
Exactly bum. Scares me too. Thats why I bought the longest line available ~3m I think and I move my bottle the entire 3m from the burner. If its a good weather day - no wind - I'll sit the bottle outside my shed, while brewing inside. Scares me to think about leaks with the Italian Spiral cranked up. :unsure:
Adam Howard
Well-Known Member
- Joined
- 18/2/10
- Messages
- 511
- Reaction score
- 63
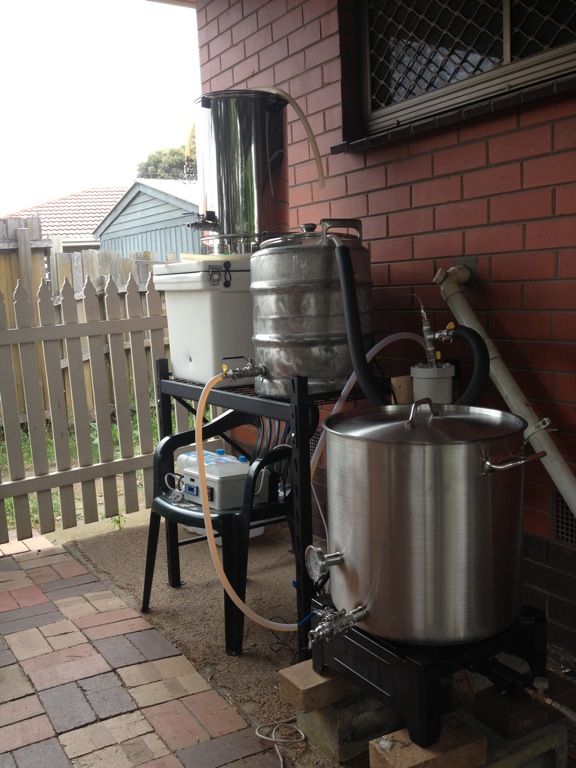
Here's mine. First run with the HERMS.
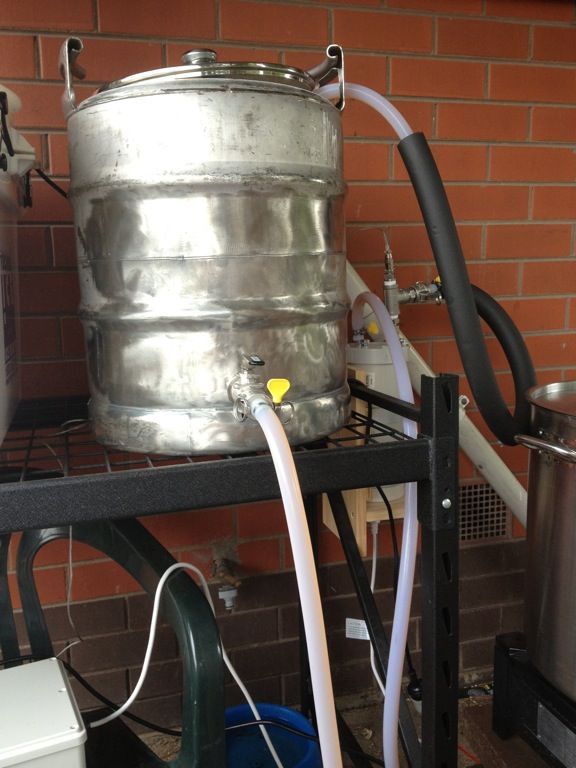
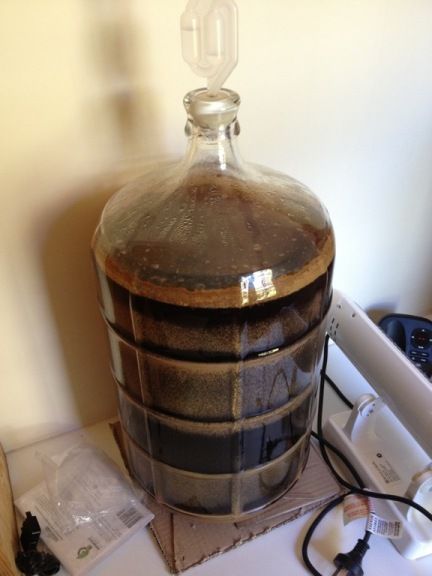
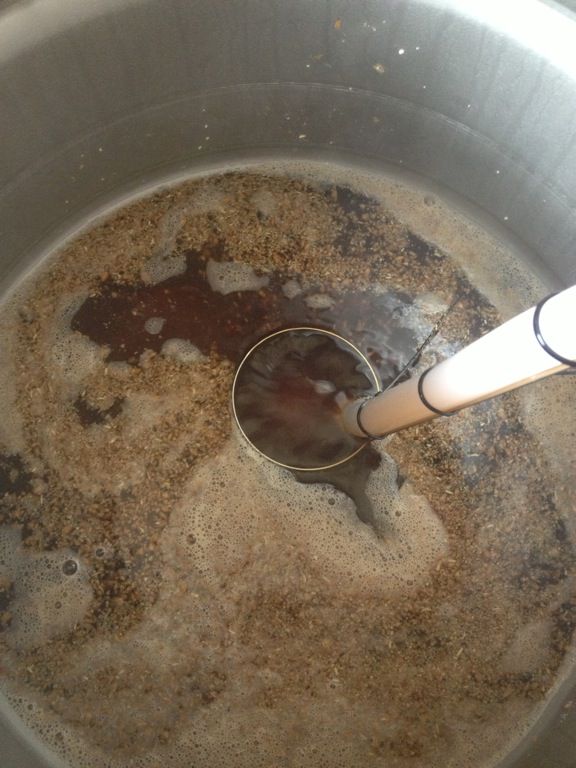
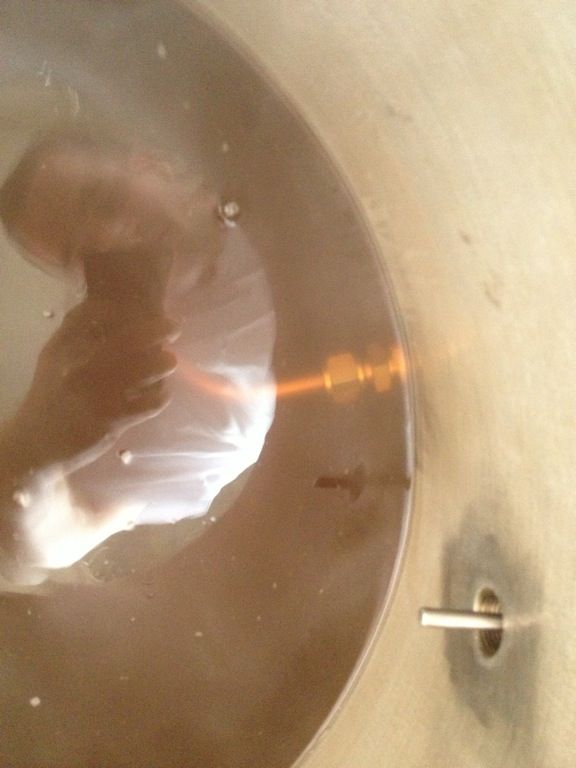
Awesome wort clarity. Got a really good crush, no flour, chunks of endosperm and husks that looked like rice hulls. Great brew day.
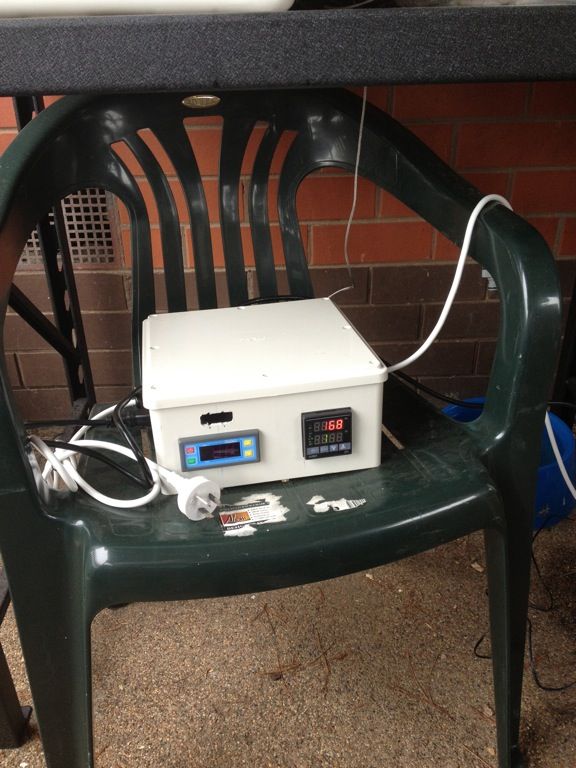
Got a few more things to fix up. Will be installing another shelf under the one the HLT and Mashtun are on to hold the control box and pump. Will be extending the stand with another Rack-It leg to have the burner on a stand and not on bricks.
Fridgemate will end up running the HLT. Also have power input for a March pump once I get around to it. Wired up the PID myself, it worked perfectly.
citizensnips
Well-Known Member
- Joined
- 9/7/07
- Messages
- 769
- Reaction score
- 127
heres my first ag set up. biab of course. had my first brew saturday, went great...cant wait to taste dr smurtos golden ale :chug:
View attachment biab.bmp
View attachment biab.bmp
adryargument
Well-Known Member
- Joined
- 27/1/11
- Messages
- 878
- Reaction score
- 84
Well she's not quite finished but this is my pride and joy so far,
Brewtroller controlled 4V herms, electric with gas kettle. Most of the s/s fab is finished, just need to powder coat the frame put it back together and see how little I know about brewtroller.
View attachment 57898
Mill is home made, knurled the rollers out of some s/s steam pipe. We wanted to make it as stand alone as possible so its mounted to the top and will be run via 240v Drill.
View attachment 57899
I read somewhere (possibly the 'yeast' book??) that having a grain mill near your brewing area was a no-no due to certain lactic micro-flora that can be spread with the mill-dust.
Anyone else able to shed light on the subject - i have been looking to put my mill on my brew stand but have avoided it for this reason.
browndog
Are you bulletproof boy?
- Joined
- 23/9/03
- Messages
- 3,635
- Reaction score
- 157
Hey Cocko, I've beaten Jonathon to the punch mate, here are the details.
It is a 3V single tier all electric rig. The 80L HLT has a PID controlled 2400W element with a low water warning light and buzzer. The 45L mash tun has a PID with a sensor located in the center of the mash that is used to set the mash temperature. This PID energises a second PID that has a sensor in the outflow of the heat exchanger. Why do it this way? I can set the temperature of the heat exchanger to what ever temp I choose so that I know the wort exiting the heat exchanger will never be hot enough to denature any enzymes. The Heat exchanger is powered by a 2400W element. The 80L kettle has two 2400W elements controlled by two burst fire controllers. Both the mash tun and kettle have false bottoms to filter particulates. Chilling is achieved with an inline 30 plate, plate chiller. All the plumbing and fittings are stainless steel. The vessels are removable from the stand via barrel unions. The march pump has two modes, automatic when it is being controlled by the mash PID and manual for transfering liquids vessel to vessel. I've been building this thing a bloody long time and only finished it as I have sold up old faithful....my precious, to go on a trip to the States. You can see the build thread here build thread.
The beer I brewed was an attempt at one of the fine west coast IPAs I drank while over in the States. I used a Pliny the Elder grist with Warrior for bittering, a whack of late Falconers Flight and some Simcoe to finish off, mashed at 66C for a 1070 SG and 100IBUs. The recipe was worked on BrewMate and I pretty well hit all my targets.

Plumbing, you can see where the plate chiller connects on the left.

Heat Exchanger

HLT

Mash Tun

Kettle

12.5 kg grain

Filling the mash tun

One fully loaded mash tun

Heat exchanger PID SV 70 Mash Tun SV 66

290G hops

Recirculating

The boil

I left a tap open when I started to chill and ended up with about 7L of wort in the mash tun and lost my cool enough to forget to take photos of the chilling part and I've got about two pages of tweaks, configuration changes and additional items to get before the next brew day.
cheers
Browndog
It is a 3V single tier all electric rig. The 80L HLT has a PID controlled 2400W element with a low water warning light and buzzer. The 45L mash tun has a PID with a sensor located in the center of the mash that is used to set the mash temperature. This PID energises a second PID that has a sensor in the outflow of the heat exchanger. Why do it this way? I can set the temperature of the heat exchanger to what ever temp I choose so that I know the wort exiting the heat exchanger will never be hot enough to denature any enzymes. The Heat exchanger is powered by a 2400W element. The 80L kettle has two 2400W elements controlled by two burst fire controllers. Both the mash tun and kettle have false bottoms to filter particulates. Chilling is achieved with an inline 30 plate, plate chiller. All the plumbing and fittings are stainless steel. The vessels are removable from the stand via barrel unions. The march pump has two modes, automatic when it is being controlled by the mash PID and manual for transfering liquids vessel to vessel. I've been building this thing a bloody long time and only finished it as I have sold up old faithful....my precious, to go on a trip to the States. You can see the build thread here build thread.
The beer I brewed was an attempt at one of the fine west coast IPAs I drank while over in the States. I used a Pliny the Elder grist with Warrior for bittering, a whack of late Falconers Flight and some Simcoe to finish off, mashed at 66C for a 1070 SG and 100IBUs. The recipe was worked on BrewMate and I pretty well hit all my targets.

Plumbing, you can see where the plate chiller connects on the left.

Heat Exchanger

HLT

Mash Tun

Kettle

12.5 kg grain

Filling the mash tun

One fully loaded mash tun

Heat exchanger PID SV 70 Mash Tun SV 66

290G hops

Recirculating

The boil

I left a tap open when I started to chill and ended up with about 7L of wort in the mash tun and lost my cool enough to forget to take photos of the chilling part and I've got about two pages of tweaks, configuration changes and additional items to get before the next brew day.
cheers
Browndog
Dan Pratt
Well-Known Member
- Joined
- 28/1/10
- Messages
- 3,279
- Reaction score
- 1,274
wow just wow browndog that is just plain imprressive :icon_drool2:
Here here, well done.
The Village Idiot
Well-Known Member
That is some serious ****!!!!!! I am not sure if I hate you or love you browndog...... :unsure: Ever thought of going into production?
_HOME_BREW_WALLACE_
Professional Drunken Yahoo!
- Joined
- 30/6/09
- Messages
- 1,365
- Reaction score
- 68
In awe!! Great setup BD. 1 Question........ Whats with the HEX photo? The inside of the coil looks bone dry. Was the coil wound too tight?
browndog
Are you bulletproof boy?
- Joined
- 23/9/03
- Messages
- 3,635
- Reaction score
- 157
In awe!! Great setup BD. 1 Question........ Whats with the HEX photo? The inside of the coil looks bone dry. Was the coil wound too tight?
If the HX is full you can't see the coil or the element so I took a pic of it dry for the detail.
B
bradsbrew
Guest
In awe!! Great setup BD. 1 Question........ Whats with the HEX photo? The inside of the coil looks bone dry. Was the coil wound too tight?
The whole thing is empty with what looks like sod. perc grains sticking to the side of the cut down extinguisher.
Awesome job tony. That control board looks mighty sexy.
Cheers
browndog
Are you bulletproof boy?
- Joined
- 23/9/03
- Messages
- 3,635
- Reaction score
- 157
The whole thing is empty with what looks like sod. perc grains sticking to the side of the cut down extinguisher.
Awesome job tony. That control board looks mighty sexy.
Cheers
That white stuff is little nodules of oxide or something as a result of leaving the HX full of water overnight. The HX itself is made from a 5kg aluminium fire extinguisher. Quite proud of the fact that I even folded that box up out of flat sheet Brad.
cheers
Browndog
Cocko
Oh Dear..
Hey Cocko, I've beaten Jonathon to the punch mate, here are the details.
It is a 3V single tier all electric rig. The 80L HLT has a PID controlled 2400W element with a low water warning light and buzzer. The 45L mash tun has a PID with a sensor located in the center of the mash that is used to set the mash temperature. This PID energises a second PID that has a sensor in the outflow of the heat exchanger. Why do it this way? I can set the temperature of the heat exchanger to what ever temp I choose so that I know the wort exiting the heat exchanger will never be hot enough to denature any enzymes. The Heat exchanger is powered by a 2400W element. The 80L kettle has two 2400W elements controlled by two burst fire controllers. Both the mash tun and kettle have false bottoms to filter particulates. Chilling is achieved with an inline 30 plate, plate chiller. All the plumbing and fittings are stainless steel. The vessels are removable from the stand via barrel unions. The march pump has two modes, automatic when it is being controlled by the mash PID and manual for transfering liquids vessel to vessel. I've been building this thing a bloody long time and only finished it as I have sold up old faithful....my precious, to go on a trip to the States. You can see the build thread here build thread.
The beer I brewed was an attempt at one of the fine west coast IPAs I drank while over in the States. I used a Pliny the Elder grist with Warrior for bittering, a whack of late Falconers Flight and some Simcoe to finish off, mashed at 66C for a 1070 SG and 100IBUs. The recipe was worked on BrewMate and I pretty well hit all my targets.
Plumbing, you can see where the plate chiller connects on the left.
I left a tap open when I started to chill and ended up with about 7L of wort in the mash tun and lost my cool enough to forget to take photos of the chilling part and I've got about two pages of tweaks, configuration changes and additional items to get before the next brew day.
cheers
Browndog
Oh.
Dear.
God.
******* mighty mate!
And to think you did all that in no time at all!
Seriously, just awesome.
Desert Brewer
Well-Known Member
- Joined
- 11/2/08
- Messages
- 49
- Reaction score
- 0
Gday all, ive been lurking long enough and thought it was time to post some pics of my setup - i felt bouyed by yesterdays brewday as it went down pretty much incident free - although a couple of points down on the OG - it was good day, the brew is a Pacific Ale Clone - its version 3, i hoping it will be ready to consume on Christmas Day.
The prep.

The Grist.

The Mash - a 5 step pilsner mash on this occasion.

THe Burner - Italian Spirals.

THe Brew Cave - Like my set up, very low tech but gets the job done.

The Red Centre !

I do realise that im not hoisting a motor - but it works !

Post boil to 28 degrees via 2 imerrsion chillers and a heat exchanger in 30 - 40 mins

The important temp control - the home energy audit fella nearly had a heart attack !

The previous brewday results - a very tasty all Saaz B (Motueka) Pils

Happy Brew Days,
Cheers DB.
The prep.

The Grist.

The Mash - a 5 step pilsner mash on this occasion.

THe Burner - Italian Spirals.

THe Brew Cave - Like my set up, very low tech but gets the job done.

The Red Centre !

I do realise that im not hoisting a motor - but it works !

Post boil to 28 degrees via 2 imerrsion chillers and a heat exchanger in 30 - 40 mins

The important temp control - the home energy audit fella nearly had a heart attack !

The previous brewday results - a very tasty all Saaz B (Motueka) Pils

Happy Brew Days,
Cheers DB.
Similar threads
- Replies
- 41
- Views
- 10K
- Replies
- 13
- Views
- 5K
Withdrawn
[MELB] 65L SS Insulated Mash Tun
- Replies
- 2
- Views
- 1K


