Show us your brewrig

Australia & New Zealand Homebrewing Forum

Help Support Australia & New Zealand Homebrewing Forum:

This site may earn a commission from merchant affiliate links, including eBay, Amazon, and others.
Finally finished my pot in a pot bastardised 2v HERMS.

40L SS pot.
19L Alum Big W pot
0.9mm stainless mesh

40L Crown Urn with hex inside
Italian spiral burner with Cigweld regulator
etc

Three_brothers_brewery_2.jpg Three_brothers_brewery_1.jpg

Running it now with some napisan through it.

First test run is Thursday morning.....Can't Wait!!!!
 
(off topic follow up)

Dont think the pictures will help much, but here is the 2 washer combo (doesn't leak) against the 2.5mm silicone o-ring (does leak). They pretty much look the same but I quess because the male QD has a bevelled edge and the o-ring is not under any real compression there is probably room for leak. there is less free play in QD when the flat washers are installed. Perhaps a 3mm o-ring would work

IMAG0151__Small_.jpgIMAG0150__Small_.jpg


Interested also, two of my SS QD's leak, always forget to put the hoses away for identification after brewday. So next brewday I find them again when they leak. Got mine from Ross at Craftbrewer, only two leak out of the 10 that I have, no biggie but bloody annoying. Sometimes if I remove the washers and push them back in they seal ok. Would like to know where to buy replacements/spares from.

Screwy
 
what if your making a wheat beer rob S?? you have to put wheat in that :p
 
here is my single vessel brewing system....

40lt Birko Urn, exposed element, 1/2 ball valve, removed sight glass.
home_brew_1V_006.jpg

Brown pump with cistern hoses
home_brew_1V_007.jpg

Top view of vessel - wort return system - bucket in urn brewing
home_brew_1V_008.jpg

A view of the holes drilled into the copper pipe
home_brew_1V_009.jpg

The bucket in urn without the wort return.
home_brew_1V_010.jpg

Splatter guard on top of the bucket base
home_brew_1V_012.jpg

The cake rack, about 75mm clearance from the element.
home_brew_1V_011.jpg

Going to try an Aussie Ale this weekend, milling the grain at 1.5mm. from previous uses, flow control will be vital to a good step mash.

75% AUS ale
17% AUS Wheat
5% Flaked Wheat
3% Munich 1

Hops - Galaxy, Cascade & Citra

OG 1052

Wyeast 1056

Strike water 30 litres
Knock out 20litres ferment
4 litres trub

Step Mash Schedule

Mash in 53
Protien Rest - 50/10
Sacc - 66/60
A-amylase - 72/10
Mash out 78

5lt sparge with tap water/boiled water at 78 degree

90 min boil


:)
 
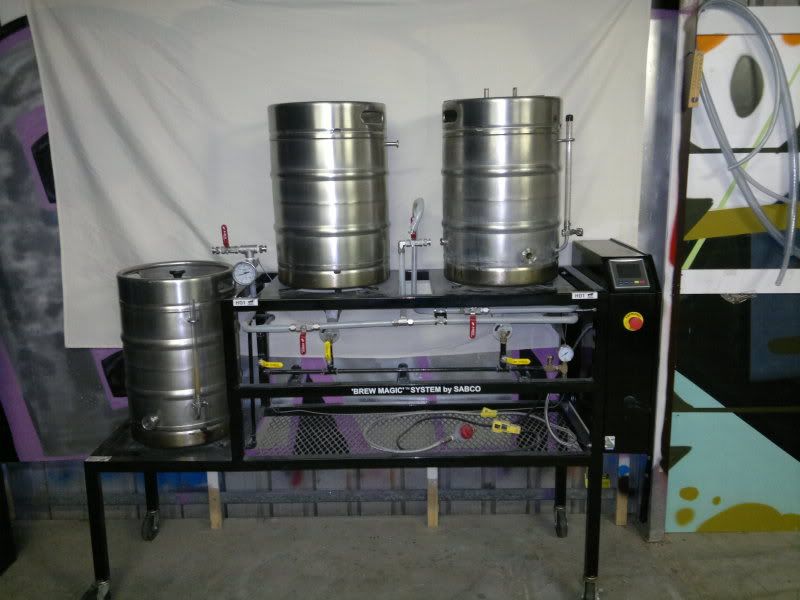
That's $7000 worth of kit according to the website :(

Is that right if you don't mind me asking?

Brand new, yeah, not including shipping, the Chill Wizard and the transformer.
I bought it used though.
 
Hi guys,
This is my 3 vessel single tier brew setup.
255.jpg

Inside of boil kettle
244.jpg

Outside of boil kettle
245.jpg

Chiller
248.jpg

Mash tun
249.jpg
250.jpg

Burner
252.jpg
 
Silicone outlet hose with valve for bleeding air from the line so the march pump can easily prime

247.jpg
March pump
256.jpg
March pump and chiller
257.jpg
 
Hey Randomiser!

Sweet looking setup you got going there!

Cheers Ben
 
Cheers BPH,
It has taken a while to get to this stage, but I'm pretty happy with it. I think having a silicone gasket between the valve and the kettle wall, then tightening the nut and washer from the inside is the best way to do weldless connections. I have not had any leaks doing it like this. Other configurations I have seen rely on thread tape to stop wort leaking out. This configuration doesn't.

I was having trouble priming the march pump too. I trawled through forums looking for a way to bleed air. I have seen posts where people have put a bleed point at the pump discharge. To me this seemed like a bad idea because you would spill beer and make mess in order prime the pump. I also think the vent should be at a high point. With my configuration you open up the valve from the vessel then slowly open the vent valve to let the air escape and the pump inlet line to fill with liquid. When the line is fully primed, close the top valve and you're good to go. I haven't seen anywhere else that uses the same configuration as what I have used and would strongly recommend it if you're having priming issues.

My mate helped with the pump 'stand'. It's just a downpipe clamp drilled into a block of wood.

Cheers
 
I am not sure about your priming issues mate, but all the other lads on here would know. Check out Don Burke's & Sim's & the "red rocket" brew rigs. I was pretty keen to design a system around a Sabco "Brew magic" system

Cheers
 
Hey

This is to everyone who has a 3 keg single tier setup with pumps and what not.

How do you go about cleaning the mash tun and kettle? Do you take the mash tun and kettle off the rig to clean them?

I'm about to design a new rig to do full keg sized batches - automated with an opentroller DX1 but I'm just not sure if there's a simple way to clean everything, pipes included, without taking everything apart and stripping the brew rig down each time.

How do you get the grains out of the mash tun for example?

Cheers :)

Hunt
 
Take a mug/scoop and scoop it out into a bucket. Pete in Boronia has his setup with a hinge system so he can tip it upside down in place into a bucket.
Scooping out is fairly quick and painless though.
 

Latest posts

Back
Top