Wolfy's 3v Stainless Home-brewery Build Details

Australia & New Zealand Homebrewing Forum

Help Support Australia & New Zealand Homebrewing Forum:

This site may earn a commission from merchant affiliate links, including eBay, Amazon, and others.
Wolfy, what's the order for the washers? I can see from the outside shot, you go SS washer - Silicone washer - Pot wall - ? - ? - ?

Can you share the inside sequence? Am I right in thinking that it's Silicone washer - SS washer - Nut?

Cool guide mate gave it a decent read after you directed me to it the other day.

Cheers,

Brad
 
Hay wolfy, have you measured what the readable volume is on the HLT? I found when i did mine it was a bit of a PITA as i probably drilled a bit high so in the end i needed to turn my elbows round to the horizontal almost to get my volume reading where i wanted it. Though you probably had the holes drilled in a better location on the keg :rolleyes:

cmon man.. Build like there is a swap looming.

:drinks:
 
Hay wolfy, have you measured what the readable volume is on the HLT?
Nope, but I presume the sight-gauge will read between 10 and 40L, combine that with fly-sparging and the HERMS, I hope it will be accurate enough - will know in a week or so. ;)
 
Nope, but I presume the sight-gauge will read between 10 and 40L, combine that with fly-sparging and the HERMS, I hope it will be accurate enough - will know in a week or so. ;)

On mine the 10L mark is right at the point where the liquid enters the sight tube. This is for both an elbow or a T piece mounted as low I dared go before the keg wall curves and I risk not being able to seal it properly.

This works fine as I never have a need to measure below 10L anyhow, I generally fill to somewhere around 40L for strike and then top it up again before sparging. The element in my HLT is exposed at the 10L mark anyhow.
 
Work is getting in the way this week, so I've not had time to assemble everything yet. :(
However, I presume that these guys know what they're doing, since they sell the stuff for a living:
http://www.bargainfittings.com/index.php?r...p;product_id=91
http://www.bargainfittings.com/index.php?r...;product_id=178
http://www.brewhardware.com/valves/59-weldless-bulkhead
(Pictures/details/info on their websites).

Pity they don't ship internationally :(

Thanks for the links!
 
Pity they don't ship internationally :(

Thanks for the links!

They don't to most countries, but they do to Australia! Last year they stopped all international shipping(problems with returns etc) later in the year shipping was resumed to Australia
 
great guide someone needs to put this into PDF format.............make it easier to go through


cheers: HBK
 
Pity they don't ship internationally :(

Thanks for the links!


Check out T&S valves, local Aust company and excellent pricing (I found to be cheaper by the time you add postage), and not that cheap n dodgy Chinese made shit like some other companies.


QldKev
 
Check out T&S valves, local Aust company and excellent pricing (I found to be cheaper by the time you add postage), and not that cheap n dodgy Chinese made shit like some other companies.


QldKev

I work just down the road from T&S valves in Ingleburn and am becoming something of a regular there just lately (they even let me out the back now so I can browse the shelves). On my last visit one of the guys let me know that they have discount prices for account customers (after I rang up a cash sale :angry: ) Accounts are free and apparently easy to set up if you have an abn. In some cases the discounts are in the order of 50% which makes them very competitive with offshore sellers + delivery, and as Kev says, the quality is there in spades.

Definitely worth a try if you're doing a new build or an overhaul.
 
Work is getting in the way this week, so I've not had time to assemble everything yet. :(
However, I presume that these guys know what they're doing, since they sell the stuff for a living:
http://www.bargainfittings.com/index.php?r...p;product_id=91
http://www.bargainfittings.com/index.php?r...;product_id=178
http://www.brewhardware.com/valves/59-weldless-bulkhead
(Pictures/details/info on their websites).

I wish I had of seen this before I bought my weldless bulk heads :( I would have gone for the one in the 2nd link

Instead, I bought the bulk head & had trouble tightening it properly. I then bought hex nipples to replace the threaded nipple but now I think I need the flat washers instead of the O-Ring.
 
#13: Insulation
Blog rant

Buffed and polished stainless kegs, look good and add a very nice bling-factor. However, I wanted it to be more about making good beer than looking good - besides it's not as if anyone, except myself, will be looking at the new setup anyway. While it is uglier than polished steel, insulated kegs are logical and sensible, and while the energy-cost-savings are likely to be small, they should help. In addition since it will be electric-heated, there is no problem with open flames or melting insulation to worry about.

A neighbor was throwing away this camping mat/insulation/stuff, it's about an inch thick with black-rubber-stuff on one side and blue on the other, the pipe-insulation was on chuck-out special at Bunnings for $1.50.
insulation1.jpg


The insulation was cut into strips 15inches high and 52-53inches long, the 32mm hole-saw easily made some holes for the fittings.
insulation2.jpg


The bottom layer of insulation was a little more difficult to install fit, since it didn't really want to stick down in place.
insulation4.jpg


But copious quantities of tape stuck it in place.
insulation5.jpg


A couple of rolls of silver-Aldi tape and all three kegs were wrapped up, and while they look short, dumpy and ugly now, the latex does show off their curves. ;)
insulation3.jpg
 
hook it up and throw some grains in Wolfy.. the suspense is killing me :lol:

Looking the goods man

:beerbang:
 
hook it up and throw some grains in Wolfy.. the suspense is killing me :lol:
Getting there! Should be able to run a test-brew in the next few days, but I've only just started to re-culture some yeast, so have to wait for that before I can do anything real.

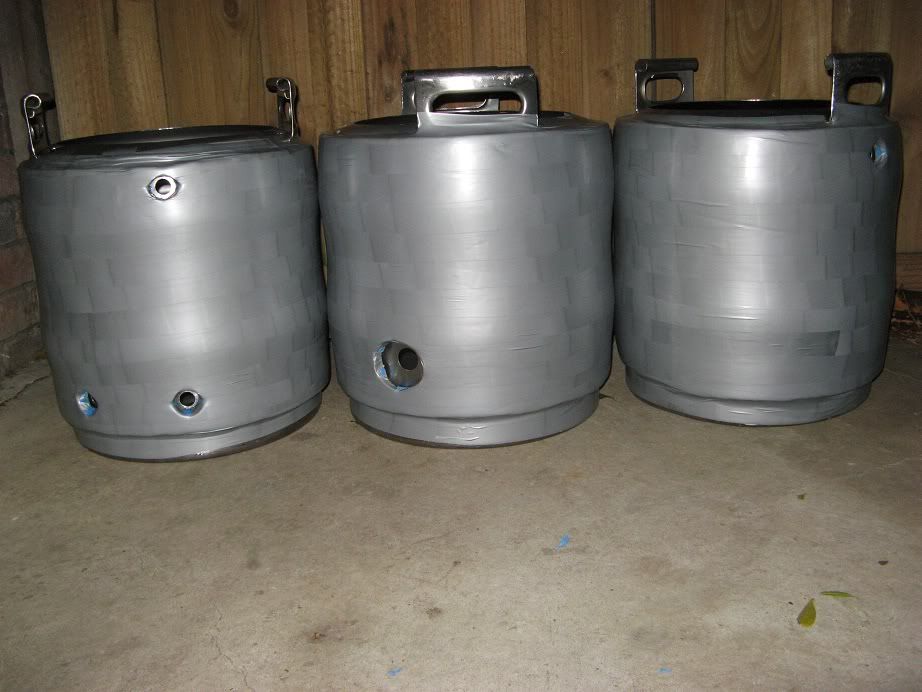
#14: Fit-out, Leak Test & Burn-in
1000-word blog rant

After assembling all the fittings and putting things together, I've come to the following realizations:

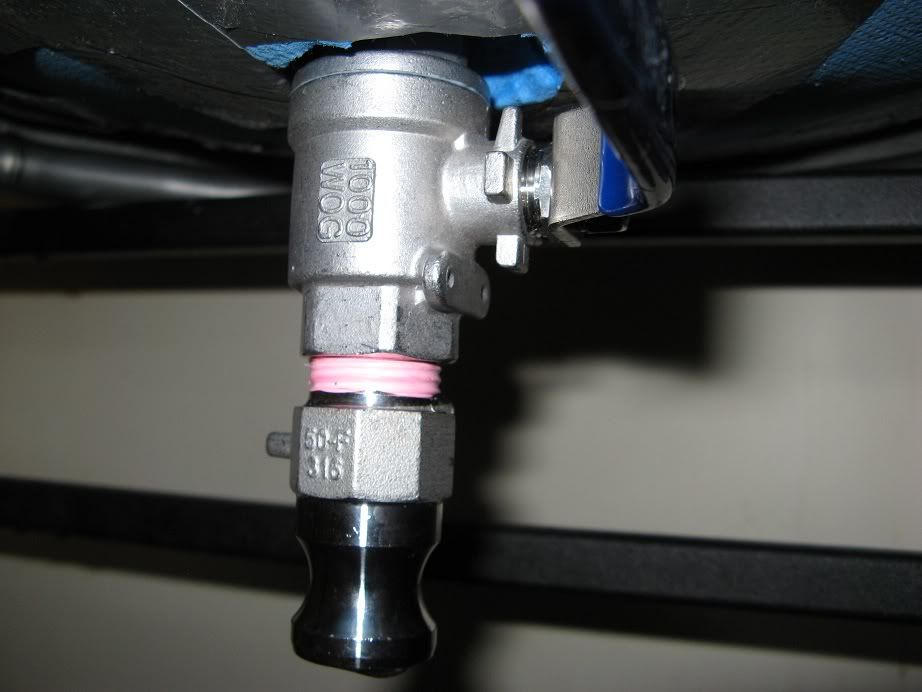
Tapered fittings (NPT) work best for pipe-to-pipe type connections, such as attaching valves to fittings or camlocks. The tapered thread, combined with some thread-tape, locks the fitting in place and prevents leaks without additional seals or gaskets.
fit_out5.jpg


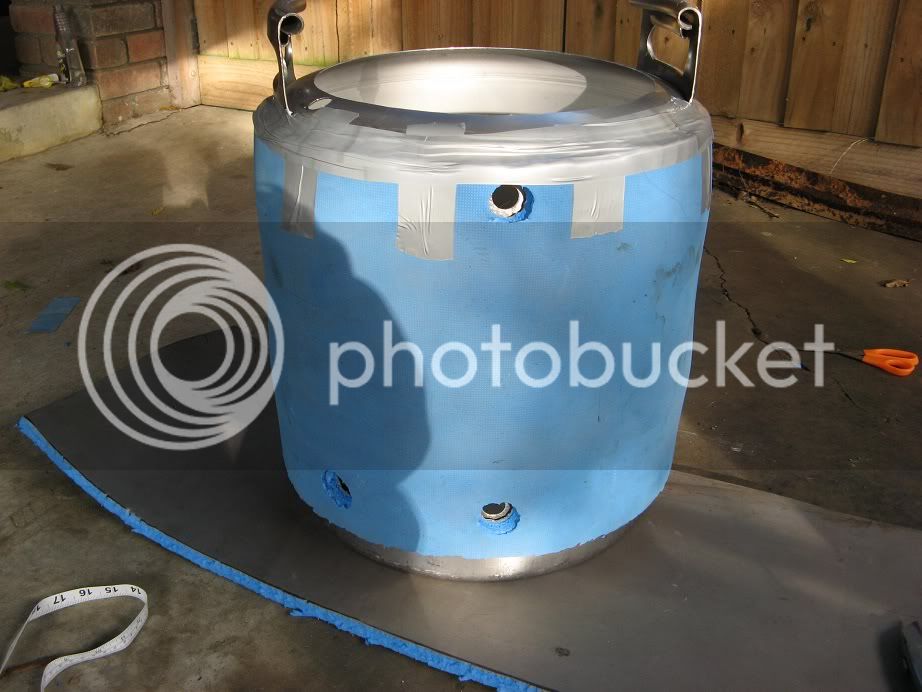
However, NTP fittings are much less useful for bulkhead-type connections through keg walls. Due to the tapered thread, the nut or fitting must tighten exactly as it compresses the gasket/or washer against the wall. However, the fitting can easily lock-tight too quickly (and not seal to the side of the vessel) or not tighten quickly enough (potentially allowing for leaks along the thread). So additional spacers- silicon (not visible in the picture) and steel washers are required:
fit_out3.jpg


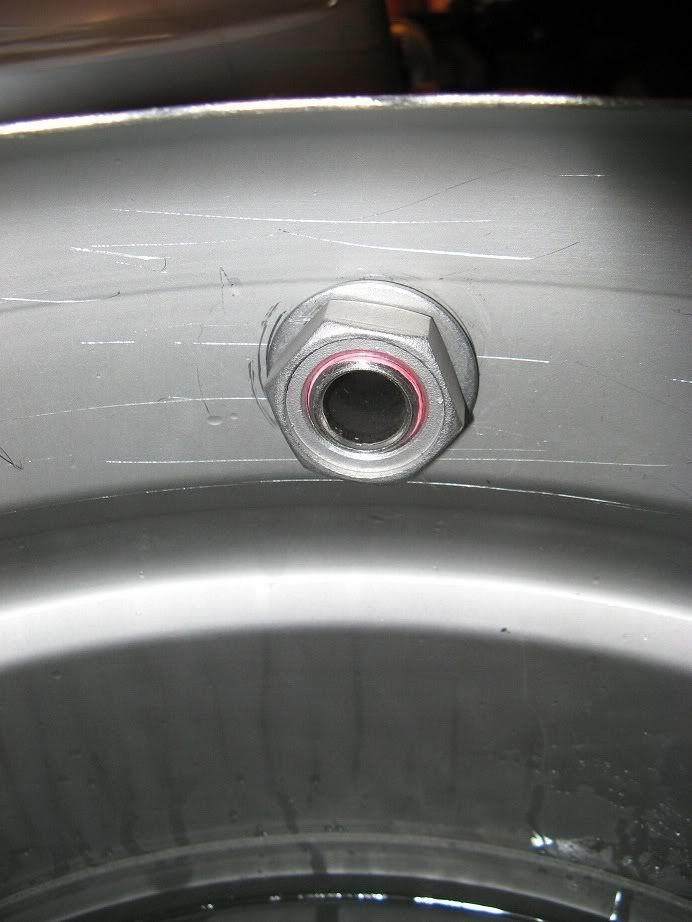
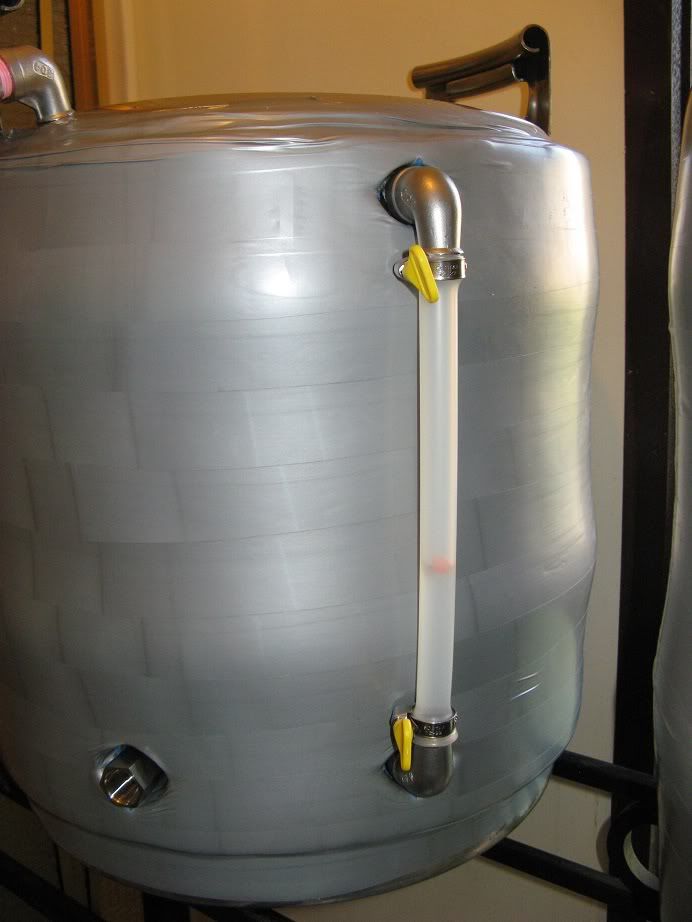
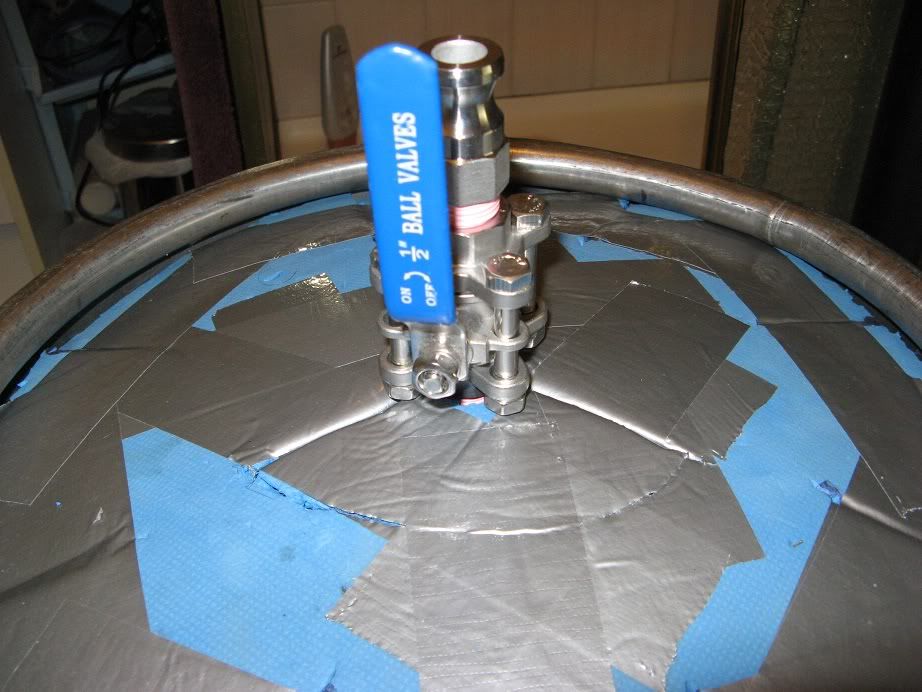
On the other hand parallel threaded fittings (BSP(P)) work much better as bulk-head connections. Thread-tape prevents leaks along the thread and the fittings tighten securely against the side of the vessel, meaning that a water-tight seal can be made with just a locknut and a silicon o-ring:
fit_out2.jpg


With this in mind - and knowing that at 1/2 inch size both BSP and NTP threads mate without problem - bulkhead type connections through the wall of a vessel would be made best with a parallel BSP thread, while fitting-to-fitting connections like the ball valves, are best using tapered NTP thread.

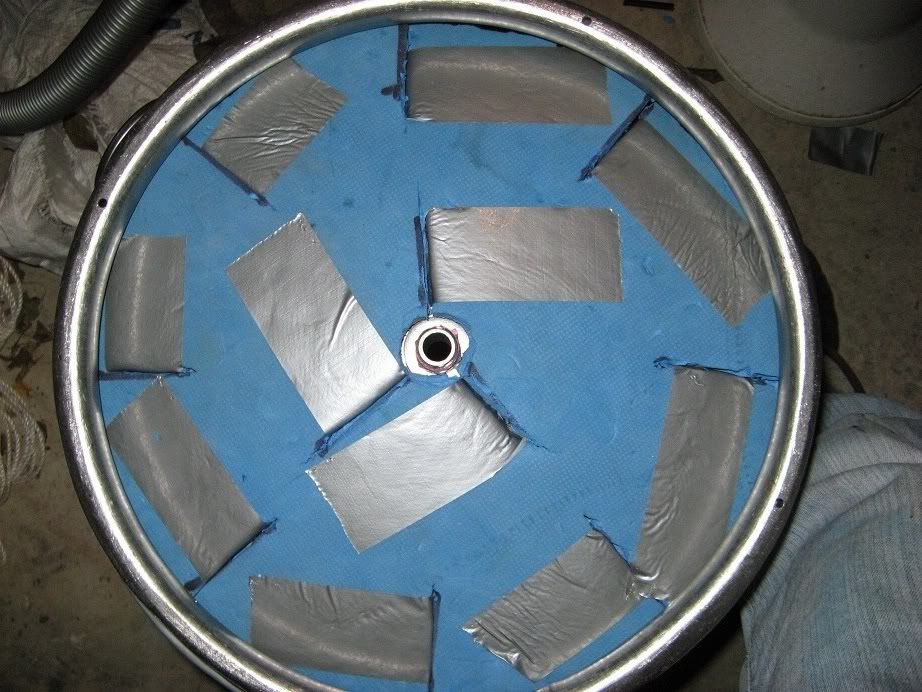
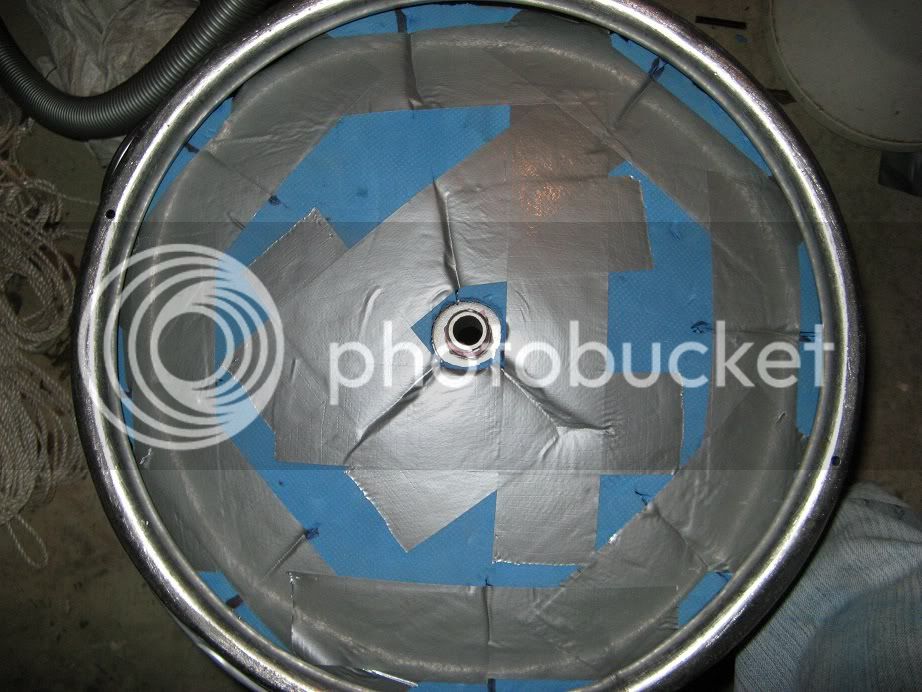
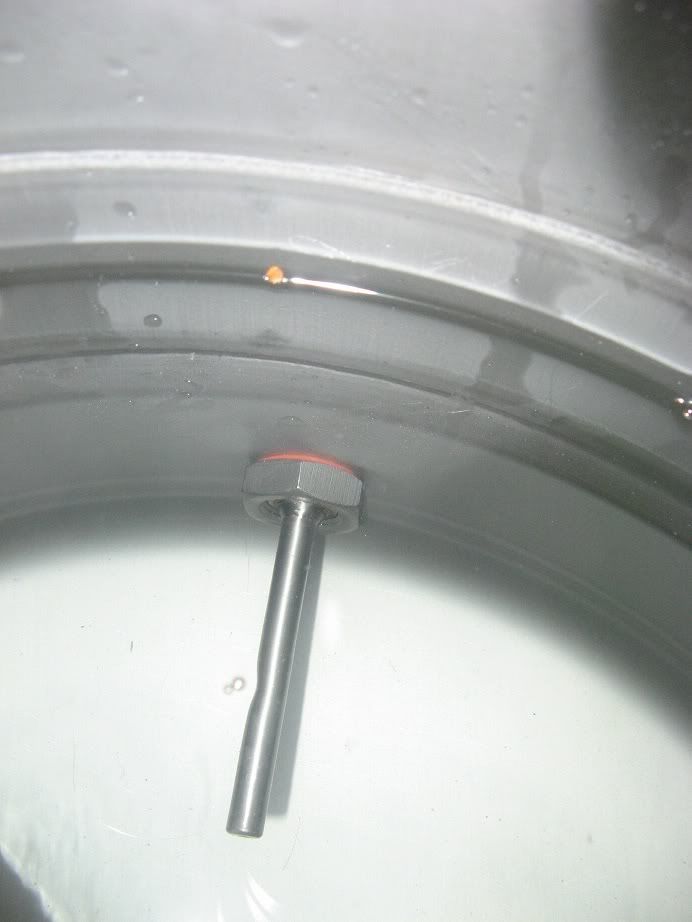
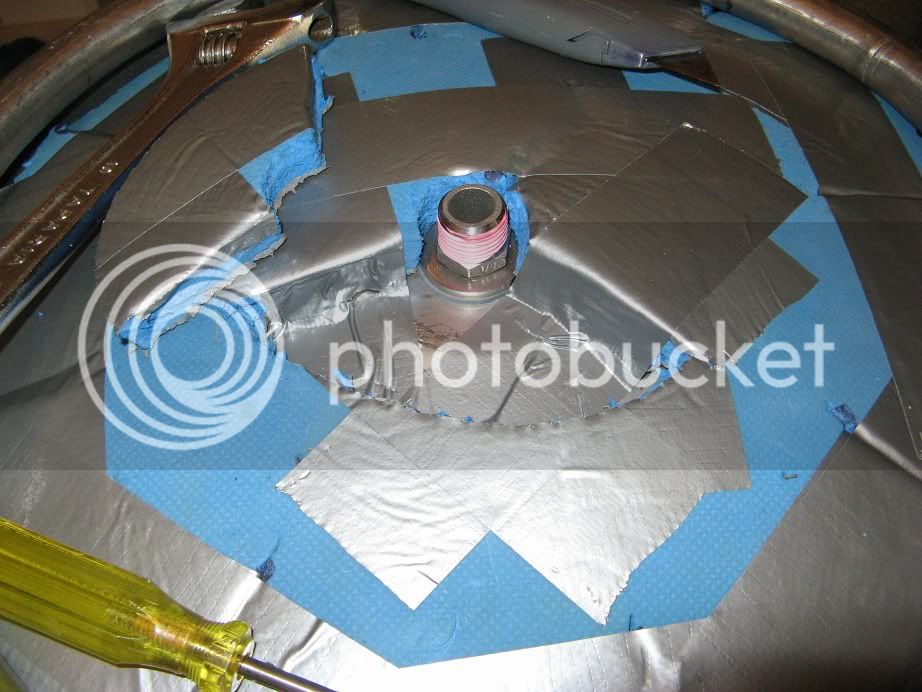
The Chinese Ebay supplied lock-nuts have an o-ring groove cut in them so the easiest and cheapest method for sealing through-keg bulkheads is simply to use the nut and a silicon o-ring (thermowell picture above). However as the fitting is tightened the o-rings can deform or break easily making them less than useful, and essentially useless in any situation that does not have a channeled-nut for them to sit inside. As a consequence many of the fittings (especially if they were through the keg with NTP) required both a silicon washer and stainless shim-washer. Most bulkhead fittings were sealed on the inside in order to to stop the water/wort from getting into the threaded connection and between the fitting and the keg-walls.

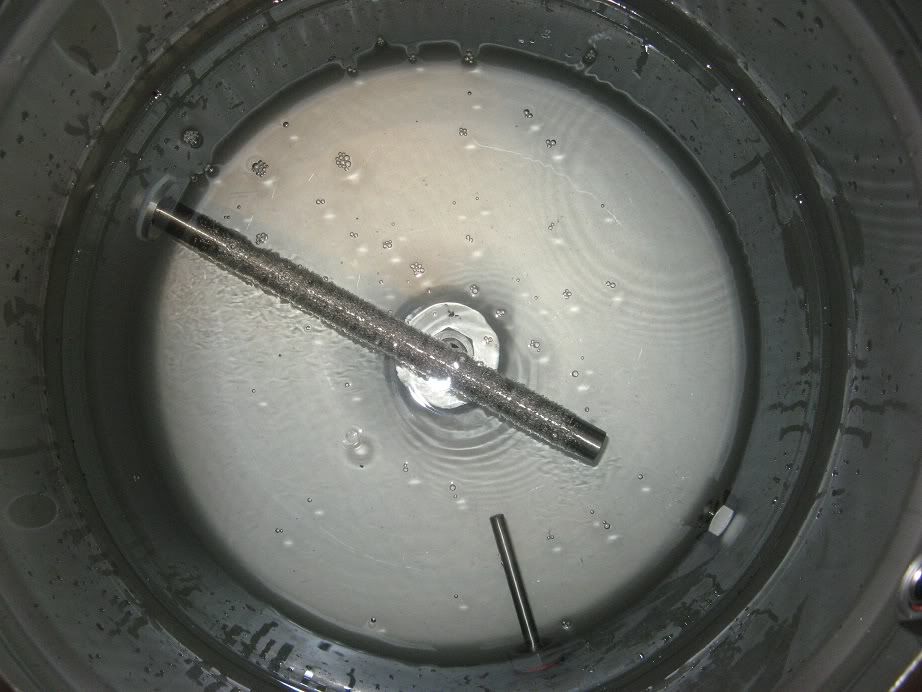
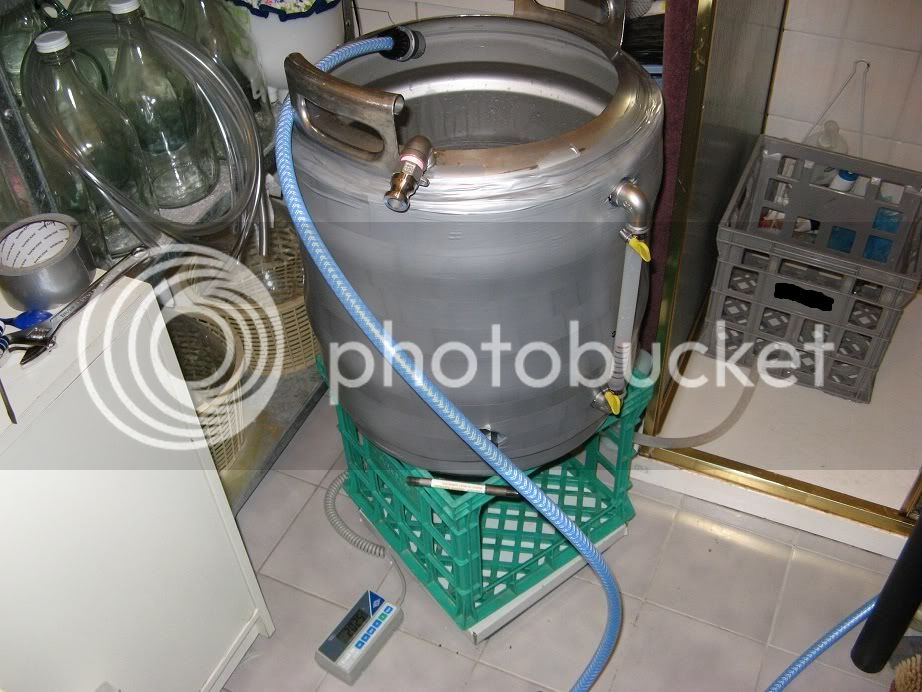
Sight-glass works well once the keg is full of water:
fit_out1.jpg


Filling the kegs with water, indicated a few fittings needed to be tightened or re-assembled, but by the time I was finished all of the seals were water-tight first time. Once that was done it was time for a burn-in test, or more correctly a boil-in, by connecting the element directly to the power-socket and running it for about an hour.
fit_out4.jpg


Probably something that could be skipped, but in this case the silicon seal 'slipped' - likely due to the fitting being over-tightened - after about 45mins and ended up spilling boiling water all over the floor:
fit_out9.jpg


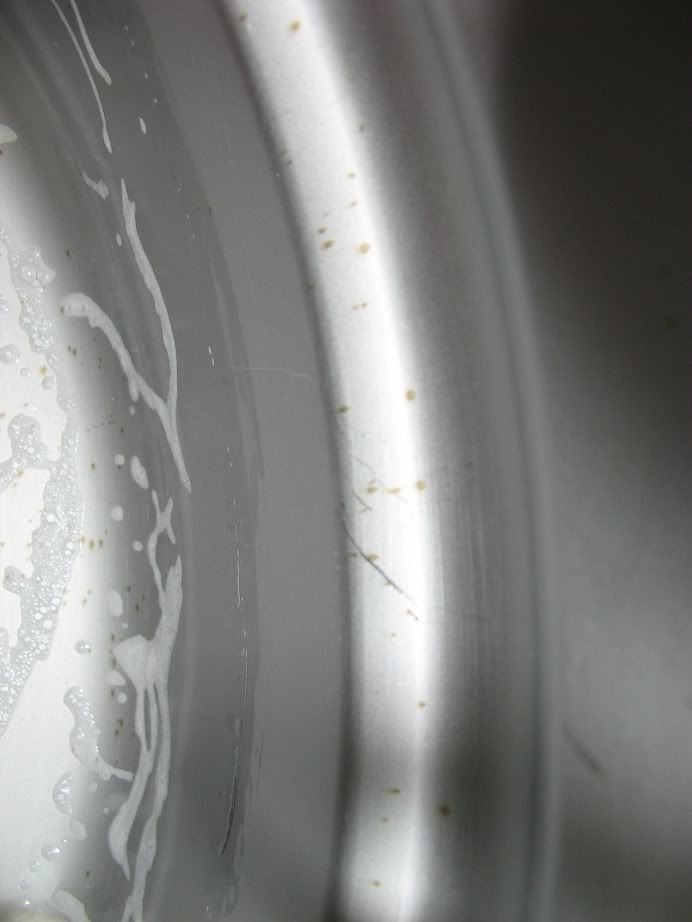
Since I was a little lax in cleaning up after cutting, drilling, filing and grinding, it's possible that bits of metal were left inside the keg which caused a little bit of surface rust after the first test:
fit_out6.jpg

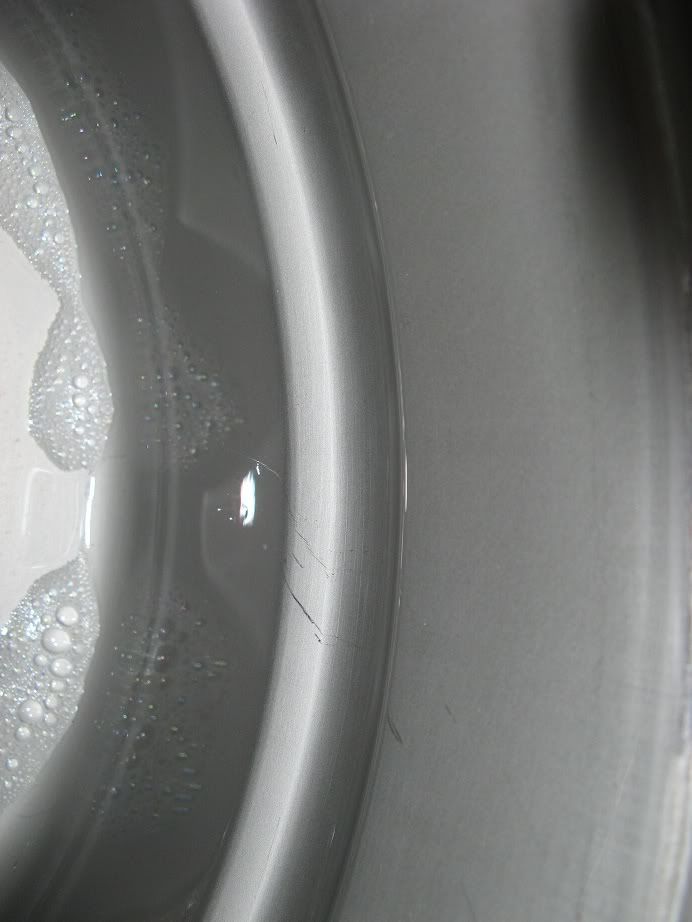
The Stainless Cleaner, a scrubby and a bit of rubbing removed them fairly quickly.
fit_out7.jpg

And it looked like new again, next time I'll be more pedantic about cleaning things after playing with power or hand tools.
fit_out8.jpg

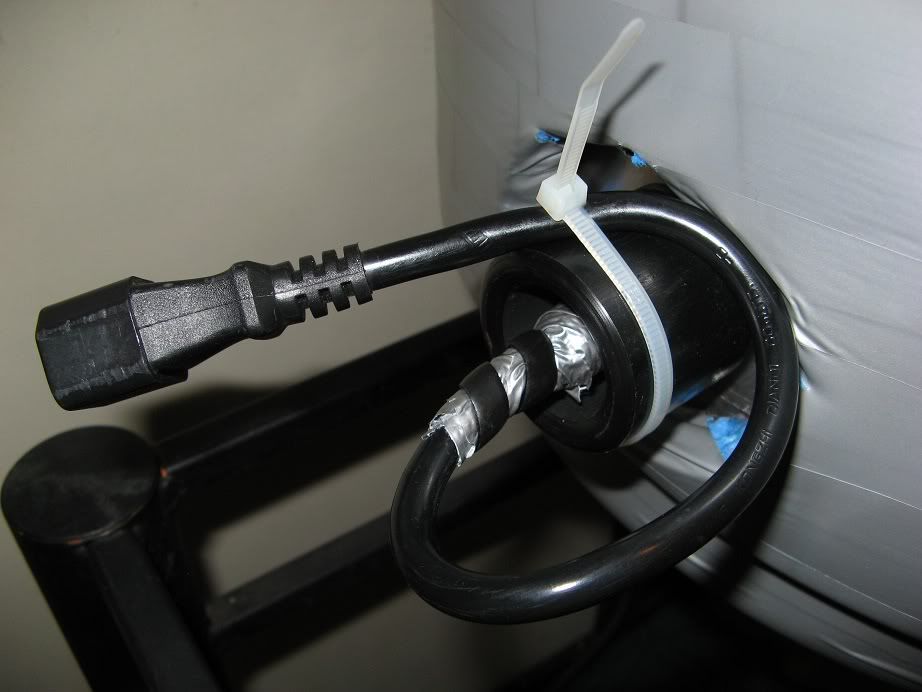
After the 1 hour test-boil the cord and element-connection were quite warm, so it's easy to understand how a bit of pressure or pulling could causes problems. Hopfully some tape, spiral-wrap and a cable-tie will help keep thing safe and secure:
fit_out10.jpg
 
...and then?
I have to clean up the 20L of boiling water spilled onto my bathroom floor (was not like i was sitting there watching the 1hour long test boil).
Wash and dry the towels/bathmats that got flooded and were used to clean the spill up.
Fix the leaking kettle-tap (that was not leaking before I undid it to stick on the insulation) but which is now difficult/impossible to do with an inch of insulation in the way and only a small hole (which should be possible tomorrow when I'm not frustrated after trying 6 times and ready to rip the insulation off and kick it across the room).
After that, refit then test the kettle elements.
But there was dinner to make and eat, and now I'm sitting watching yeast slants grow (or considering if they will) since I was a slack **** and didn't re-culture some of them for a year or two. :)

So while I have a keg-and-a-half of beer in the fridge and some more bottled in milk-crates it's not yet the end of the beer-world. But now that you have made me think about it the only way I'll probably drink the keg of Dunkelweizen (same one that was at your place) is if there is no other beer in the house - nothing wrong with the beer, its even enjoyable for what it is, but it's still a wheat beer. :icon_vomit:
 
Shifter-friendly base-insulation:
fit_out11.jpg


Fits well with the 3-piece valve:
fit_out12.jpg


HLT sight-glass calibration:
fit_out13.jpg

Graduations marked from 12-38L, the element is exposed at 10L so it should also help not run things dry.
 
hey wolfy,

just a quick note on the 3 piece valve, if you put the bolts so the heads face the pot it will make pulling it apart easier as the nuts will come off easy and the bolts will be held in place so you won't have to hold them when putting it back together.

the builld is looking good, great job.

cheers steve
 

Latest posts

Back
Top