Wolfy's 3v Stainless Home-brewery Build Details

Australia & New Zealand Homebrewing Forum

Help Support Australia & New Zealand Homebrewing Forum:

This site may earn a commission from merchant affiliate links, including eBay, Amazon, and others.
just a quick note on the 3 piece valve, if you put the bolts so the heads face the pot it will make pulling it apart easier as the nuts will come off easy and the bolts will be held in place so you won't have to hold them when putting it back together.
Very good point that. :)
I just presumed I'd unscrew them from the nipple and disassemble them that way, will see in time which method is easier.
 
I too have had problems with threaded fittings leaking even after re-tightening it seems that the heating then cooling process slowly loosens the fittings. I now use teflon tape on the threaded fittings, just the last two or three threads worth, i put about ten full rotations of tape on just a very narrow area at the end of the thread, then when you place the fitting in to the hole it acts like another seal when you tighten the internal nut, the teflon compresses against the kettle and the fitting, usually you can only see a very small white ring of teflon between the kettle and the fitting. Guaranteed no more leaks . :D
 
Very good point that. :)
I just presumed I'd unscrew them from the nipple and disassemble them that way, will see in time which method is easier.


So when do you reckon the maiden brew day will be?

EDIT: And what do you plan to do with the old rig?
 
..i put about ten full rotations of tape on just a very narrow area at the end of the thread, then when you place the fitting in to the hole it acts like another seal when you tighten the internal nut, the teflon compresses against the kettle and the fitting, usually you can only see a very small white ring of teflon between the kettle and the fitting.
I've used nearly a full roll of the thick-pink tape putting things together applying 2 rotations on each thread ... trying 10 on each might be very interesting! :)
So when do you reckon the maiden brew day will be?

EDIT: And what do you plan to do with the old rig?
Projected first brew has been 'tomorrow' ... for a few days now. ;)
However, I might I get the pump wired up tonight, and finish the hop back and HERMS tomorrow, then it will be ready for it's first run.

As what happened with my old setup: http://www.aussiehomebrewer.com/forum/inde...c=56844&hl=
Looking at the date, it's no surprise that the keg fridge, multiple crates full beer and a few batches of donations from Bulk Buys are now virtually all empty.
 
Update #15: Pump
Blog post

They're not called Little Brown Pump, for nothing:
pump1.jpg

Compared the the 1/2 inch valve and fittings, these things are 'little'. It's wired up via a 12V transformer recycled from our old cable-modem, and powered by one of the points on the control box.

The Little Brown Pump recirculated from what is essentially the bottom of the brew-stand (where the HERMS will sit) to the top of the HLT (return fitting provided for easy CIP once things are finished), via the mash tun, at a rate of 3L per min and did so without problem for an hour:
pump3.jpg


A brew-stand is on the 'to do' list, but since it's not essential for making beer, it's not going to happen yet. The old table-thing one of our neighbors was throwing out and a few milk-crates should do an adequate job.
pump2.jpg

The milk crates are cable-tied down, so they can't move or tip.

While many home-brewers, both in the UK and Australia, use the Little Brown Pumps without issue or complaint, after pulling one apart, I'm not sure it's something that will have a permanent place in my brewery.
brownpump.jpg

Not only are there a number of small, fiddly internal parts, some of which are made of metal, but the impeller/shaft and housing are not sealed that well (or separated like a Magnetic Drive pump), so wort or other contaminates could get - and stay - in/to the various internal components of the pump.
 
Update #15: Pump

While many home-brewers, both in the UK and Australia, use the Little Brown Pumps without issue or complaint, after pulling one apart, I'm not sure it's something that will have a permanent place in my brewery.
brownpump.jpg

Not only are there a number of small, fiddly internal parts, some of which are made of metal, but the impeller/shaft and housing are not sealed that well (or separated like a Magnetic Drive pump), so wort or other contaminates could get - and stay - in/to the various internal components of the pump.


It's so bloody hard to get something good for nothing!!!!!!!! :lol:

Screwy
 
#6: False bottom/filter stand-offs

As mentioned in Update #3, the 0.55mm thick perforated stainless used to make the mash false-bottom and kettle filter, is not as heavy duty as the commercial false-bottoms and might not easily hold the weight of the mash (or even sit in place with vigorous stirring). The two threaded pipe fittings arrived today, and after a little bit of work with a grinding disk on the angle grinder, they fit under the false bottom, provide support and should allow the wort to easily drain.
falsebottomstandoff.jpg

Obviously they'll be installed on the inside of the keg (but would be impossible to photograph there), and the false bottom will sit between the two washers.

Hey Wolfy,

Is your 1/2" socket 'standoff' sealed on the outside of the MLT?

i.e: plug > washer > false bottom > washer > threaded socket > vessel wall > washer/nut > hex nipple > valve?

If so, any issues with leaks? I'm about to set up a similar setup - I know ideally it should be sealed on the inside, but there is little clearance to do so, even with the 1/2" socket cut down.

Cheers.
 
Is your 1/2" socket 'standoff' sealed on the outside of the MLT?

i.e: plug > washer > false bottom > washer > threaded socket > vessel wall > washer/nut > hex nipple > valve?

If so, any issues with leaks? I'm about to set up a similar setup - I know ideally it should be sealed on the inside, but there is little clearance to do so, even with the 1/2" socket cut down.
Yes, for exactly the reason you mentioned, the false-bottom 'sits' better when the fitting is sealed from outside of the MLT/Kettle.

There is not even a washer on the inside of the keg so it goes like this:
Plug > washer > false bottom > threaded socket > keg-wall > silicon washer > steel washer > hex nipple > valve > camlock.

This is the outer-side-view of the mash tun:
fit_out11.jpg


No problems/leaks yet, but will see how things go with many repeated brews.
 
Yes, for exactly the reason you mentioned, the false-bottom 'sits' better when the fitting is sealed from outside of the MLT/Kettle.

Thanks - gives me peace of mind with my own planned setup - i'll post some pics when I'm done :)
 
Update #16: Mill Mount
Blog post

About the only thing from my old brewery that will migrate to the new one is the long-handled Coppers-type spoon, that means that even the mill/mount and mash paddle will be new and something I have to build. I got the mill some months ago, at the right price, and now that the brewery is all-but-finished it was time to find a way to mount it. I was considering making a dedicated table/mount, or building the mill onto some large plastic buckets, however following a suggestion from another home-brewer the easiest and most logical way to mount the mill was directly ontop of the Mash Tun.

Some MDF from the shed which should do the job:
mill1.jpg


The MDF was cut to shape using a jig-saw and the hole-saw was used to cut the pilot holes for the mill:
mill2.jpg


The MDF was cut to fit ontop of the mash-tun-keg and bolts used to hold it in place when fitted:
mill3.jpg


On low-speed setting (and if I ensure that one of the batteries is always changed) the cordless drill should work fine for driving the mill:
mill4.jpg


The mill-hopper, which was supplied with the mill, is likely going to be a bit small to hold a full batch of grain, so I might have to extend it in the future.
 
One easy way to make a board for the mill, wolfy, is to take a plank of pine, chop it in two. Cut half the width of the mill out from both halves, then dowel and glue them together. When you bolt the mill to the board, just make sure to secure the other side with a strip of something to keep it from buckling.

I hate MDF, esp around anything food.

PS: Good thinking of milling on top of the mash tun.. I really should do that too....
 
Update #16: Mill Mount V#2

I figured it was probably a good idea to replace the MDF with some dressed (Premium Pine from responsible sources in NZ) pine. $10 seemed a good price to eliminate any cancer causing Formaldehyde resins and other potentially not-so-nice stuff.

Most of it's made from 140x19mm pine (a single 1.8m length cut into 3):
mill2_1.jpg


Hole saw:
mill2_2.jpg


Jig saw:
mill2_3.jpg


Glue and dowel was beyond my skill-level so just used lots of wood-screws:
mill2_4.jpg


More screws - and washers - to hold the bit of wood that will sit under the lip of the keg to hold things in place:
mill2_5.jpg


Mill placement, no chance of buckling or giving in under the weight of the grain:
mill2_6.jpg


Completed (from the bottom):
mill2_7.jpg


And the top, very solid is not going to move, break or bend anytime soon:
mill2_8.jpg
 
hit that with some stain and sealer, thats a keeper!
 
Update #18: Wort!
Blog rant

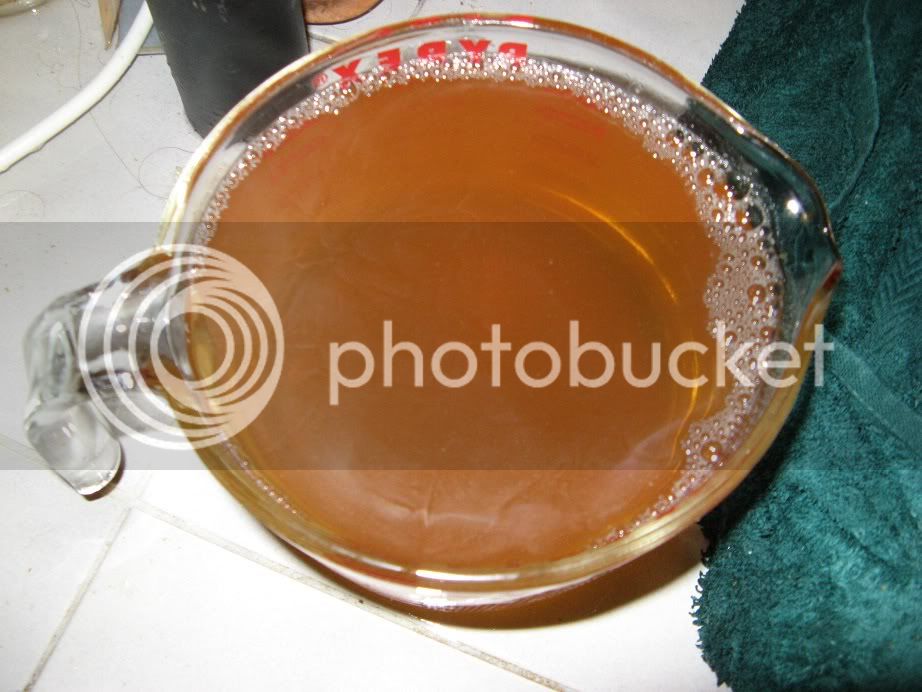
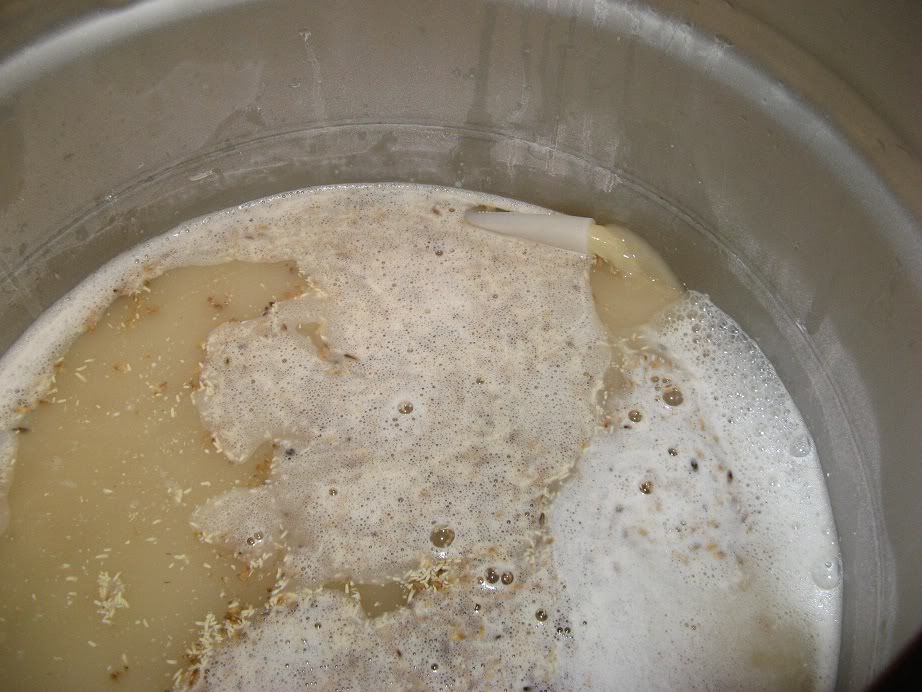
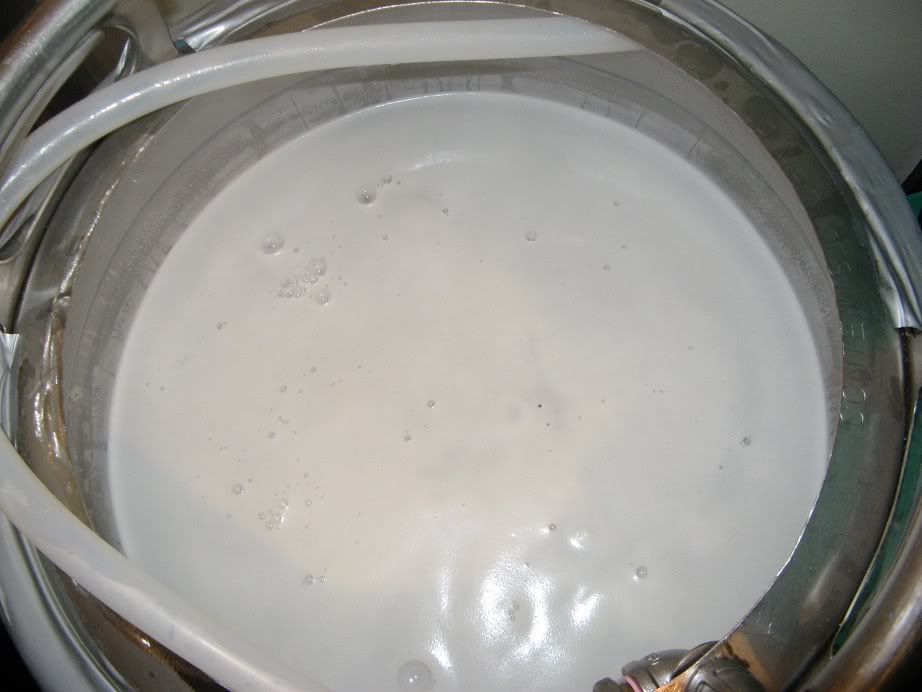
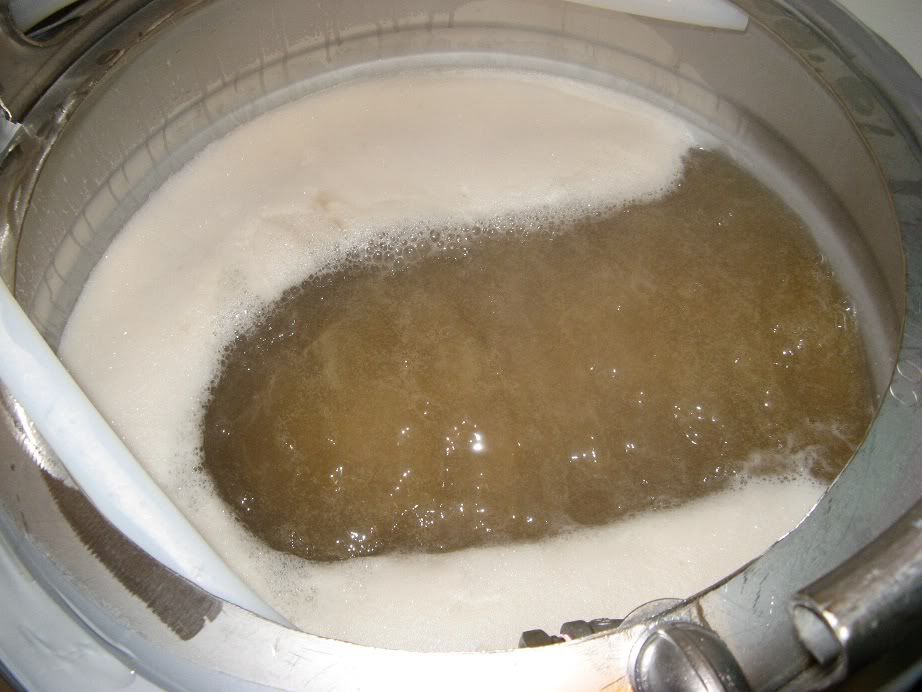
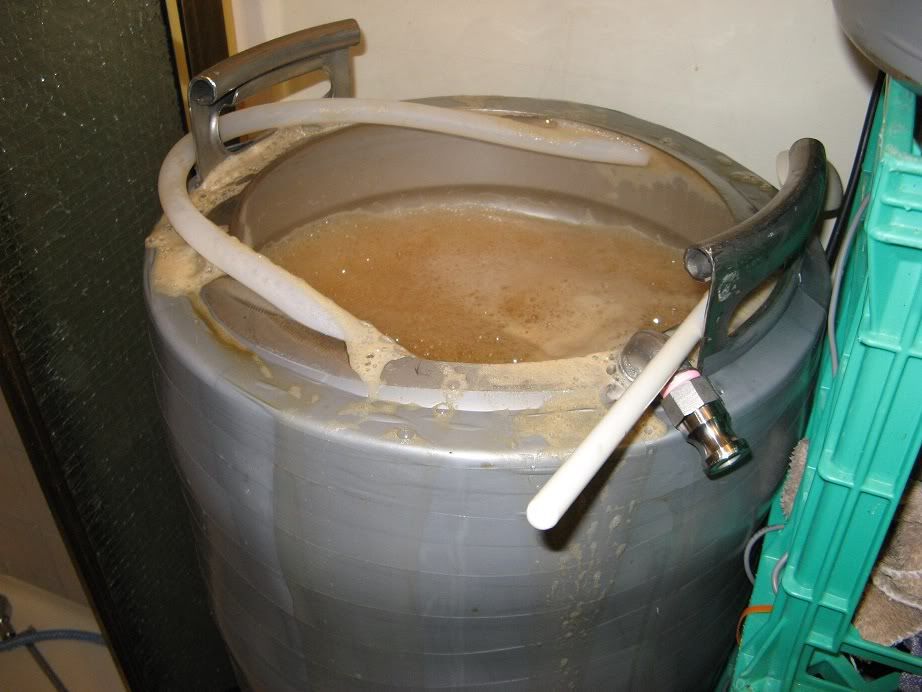
After a bit of time, effort and money, it was nice to have it finally do what it should ... make some wort:
BrewDay16.jpg

I thought it was surprisingly clear into the fermentor, I no-chilled 24L into 2 x 10L jerrys and tipped the last 4L.

I've had a 4.8kg bag of Wey Pils that G&G crushed for me 3+ years ago, it's been sitting around since then and even sustained a family of mice for a while. So I figured it would be a good test-run for the new system, with the intention of no-chilling and if they don't get infected, use the wort for lager-starters that (in theory) I might be making soon.

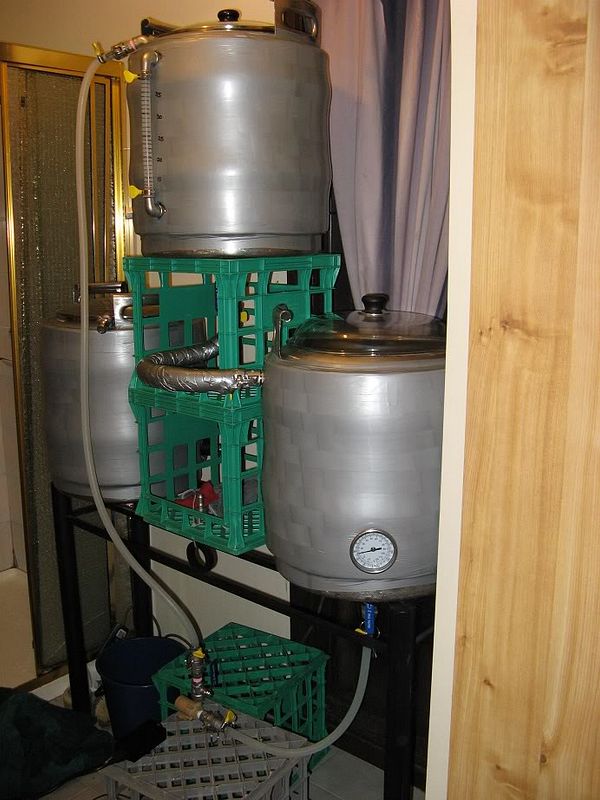
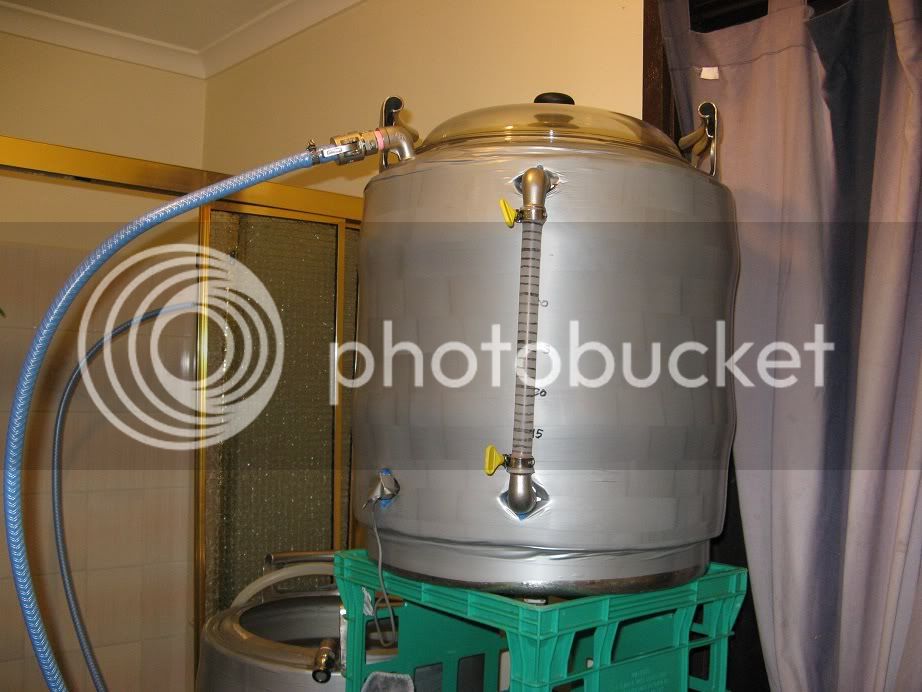
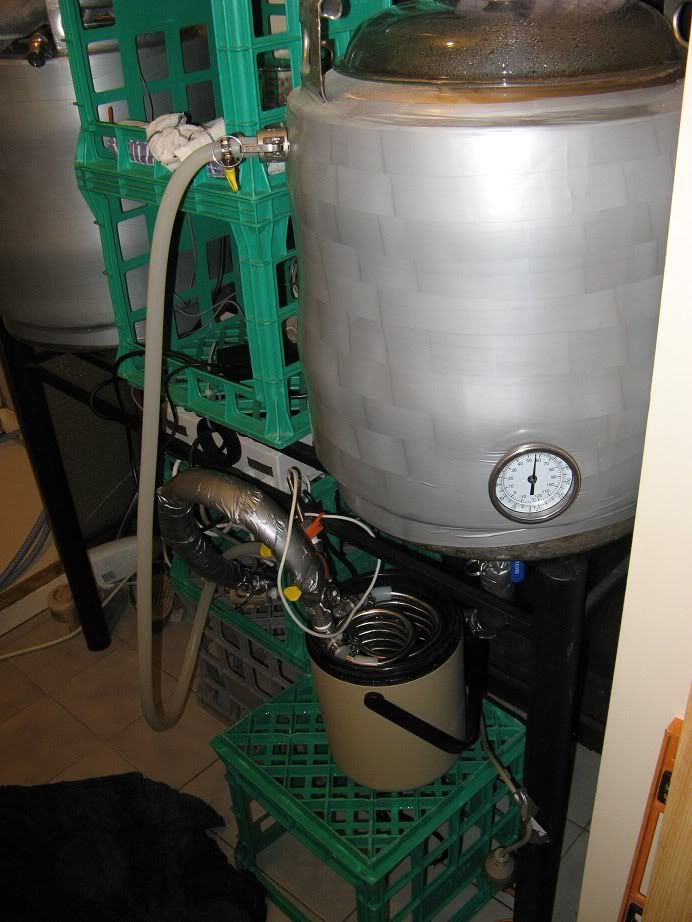
Filling the HLT, food-grade water-hose ($20 on Ebay from a mob in Dandenong) directly from the shower-outlet .
BrewDay1.jpg

I plan to fill the HLT the night before brew-day so that any chlorine will have time to dissipate.

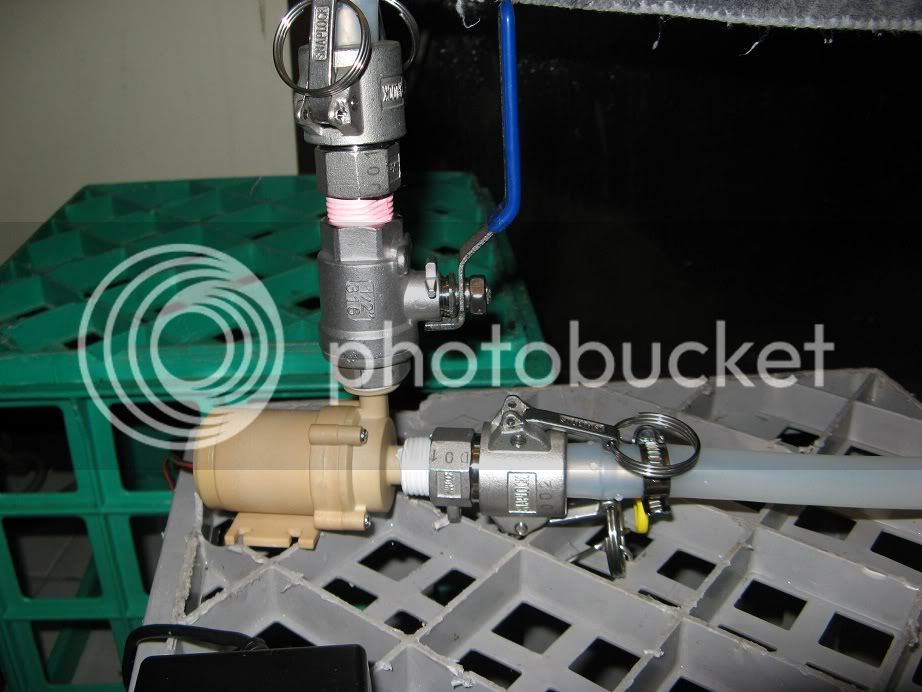
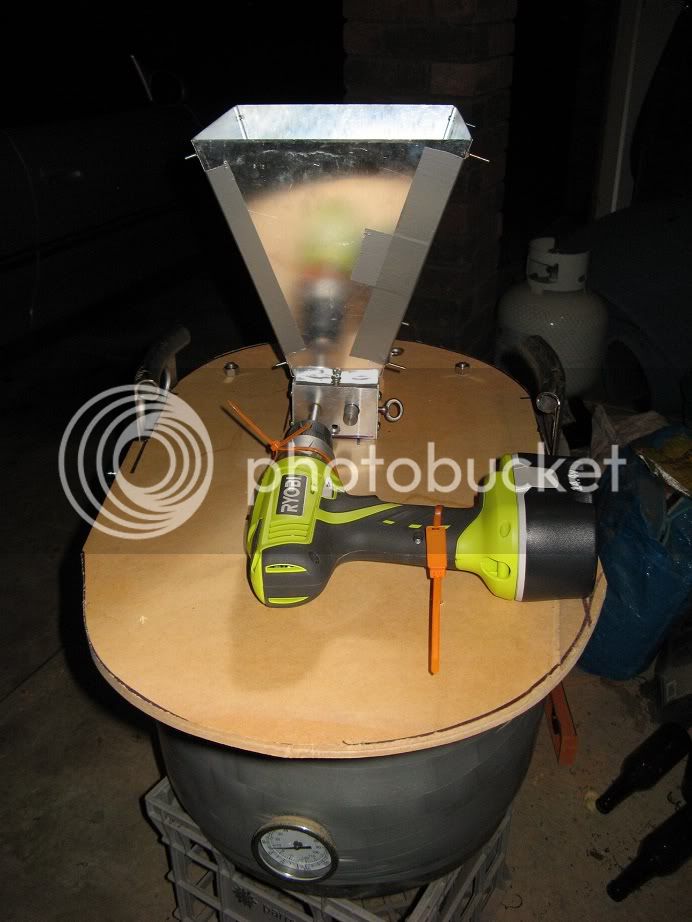
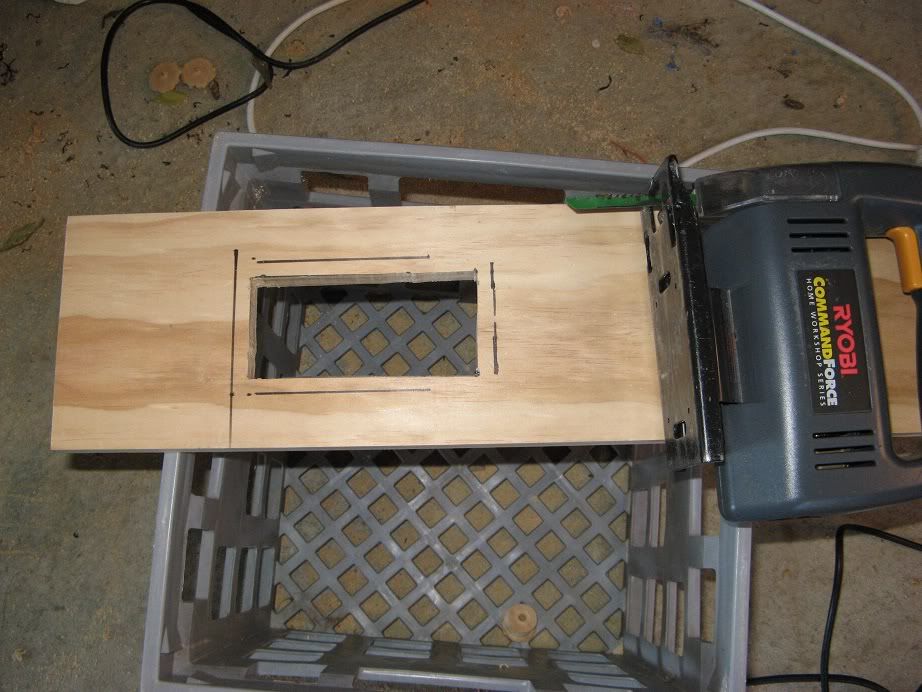
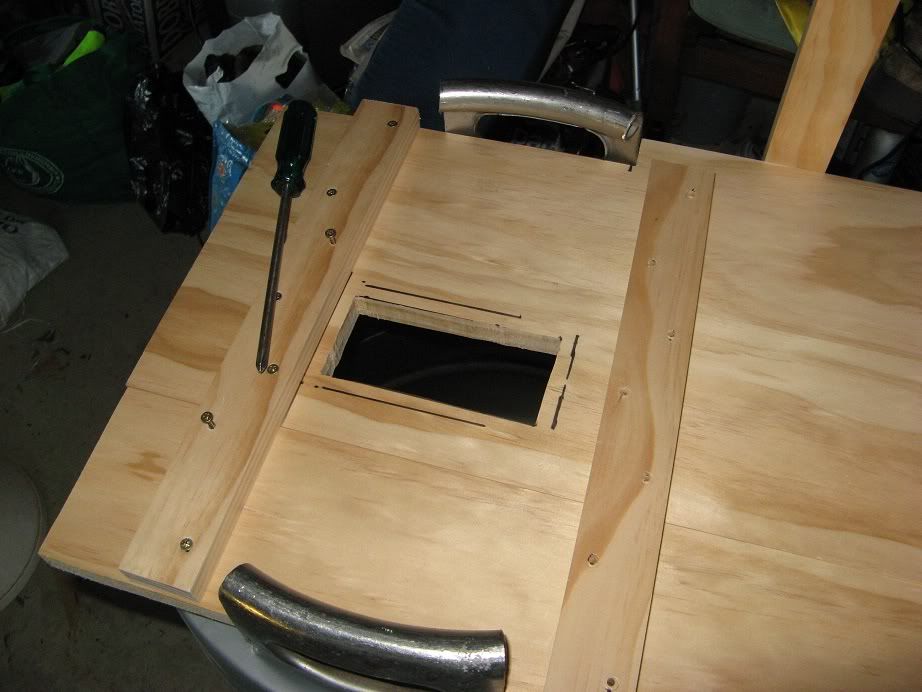
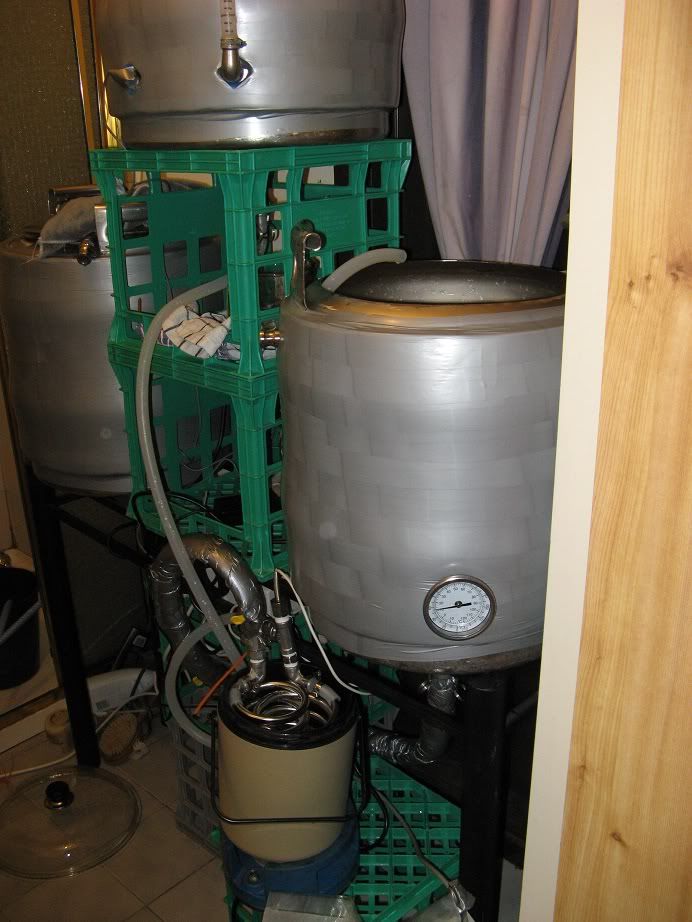
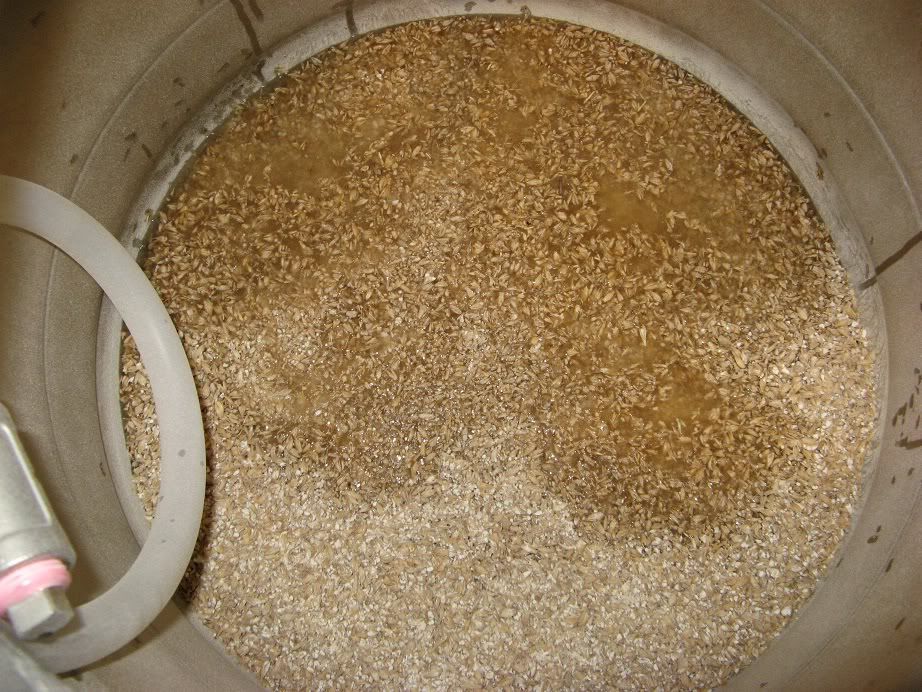
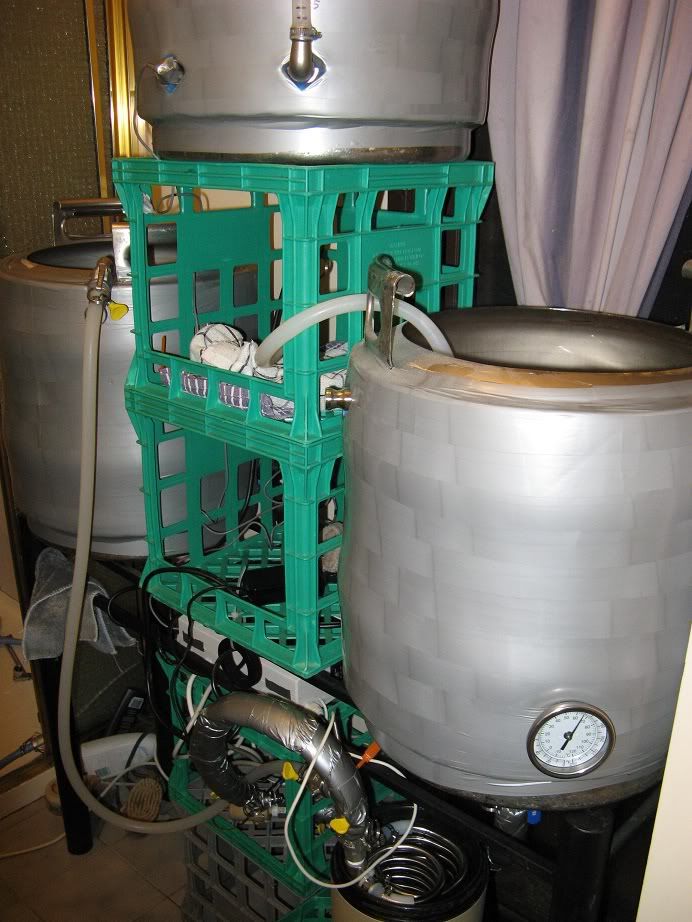
Filling the mash-tun from the bottom, via the pump, HERMS and hoses:
BrewDay2.jpg

HLT was set to 60C but by the time it was all mixed the mash-thermometer read 45C, so I'll need to test/calibrate what temperatures are required.
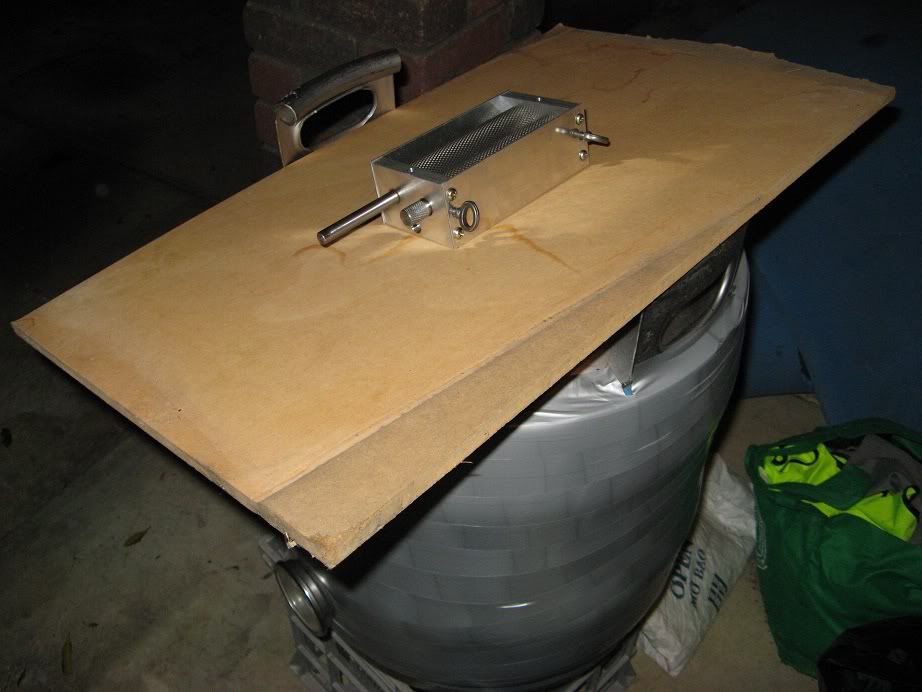
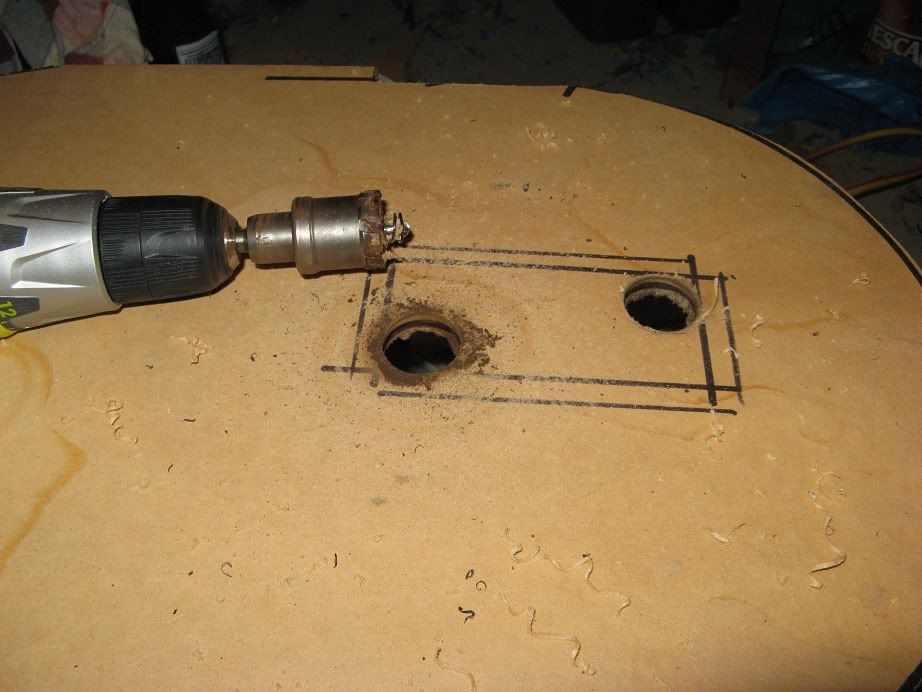
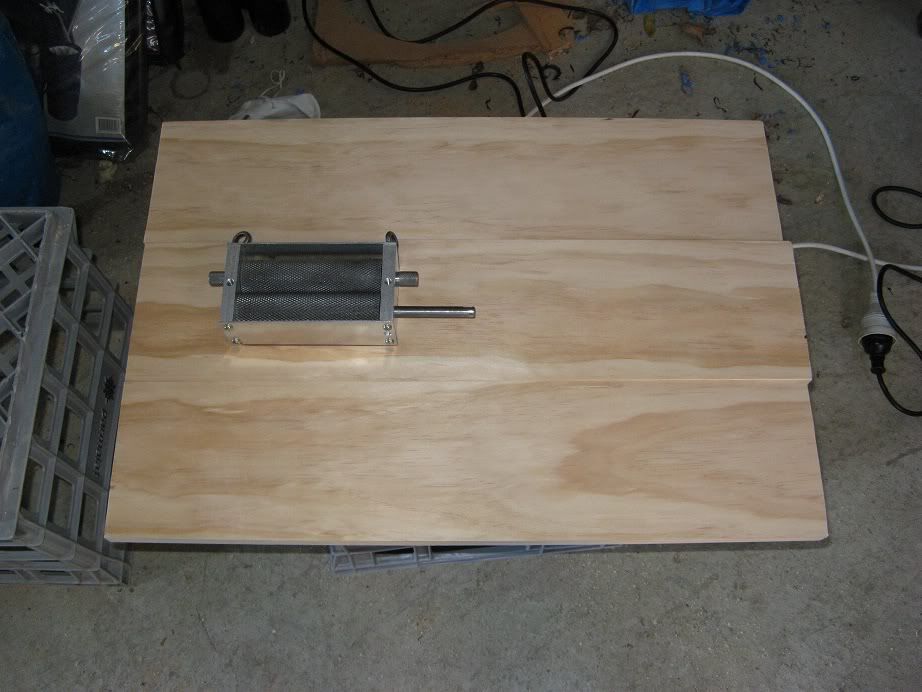
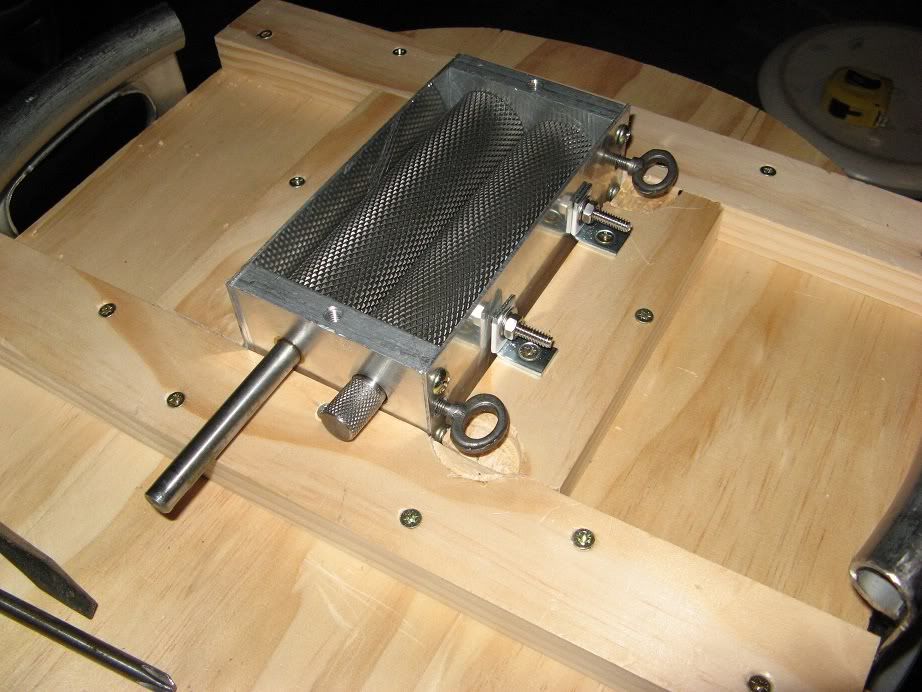
HERMS is not quite finished yet, it works fine, but needs to have the lid fitted and the fittings attached to that, but I wanted to check that it worked as expected while I could see what was going on.

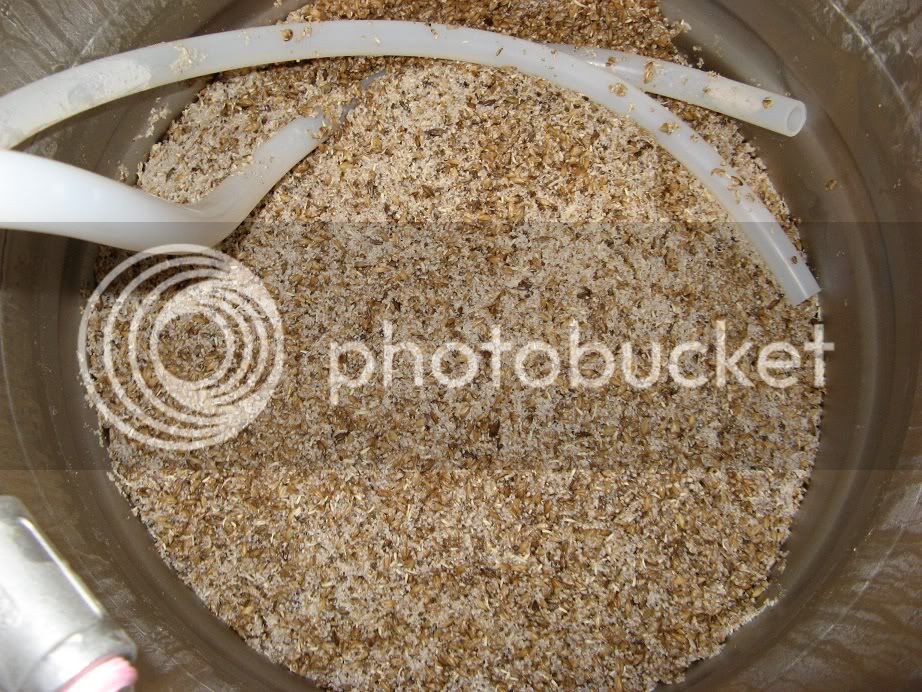
No dough-balls undeletting at what turned out to be about 45C:
BrewDay3.jpg


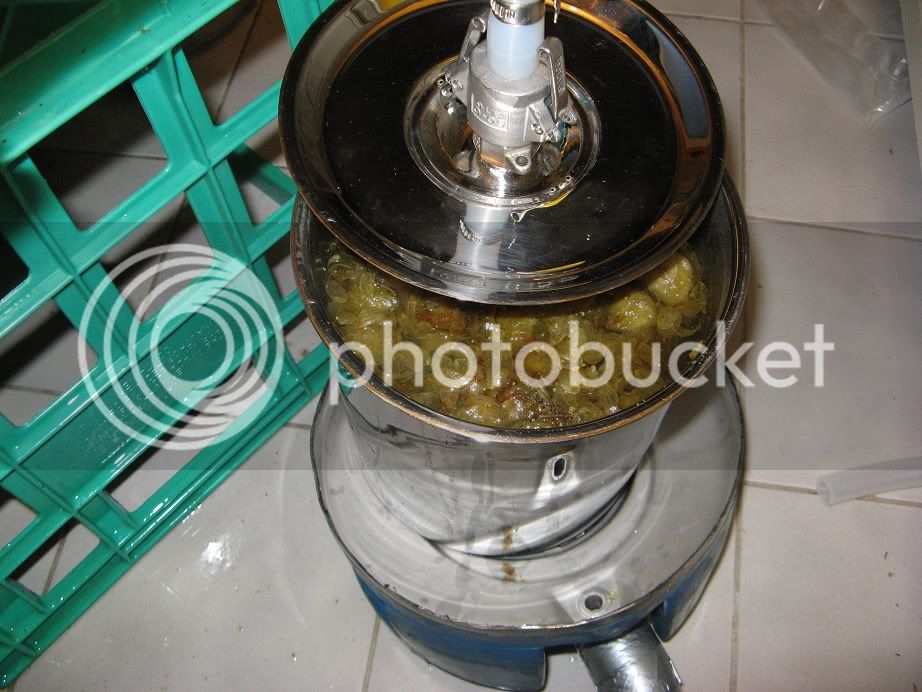
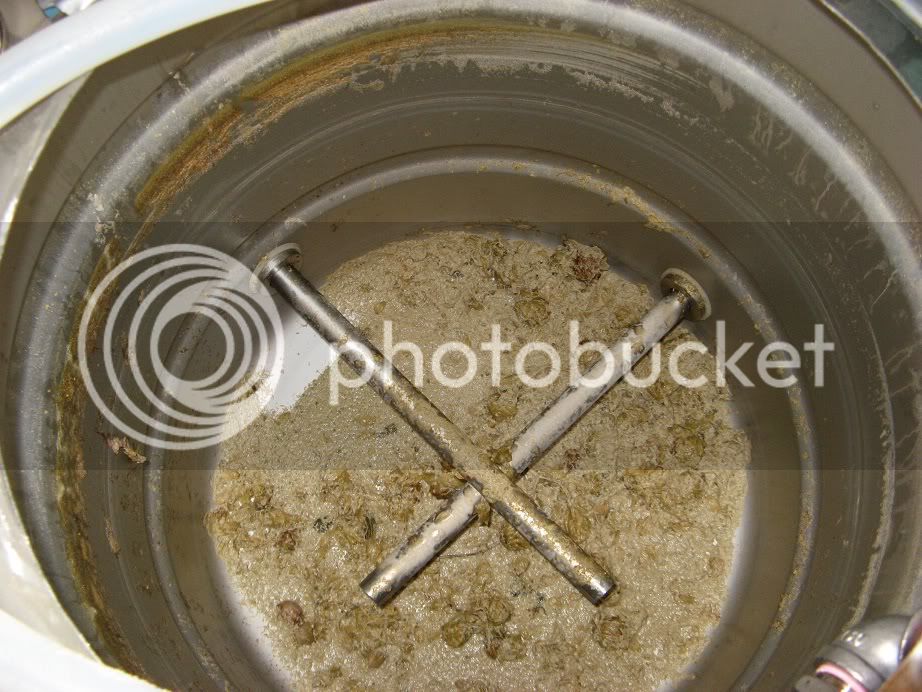
Mash-filter worked well, no problems circulating even right at the start:
BrewDay5.jpg

BrewDay4.jpg


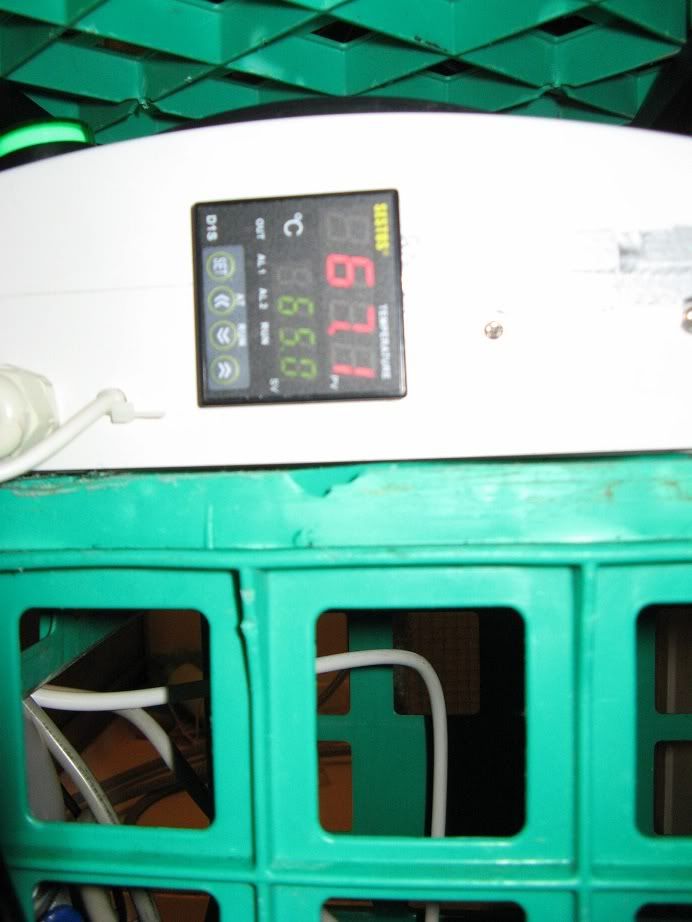
One of the main problems I did have was uncalibrated thermometers and difficulty understanding the PID instructions (or the bloody thing not working quite as expected).
Not sure if the auto-tune stuff worked or not, and for a while it seemed to think that 67C was a good temperature to run when I had it set to 65C.
BrewDay6.jpg

The mash-tun dial-thermometer consistently read 2C less than the PID, which means either one or both need calibrating and/or there were losses via the hose/mash tun.
The HLT probe also appeared to be 2-3C out, so I will need to buy a decent scientific glass thermometer and calibrate them all.

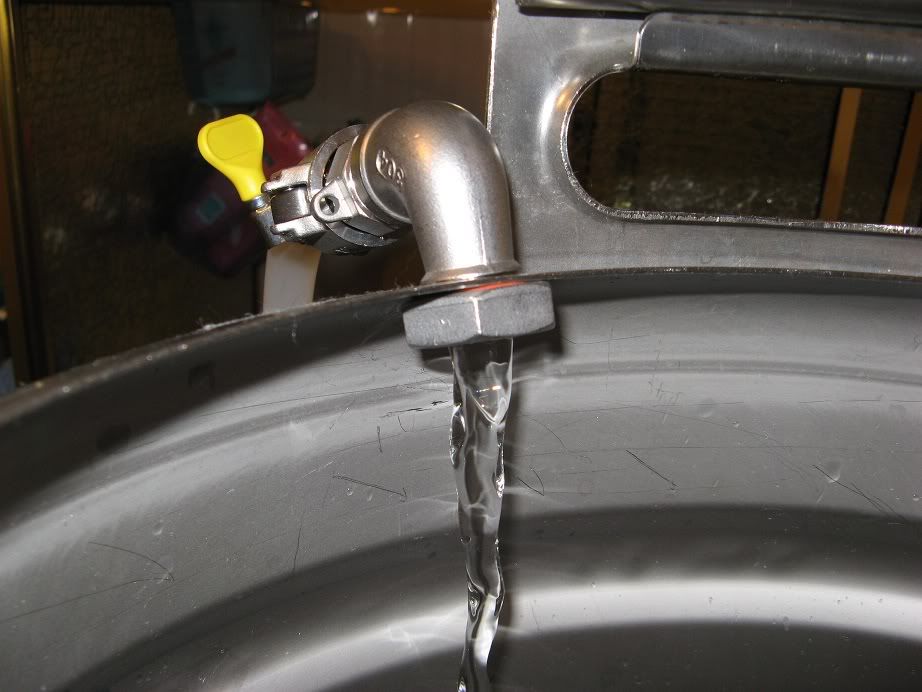
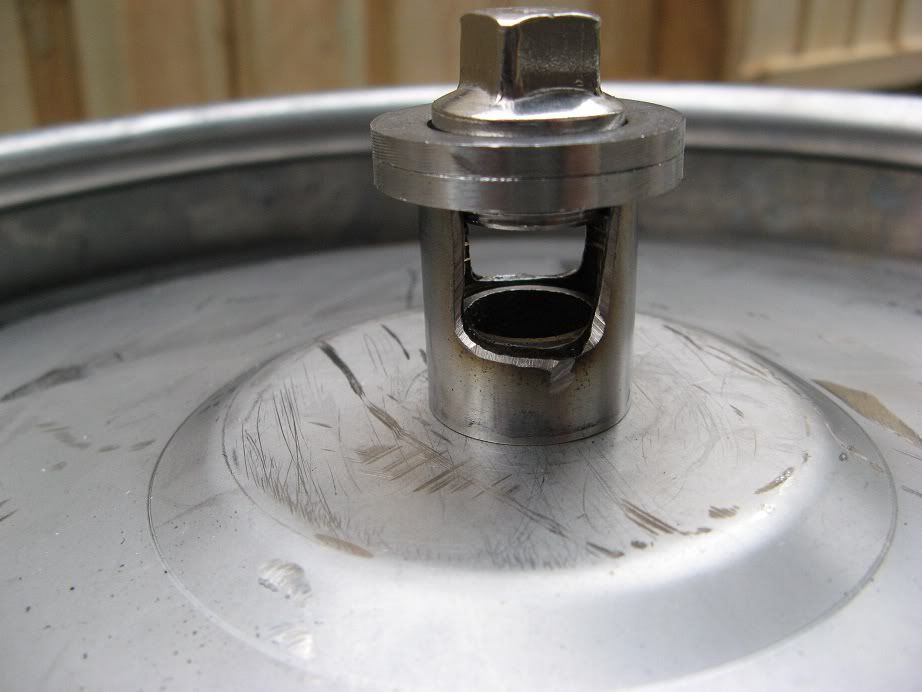
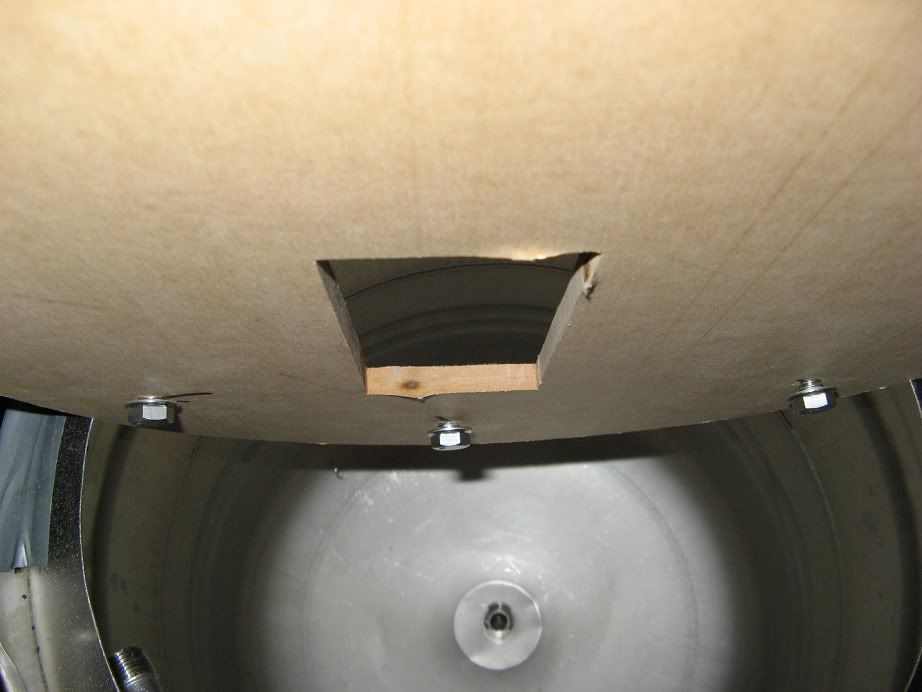
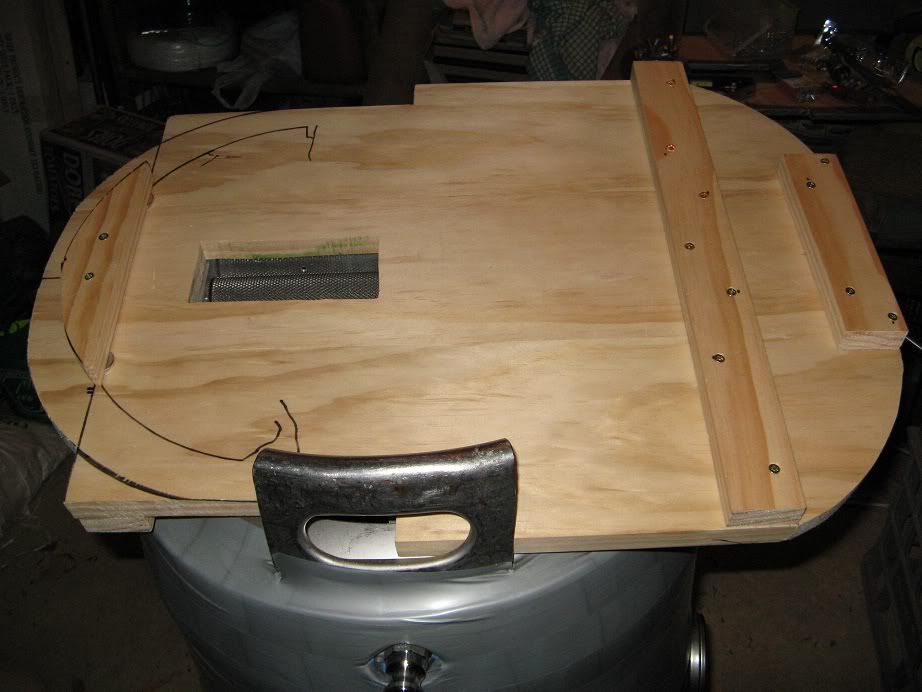
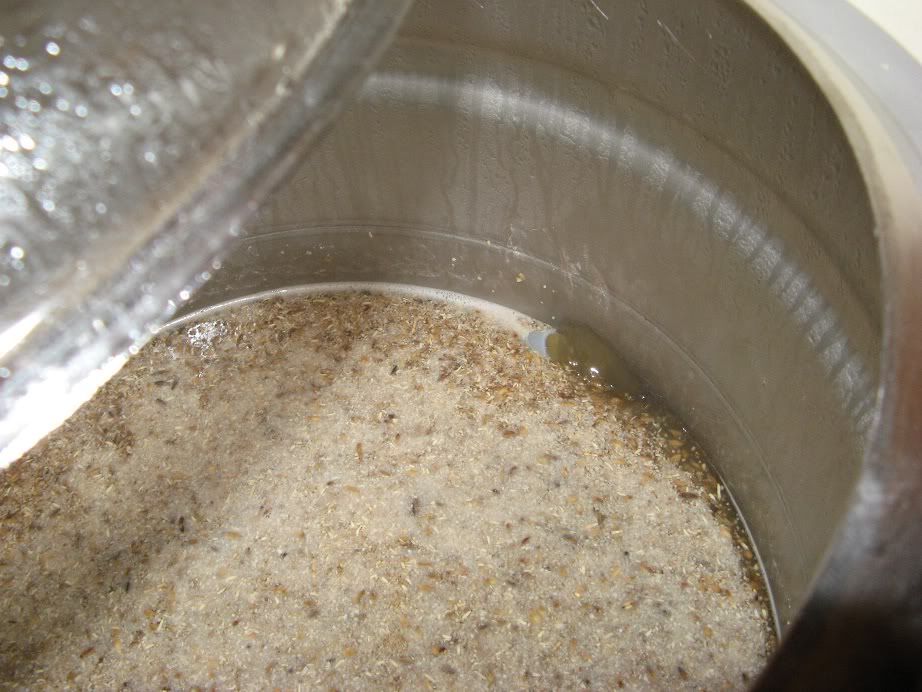
As expected, after an hour of recirculation the wort was clear:
BrewDay7.jpg

One of the things still on the 'to do' list is a better wort-return-mechanism, but I wanted to run a test first to check volumes/sizes/headspace and the like.
 
Filling the kettle while fly-sparging:
BrewDay8.jpg

Current plan is to use a 2nd pump and put all the 3 kegs on the same level, but unfortunately the (March pump take-off) HB-pump that KegKing sell only comes with barb fittings and not threaded ones, so I'll need to keep looking for one suitable.

Mash drained well enough, but I presume there was a fair bit of channeling due to the dodgy-wort-return.
BrewDay9.jpg

The second hose was because I was one camlock short and have not yet worked out the best way to compensate (or buy another).

The 2 elements worked well with with break forming even before the kettle was filled:
BrewDay10.jpg


A single element was sufficient to keep a rolling boil going, but need to add volume-markers to the kettle and then check the evaporation rate:
BrewDay11.jpg


Some random hops, Cascade that didn't vacuum-seal in the freezer and home-grown Perl which I have an abundance of:
BrewDay12.jpg

I wanted to test both pellet and hop flowers since I will generally use both in most recipes, 20g pellets and 10g whole hops in the kettle and another 20g whole hops in the hop-back.

At the end of the boil:
BrewDay13.jpg


Kettle drained via the hop-back:
BrewDay14.jpg

(More details on that when it's finished, but it worked mostly-as-expected).

A surprising amount of break and trub was left in the kettle:
BrewDay15.jpg

The kettle is drained as soon as the boil is finished (no whirlpool or waiting) from the bottom, under what is essentially a false-bottom, with the hop back adding a second filter before the plate-chiller (which I will generally use).

Same wort-picture as before, but a bit of excitement about having it all work is not a bad thing:
BrewDay16.jpg


The 'to-do' list includes fixing the wort-return to the mash, adding volume calibration to the kettle, finish the HERMS and hop-back, work out an efficient way to clean everything, try to find a way to not spill boiling water/wort all over the place when changing the hoses, calibrating the various thermometers and trying to make some sense of the PID ... and after all that is the brew-stand build. :)
 
as I understand your build Wolfy you are draining the Keggle from the bottom? Have you got a screen over the outlet? how do you stop the trub from draining to the hopback? or does the hopback act as the filter?

Looking good man

:beerbang:
 
Have you got a screen over the outlet? <snip> does the hopback act as the filter?

And how does it not get clogged in 2 seconds flat? Don't you get all the trub being sucked into it before any wort gets a chance to go anywhere?


Edit: re-read your post - never mind - you said you drained immediately and didn't whirlpool. I assume this is so you don't give the trub time to settle out of the solution, and hence avoid the problem?
 
as I understand your build Wolfy you are draining the Keggle from the bottom? Have you got a screen over the outlet? how do you stop the trub from draining to the hopback? or does the hopback act as the filter?
And how does it not get clogged in 2 seconds flat? Don't you get all the trub being sucked into it before any wort gets a chance to go anywhere?

Edit: re-read your post - never mind - you said you drained immediately and didn't whirlpool. I assume this is so you don't give the trub time to settle out of the solution, and hence avoid the problem?
The kettle has a perforated stainless false bottom, as per this post earlier in the thread: http://www.aussiehomebrewer.com/forum/inde...st&p=917684
(Essentially it's the same as the mash-tun filter, just slightly smaller so it fits in under the elements)
Whirlpooling would only concentrate the trub on top of the false bottom, and give the wort time to cool before hitting the hop-back (neither would be advantageous).
Immediately after the kettle, the hop-back has another 2 perforated 'filter plates' and the whole hop flowers, adding additional filtration.
Depending on how it all worked I was/am going to make some additional swiss voile insert filters (also so I can use hop-pellets in the hop-back) - but from the first experiment it seems the majority of the break and hops are left in the kettle, so additional complications may not be needed.

Filling the HLT and letting the water sit did well to remove any chlorine-smell, however (while it seemed a good idea at 5am) adding the brewing salts undissolved was obviously not a smart thing to do:
saltrust.jpg

The first batch of real-beer-wort might not be made today as I had anticipated. :angry:

Edit: As per the picture it looked like quite bad/deep rust, but it essentially washed away as soon as it was drained, something about iron oxides attaching themselves to the flakes of salt maybe ... cleaning/repasivating now with stainless-cleaner but was not the problem I thought it was.
 
Update #19 (or 20 or something) KegKing Elements
Blog stuff

As previously outlined the converted keg-kettle (Keggle) runs 2x KegKing 2200W heating elements. Previous posts show how they were installed and what I did to try and prevent the cord/connection from flexing when they are in use (and melty-hot).

Heating the wort by running both elements unattended is not a good idea - so I found out yesterday - with only about 33L in the kettle (leaving 17L head-space) the boil from both elements was so vigorous that the kettle overflowed as it came to the boil and the break was formed:
BDF4.jpg


After the break has formed, both elements can be run without problem, however using both at the same time (for single batches, approx 30-33L of wort) produces an extremely vigorous boil:

(Keggle indoors and heavily insulated as per previous posts)

After the wort is brought to the boil, a single element is more than adequate to keep a rolling-boil going in the insulated kettle:


(I've no idea how or if we can embed videos here).
 
Last edited by a moderator:
excellent stuff, maybe make up a power adjuster (light dimmer) as 1 element is probably not good enough for a rolling boil (it could be close) ??
 

Latest posts

Back
Top