Wolfy's 3v Stainless Home-brewery Build Details

Australia & New Zealand Homebrewing Forum

Help Support Australia & New Zealand Homebrewing Forum:

This site may earn a commission from merchant affiliate links, including eBay, Amazon, and others.
excellent stuff, maybe make up a power adjuster (light dimmer) as 1 element is probably not good enough for a rolling boil (it could be close) ??
Would you want a more active boil than in the single-element-video?


is that nipple at the top for the future sparge arm?
The kettle, which actually still has the silicon hose from the nipple to the bottom of the kettle (avoiding the elements) in the video?
Minimizes splashing (and any chance of HSA) while the wort is being transferred from the mash, filling via the kettle-tap would leave any grunge/grain under the kettle false bottom/filter. The hose gets removed as soon as the kettle is full and I remember to pull it out.
Theory is - in the future - they will both allow quick/easy changing for a CIP spray-thing. Attach spray-thing to nipple via silicon hose, put lid on, pump/spray cleaning stuff all over the inside. So far I've found cleaning immediately after use saves much scrubbing, so the need for CIP will depend on my laziness now (not cleaned up from today's batch yet) and in the future
 
Last edited by a moderator:
Update #20: Hop-back
1000 words of text as well as 16000 words worth of pictures on blog here.

Originally I was planning to make an enclosed (pressurized) system, much like the Blichman Hop-Rocket. However, after research and reading, it appears that many Hop-Rocket owners run it up-side-down with the top open and get good or better results using it that way as a hop-back. Not having the hop-back fully enclosed made it much easier to design and make, however it does require monitoring while the kettle is draining to ensure that the system remains in equilibrium.

It's made from a "3L Bain Marie Buffet Stainless Steel Canister & Cover" (~$30 delivered from Ebay), however cheaper stainless canisters with perspex-type see-through lids that would likely do just as good job.
HopBack1.jpg

(Note: the silicon hose is to prevent splashing and reduce/eliminate any chance of HSA, however to work best - so the hose sits close/ontop of the wort, it needs an elbow under the lid which is not shown in the picture above).

The hop-back has 2x perforated stainless inserts, the first/bottom one has 3 stainless bolts that act as a stand-off to keep the filter above the base and allow adequate space for it to drain without issue:
HopBack2.jpg

The second perforated stainless insert-filter sits ontop of the bolt-heads:
HopBack3.jpg


HopBack4.jpg


HopBack5.jpg
 
For using hop-pellets, I first made and used a swiss-voile hop-back-bag:
HopBack6.jpg


HopBack7.jpg


But a better (and easier) solution, was a single-disk of swiss-voile sandwiched between the two filter plates:
HopBack8.jpg


HopBack10.jpg


Both the kettle kettle false bottom and hop-back actually work better when using more hops (especially whole hops).
HopBack9.jpg

3 kettle additions and 1 in the hop-back, each combining both whole hops and hop pellets:
HopBack11.jpg


Kettle filter doing it's job:
HopBack14.jpg


And the hop-back after use:
HopBack12.jpg

The second/swiss-voile layer, filtering the rest of the break and all the pellet hop-debris:
HopBack13.jpg


Leaving nice clear wort into the fermentor:
HopBack15.jpg
 
Where did you source the perf stainless inserts? Buy a sheet and cut it?
Wort looks fantastic in the last shot, nice work.
 
In another thread I got accused of not being a real brewer because I didn't use swiss-voile, so here is an AHB-only update:
Update #21 Swiss-voile

In keeping with the DIY aspect of this brewery build, with some guidance from SWMBO (she threaded the machine and provided basic instructions):
BDF5.jpg


I made some a hop-back-bag:
BDF6.jpg

and some hop-socks:
hopsock.jpg


Both worked as intended, however, the additional hop-debris floating around in the kettle actually seems to allow it to filter better. In addition since they were sewed with thin nylon thread and are made from flimsy nylon swiss-voile, they didn't stand up to the washing machine:
BDF9.jpg

... so it's unlikely they will feature in future brew days.

However the swiss-voile insert in the hop-back (previous post) worked very well and does not require using the sewing machine again, so I plan to continue with that approach.
 
Where did you source the perf stainless inserts? Buy a sheet and cut it?
Wort looks fantastic in the last shot, nice work.
Yep, as per: http://www.aussiehomebrewer.com/forum/inde...st&p=917684
A single $47 500x500mm sheet of perforated stainless was cut/shaped (angle grinder + file) to filter the mash-tun, kettle and hop-back, paying someone else to do it, or having just the hop-back inserts made was prohibitively expensive.

2 out of the 3 brews (so far) have been surprisingly clear into the fermentor, hopefully with a few minor adjustments they'll all be that way. :icon_cheers:
 
Update #22 HERMS Build
More details on blog

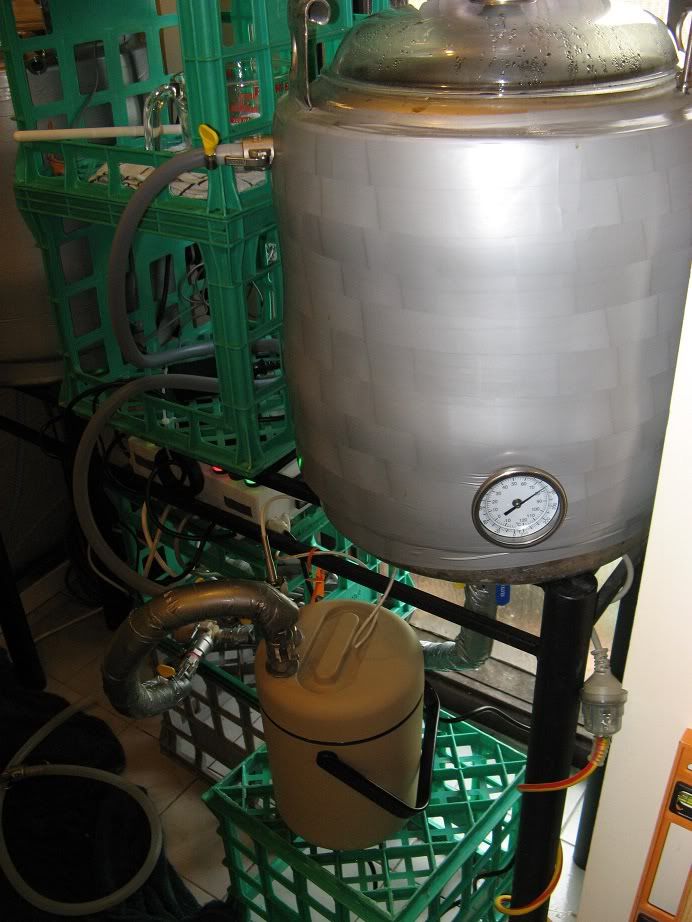
The HERMS unit was the single most time-consuming item of the entire new-brewery build. Not that it ended up being overly technical, difficult or even that special, just that it took so many different design-iterations and build attempts to actually make the bloody thing.

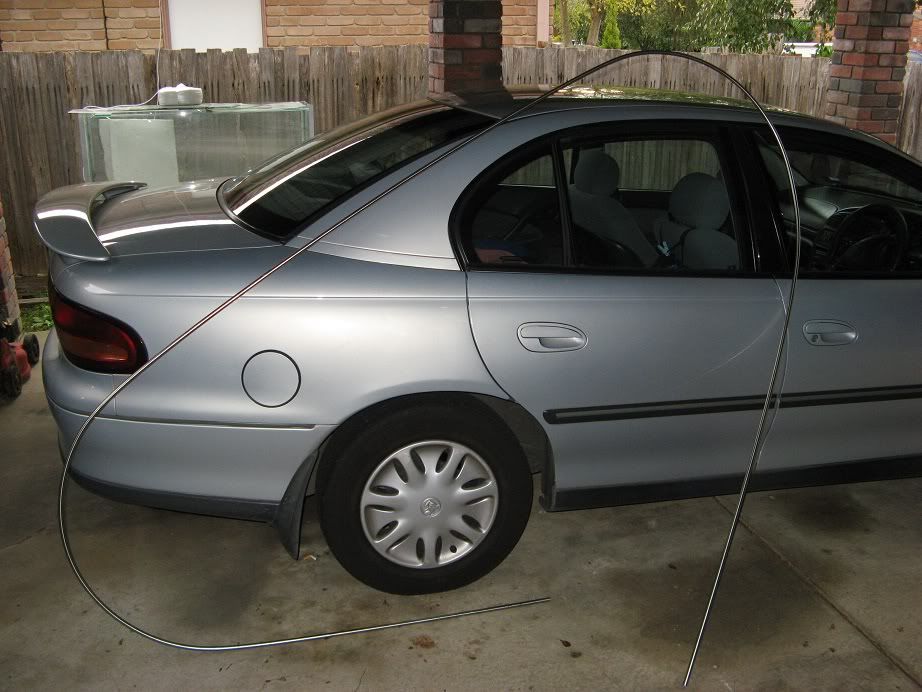
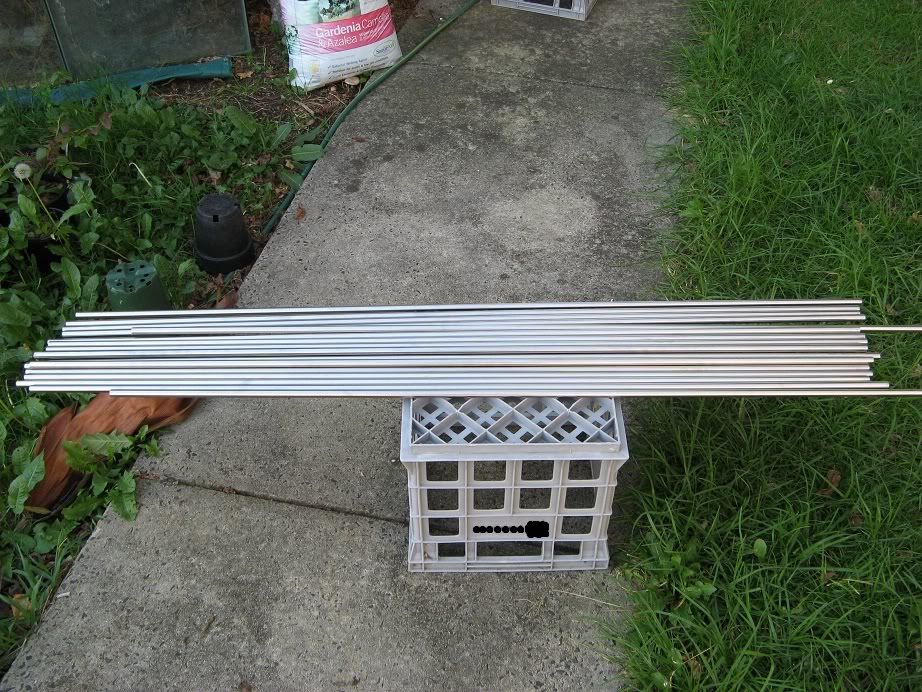
Trying to source the stainless-tube was the first complication. Geordi Stainless said multiple times (on the 'phone) that they had 6m lengths of 1/2 inch/12mm thin walled stainless tube in stock, unfortunately after driving there, they had sold it all (some time ago) and only had 1.2mm wall thickness. In addition, full 6m lengths of tube were not so easy to get home in the car:
herms_build1.jpg

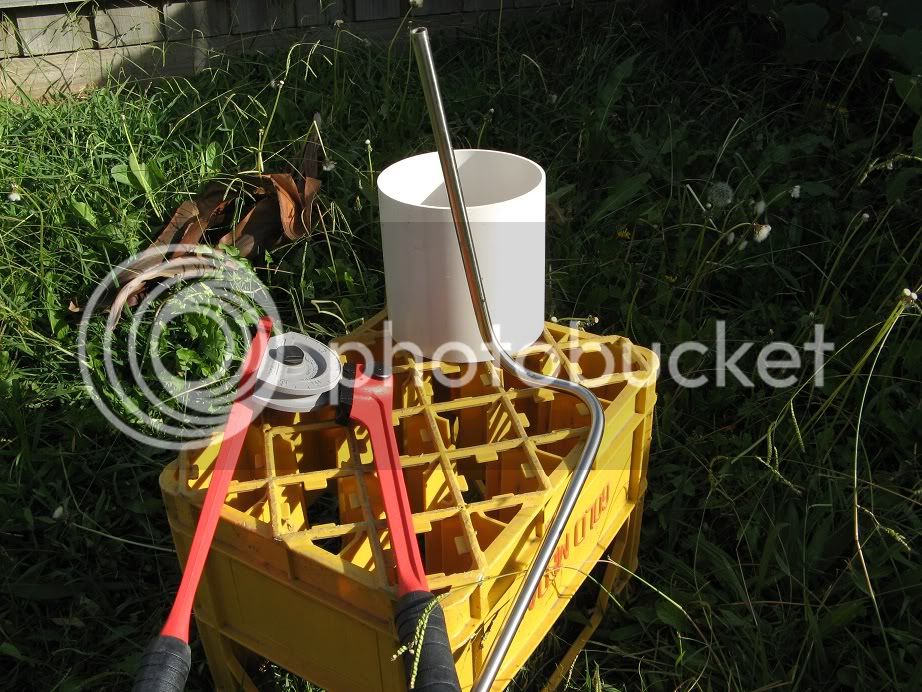
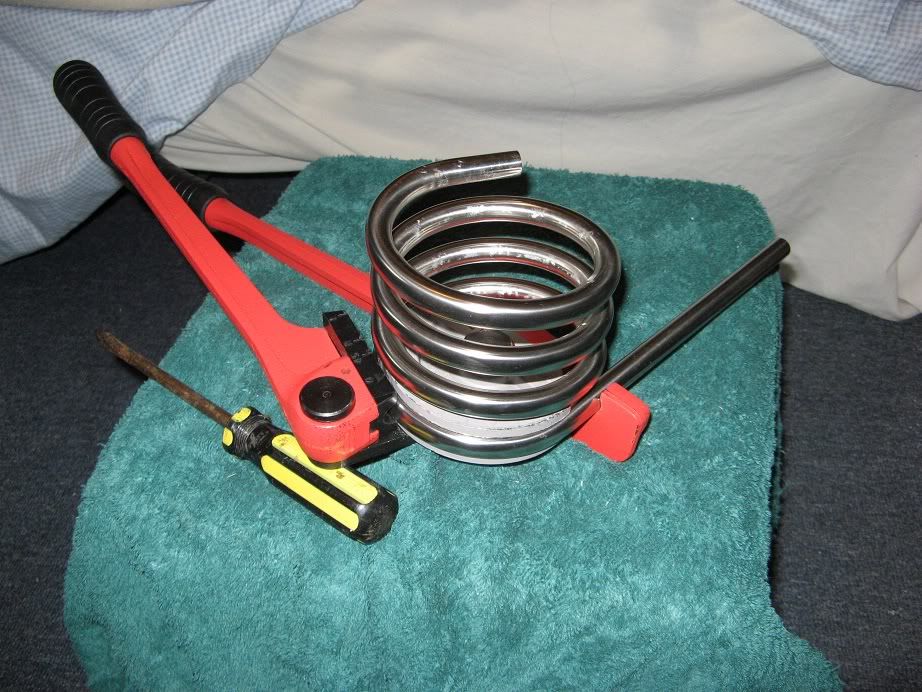
While it was possible (just) to manually bend the 1.2mm wall-thickness tube (with a pipe-bender borrowed from husky) it proved to be an absolute bitch to bend around anything (such as a 4kg CO2 bottle) to shape it into a reasonably small size:
herms_build2.jpg

... so don't let anyone tell you that it's easy enough to do. :)

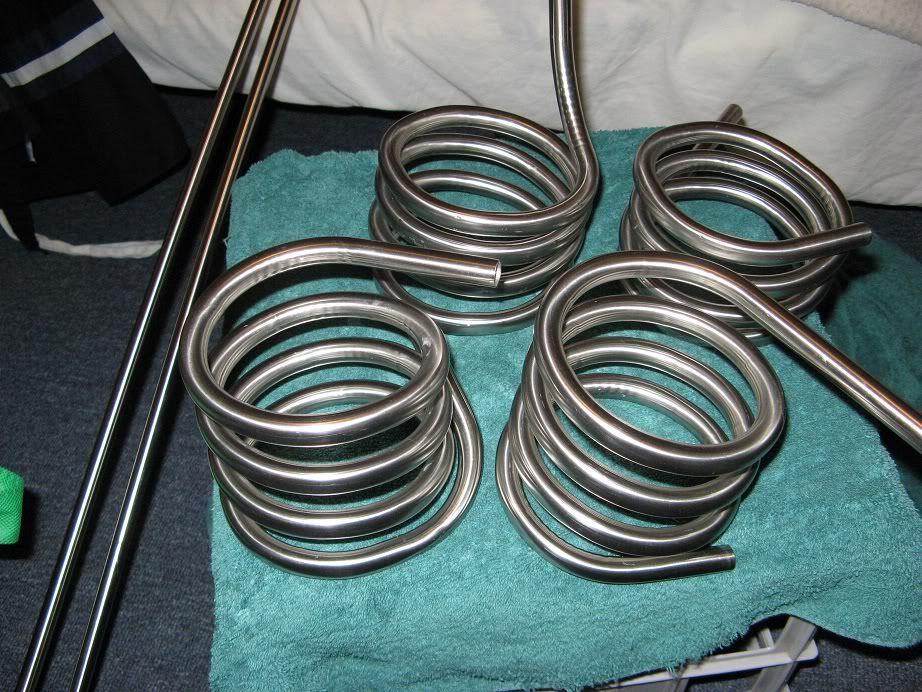
After bitching at Geordi on the 'phone they referred me to another stainless dealer, in Dandenong, who did had an abundance of 12mm 0.9mm wall-thickness stainless tubing in stock, unfortunately it only came in 1.2m lengths (which they were happy to sell at scrap-metal prices):
herms_build3.jpg


The thinner walled tube was much easier to bed and work, the obvious and only problem being that multiple lengths would be needed to get a long enough continuous length for adequate heat-exchange.
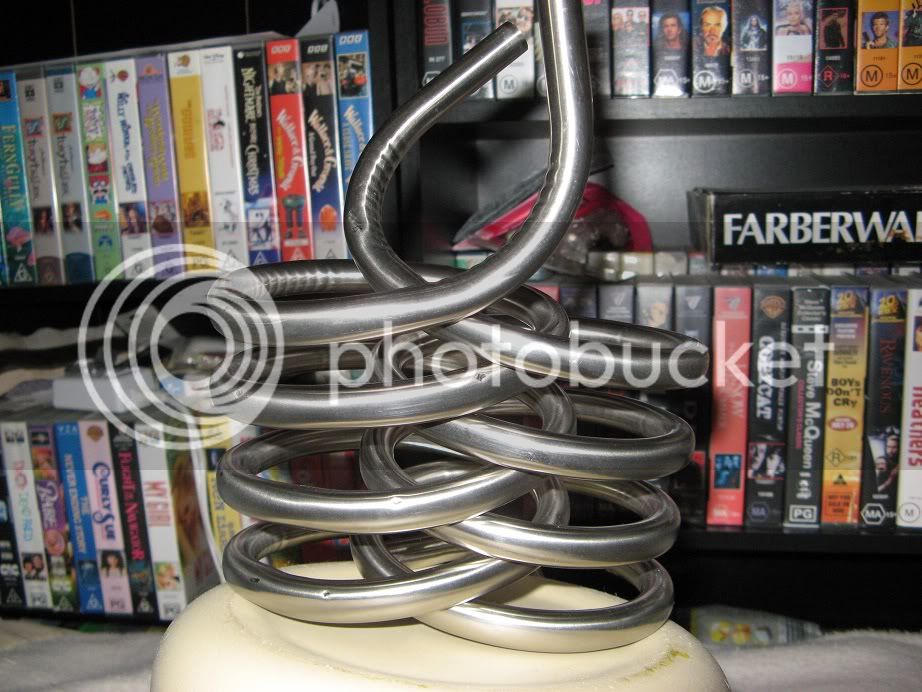
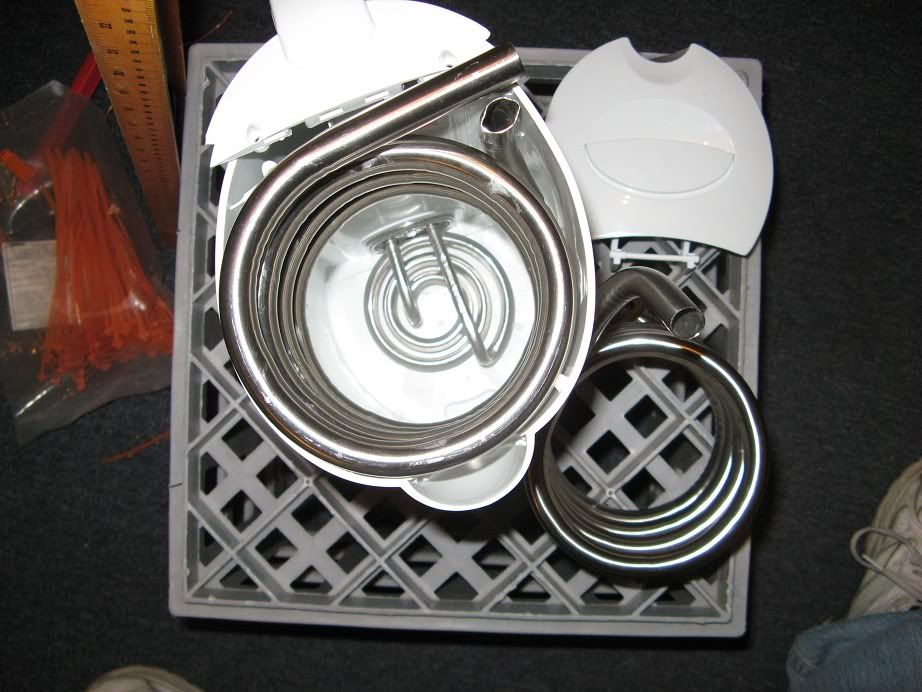
herms_build4.jpg

So I tried a few different ideas and concepts.
herms_build5.jpg


herms_build6.jpg


herms_build7.jpg

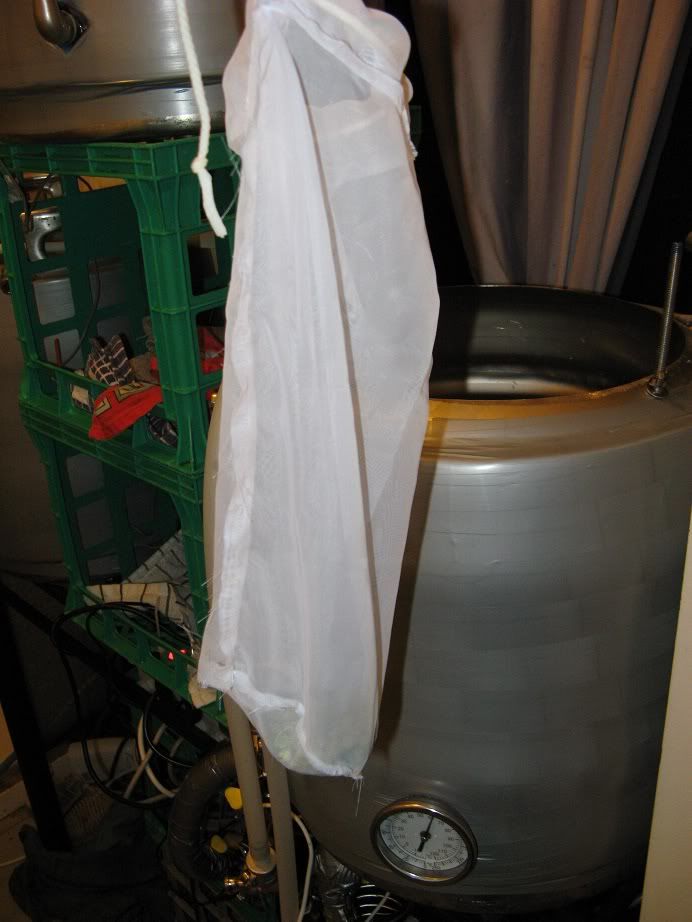
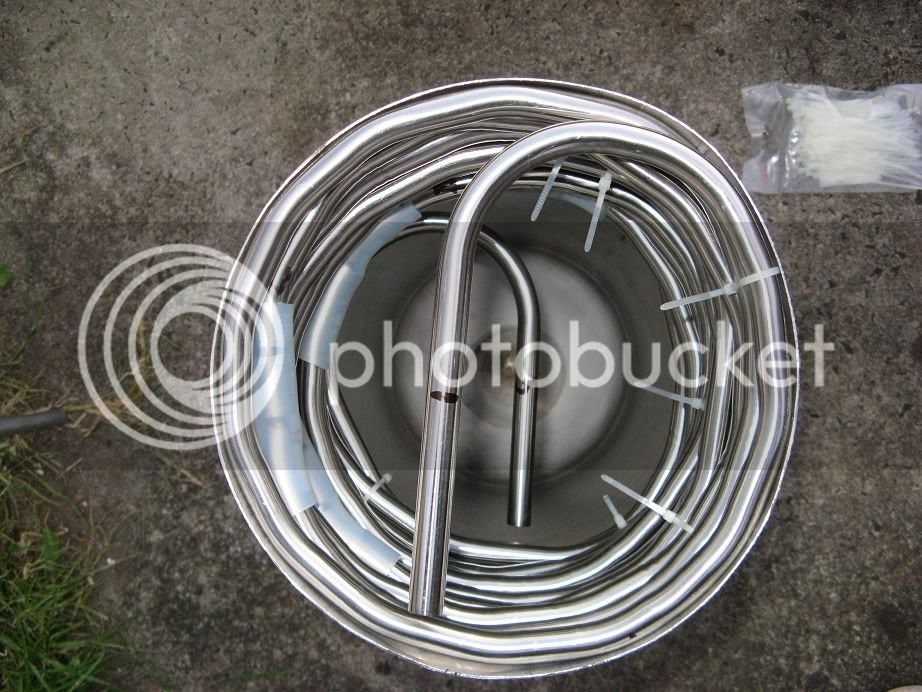
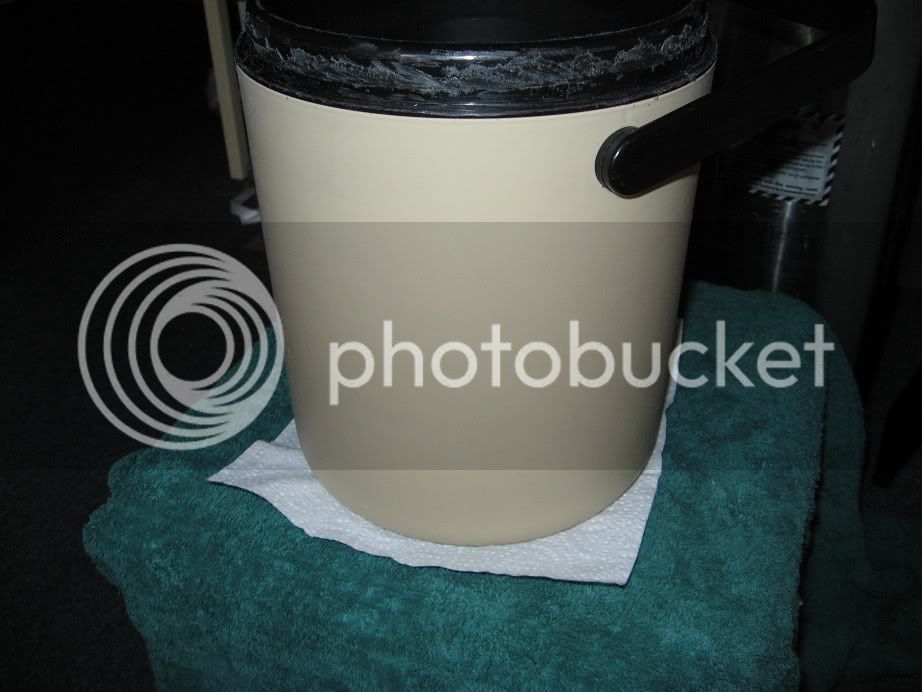
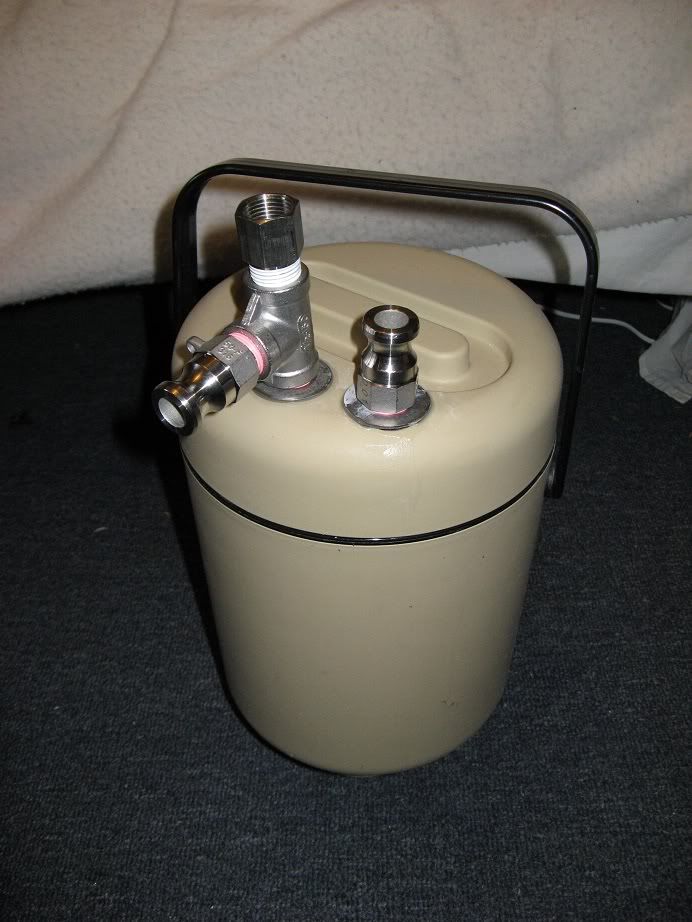
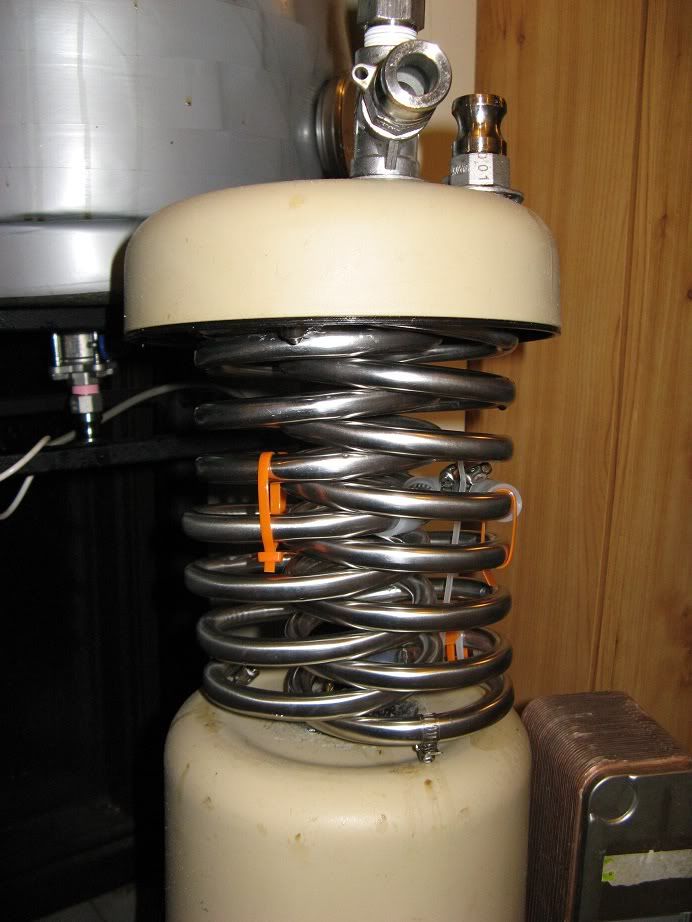
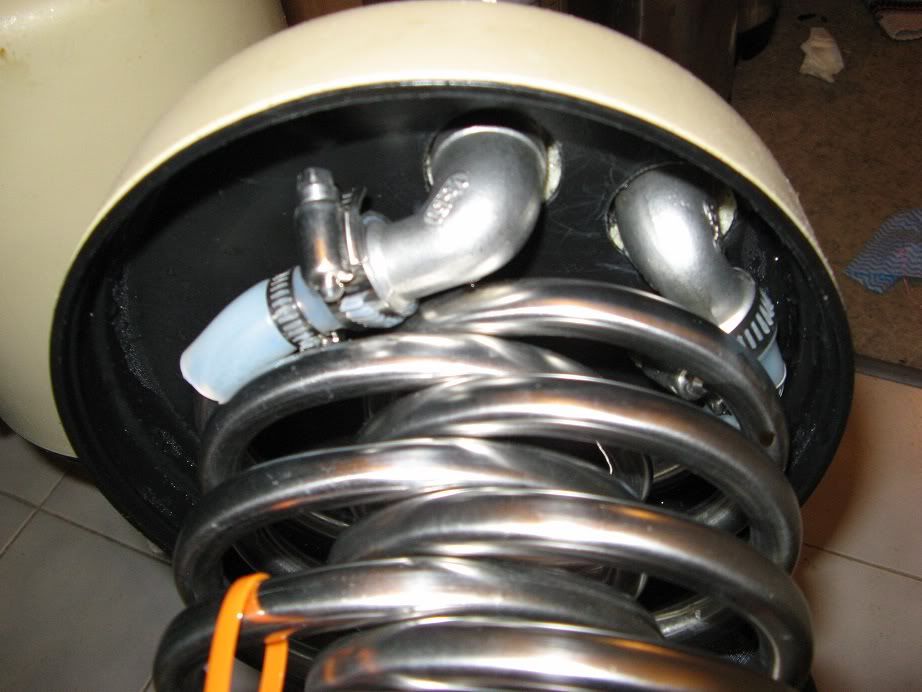
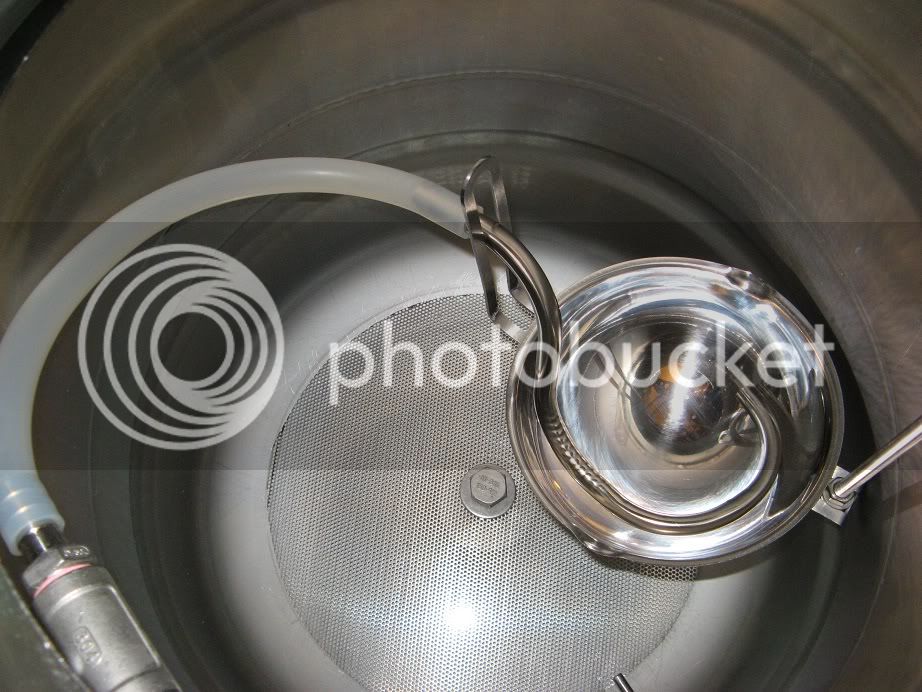
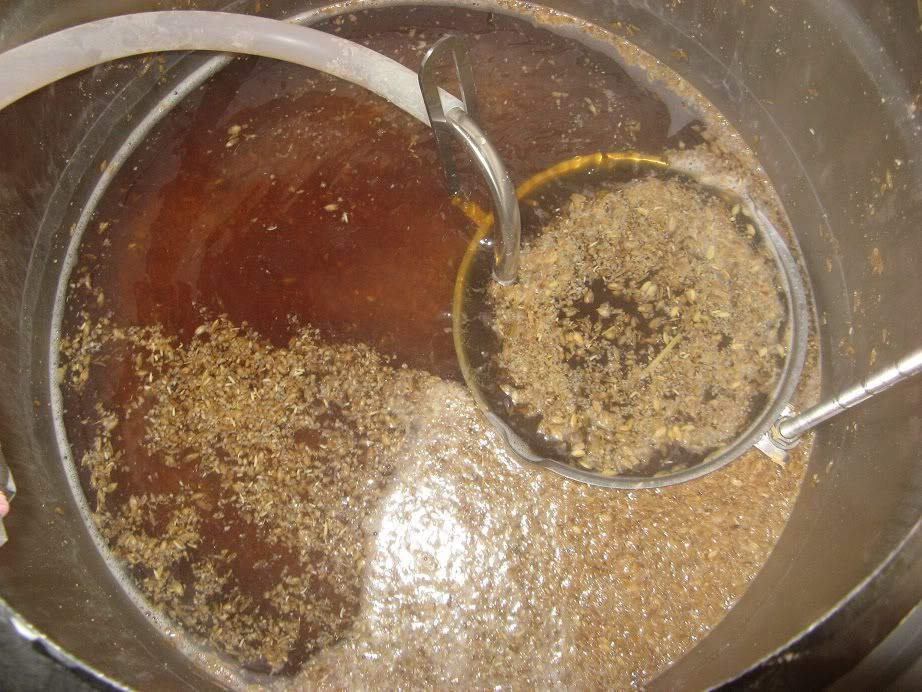
The coil-in-corny-keg is actually a good idea and should work well, the only issue being the relatively large volume of water that needs to be heated, resulting in a slower than optimal response time. It's possible I'll add a few fittings and use it (filled with ice-slurry) after the plate chiller to drop the wort 'instantly' out of the kettle down to lager-pitching temperatures - when the larger volume inside the cut-keg will actually be an advantage.

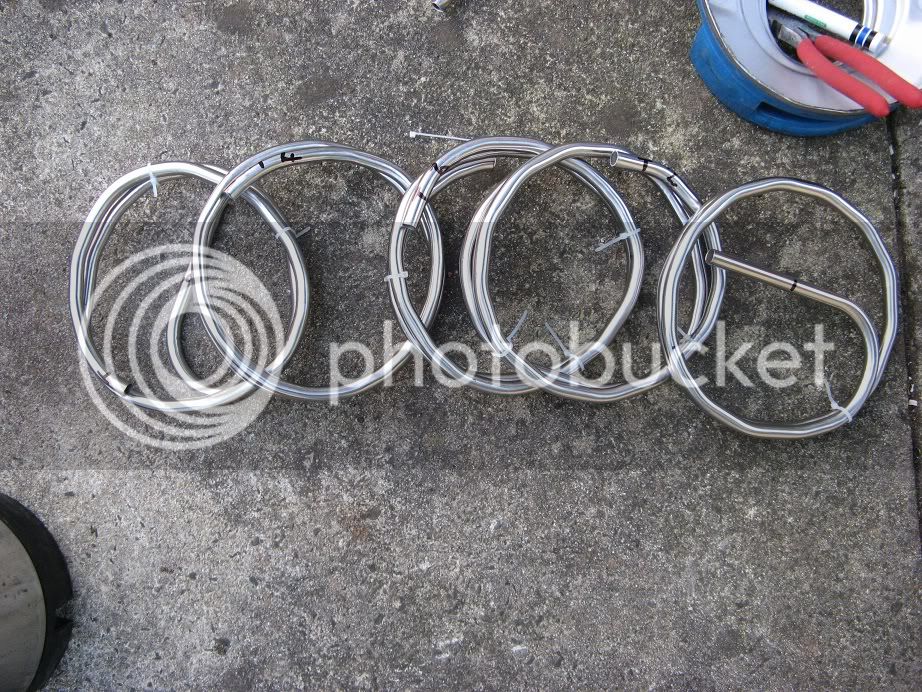
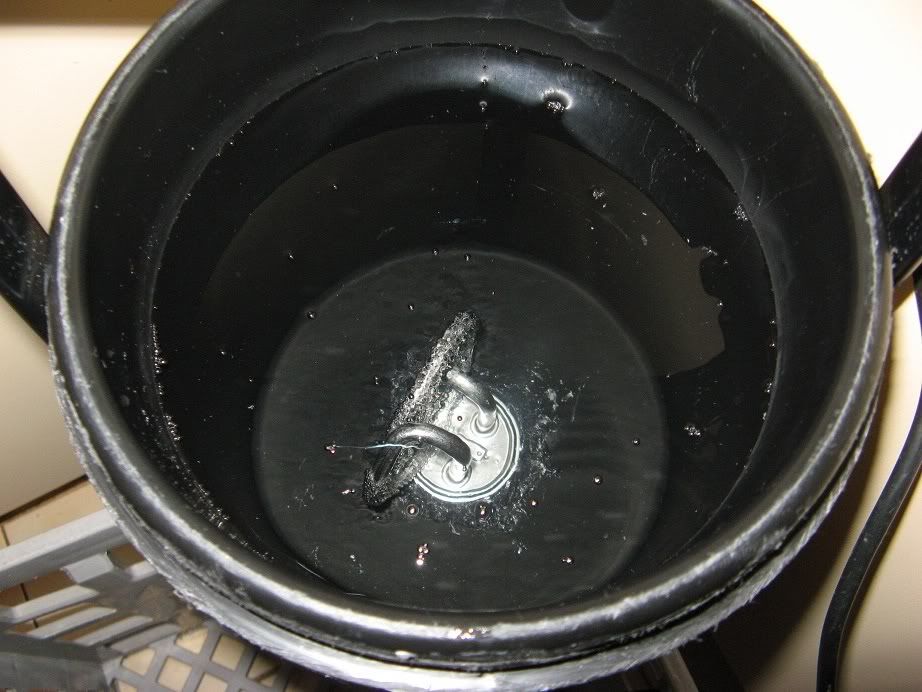
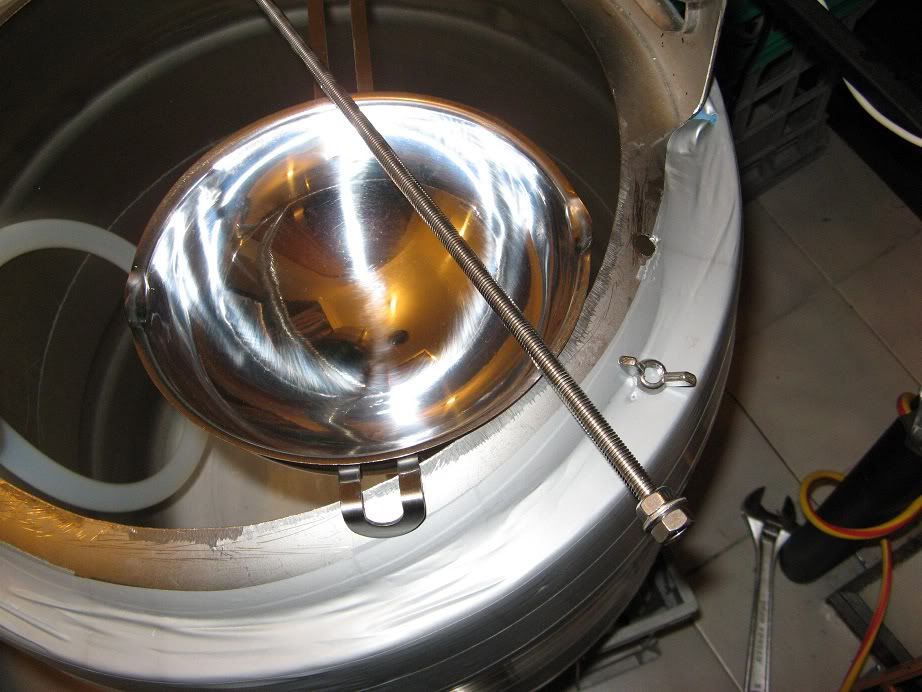
I was told it was impossible to manually bend stainless tube to fit inside a kettle, so I proved that theory wrong:
herms_build8.jpg

The problem being the inlet and outlet - since the coil was already as tight as it would go - it was difficult (but not impossible) to bend both ends up to the top which was the easiest design solution - so I concluded it was more effort than it was worth.

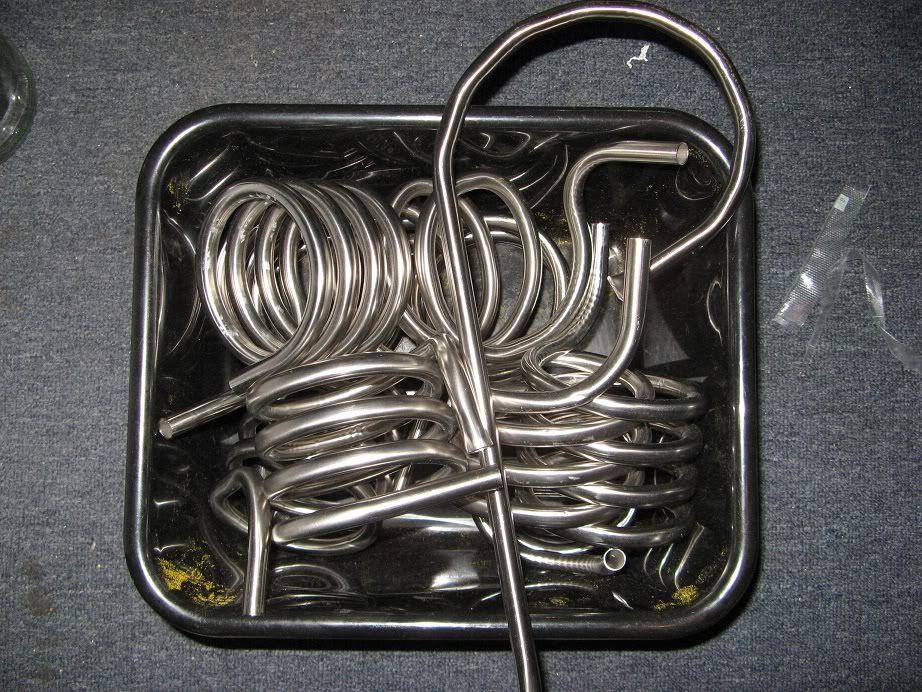
All that resulted in a HERMS design, but also a bit of scrap-coiled-stainless (the 6m Geordi-length is still somewhere in the backyard under the long-winter grass, I'll have to find it before mowing the lawn come spring):
herms_build9.jpg
 
Update #23 HERMS Build
Bla-bla blog rant

In the end the HERMS actually ended up being compact and fairly simple.

Four 1.2m lengths of 1/2 inch/12mm 0.9mm wall-thickness stainless pipe was bent into coils (two clockwise and two anticlockwise):
herms1.jpg


Op-Shop wine cooler for the housing:
herms2.jpg


BigW kettle-element installed in the bottom:
herms4.jpg

... with an abundance of silicon:
herms3.jpg


Also ground away the thread at the top of the cooler so that the lid would simply snap into place:
herms5.jpg

(Hint: Don't use an angle-grinder to 'grind' thick plastic, it melts and burns like all **** when you get it on yourself).

Only cordless kettles were available at BigW, KMart and Coles, but luckily the IEC-type power plug:
abodeplug2.jpg

.. plugs straight into the back of the 'cordless' part of the BigW Abode kettle's element socket:
abodeplug1.jpg
 
Completed the enclosure passes the boil-test:
herms6.jpg

and leak test (no surprise given the quantity of silicon used):
herms7.jpg


Installed with fittings (PID probe slides into in the thermowell):
herms8.jpg

highly technical HERMS mount (pending brewery stand build):
herms9.jpg


Double-helix/coil fits inside the cooler:
herms10.jpg

affixed to the lid:
herms11.jpg


According to the PID can raise the mash temperature by about 1 degree C per minute, which is what was aimed for.
However the little brown pump has a flow rate of about 3L per min, which is likely a little slow to get a fast response from the grain-bed temperature. Since one of the little brown pumps has decided to stop working - after being used twice - it's likely it will be replaced by a 'decent' home-brew pump some time in the semi-near-future.
herms12.jpg

Wort is filtered by the perforated stainless false bottom, drains out of the bottom of the mash-tun, into the pump, is pumped into the HERMS coil (PID temperature probe is mounted at the HERMS-coil outlet) and back into the top of the mash-tun. By filling the mash-tun (from the bottom) from the HLT via the pump and HERMS, the pump is primed and everything is up-to-temperature by the time the mash is stirred.

Total cost ended up being only $4 for the cooler, another $4 for the lengths of stainless tube, and $7 for the BigW kettle ... plus fittings ... and lots of trial-attempt-tube.
 
Update #24 Wort Return
Blog

The basics of the wort return are simply a stainless steel Ikea Stabil double-boiler inset and some stainless all-thread. By drilling a small hole in the top-lip of the keg, the wort return is held in place by the all-thread and the height adjusted with a wing-nut.
wort_return1.jpg

... however, it's taken a few batches to get 'right'.

Initially the silicon hose was run directly into the dish, but since the hose is slightly boyant it tended to float and didn't want to stay in place:
wort_return2.jpg


A small piece of stainless tube pushed into the end helped a little:
wort_return3.jpg


But if you've been reading all this thread (not sure anyone has!) you'll have noticed that I have an abundance of coiled 12mm (1/2 inch) stainless tube, and so the solution was obvious:
wort_return4.jpg

And after a 75min recirculated mash (even with 40% wheat) the wort return works well and the wort is nice and clear:
wort_return5.jpg


This video was taken just after mash-in, grain bill is 50% Pale Malt, 40% Wheat malt, 7% Munich Malt and 3% Crystal Malt (and some Rice Hulls):
http://youtu.be/zDU8t2917Iw
(I still don't know how to embed them here)

75mins later at mash-out:
http://youtu.be/ZVYtMfKgOtU

For small/single batches, the 1L volume is likely a little large and the return-dish is a little too deep, so I'll find a cheap shallow stainless bowl (discount store), drill a hole in the lip of the bowl and use that (instead of the double-boiler-insert) when mashing small grain-bills.
 
Nice work as always wolfy! With all that spare ss tube, have you considered fully hard-plumbing your rig?
 
Nice work as always wolfy! With all that spare ss tube, have you considered fully hard-plumbing your rig?
It's a consideration, especially with a proper brew-stand, however even the generic 'Double ferrule Tube Fitting' required to attach the stainless tube are quite expensive (I think).
 
For small/single batches, the 1L volume is likely a little large and the return-dish is a little too deep, so I'll find a cheap shallow stainless bowl (discount store), drill a hole in the lip of the bowl and use that (instead of the double-boiler-insert) when mashing small grain-bills.

I've got a set of stainless steel measuring cups, like these:
roy-mcs-set.jpg


I reckon one of these could be easily jury-rigged into replacing your bowl for the return dish, losing you no more than 1/4 to 1 cup of wort.
 
I've got a set of stainless steel measuring cups, like these:
roy-mcs-set.jpg


I reckon one of these could be easily jury-rigged into replacing your bowl for the return dish, losing you no more than 1/4 to 1 cup of wort.
Yep, something like that would work well, I'll have to check for those in the cheapie-shops too. :)

However, since I fly-sparge the container gets filled with water from the HLT so there is no loss of efficiency/wort, it's just that a shallower container would sit above the grain-bed more easily.
 
+1. I like the Wing Nut/Bolt through the Keg solution to adjusting the height.

One shortcoming of the Beerbelly ones is the height adjustment between main mash and sparge. The BB one rests on two O Rings, so you have to get your hand underneath and roll the O Rings on the SS tube, a hassle when full of hot sparge water/grain. I prefer the Wing Nut to my Marigolds.

21nd+vd4a7L._SL500_AA300_.jpg
 
Update #25 Kettle Volume Markings & PID Auto Tune
Blog stuff.

In order to know how much wort is drained from the mash tun into the kettle, I added volume markings were added to the inside of the kettle.
The $3 Ebay-supplied 'Etching/Engraving Pen':
kettlevolume1.jpg


... did a good job to engrave the volume markings on the inside of the keggle:
kettlevolume2.jpg


The first few times used the PID was not very accurate, over-shooting - and then holding the temperature - 1 or 2 degrees above the set value. The instructions for auto-tuning the PID (as provided by SESTOS) were not very helpful:
"First operate the Auto adjustment, press AT key 2 second, SV display blink AT, finally into PID control mode. Press the AT key 2 second to abandon Auto adjustment."

Luckily the functionally of the uinit is so similar to the Auber PID that their detailed and easy to understand instructions can be used.
What those instructions made clear was:
By default auto-tune is not enabled.
To enable the auto-tune function one must enter the settings-menu and change the 'CtrL' setting (called 'At' by Auber) from 3 to 2.
Once this is done the PID will enter auto-tune mode where it will configure itself for the system.

Now that the auto-tune has been run, the PID holds the mash-temperature to within about 0.2 deg C of the set value - a much better result:
PID.jpg
 
Update #26, Temperature calibration, pump and hose insulation

I picked up a couple of mercury thermometers at Science Supplies so that I could calibrate the various thermometers and temperature probes through the brewery.
calibration.jpg

As it turned out the PID temperature probe was reading about 2degC above the actual temperature, the mash-tun's dial temperature probe was close enough to be accurate, and the TempMate and cheap digitial thermometers were within about 0.5degC at most temperatures measured.

Having fixed insulation on the silicon hoses was a nuisance, making them less flexible and harder to clean. These little velcro straps (usually used to tie computer/electrical cables) work well to hold the hose insulation in place, while also allowing it to be easily removed when required.
insulationtape.jpg


Cheap-little-brown-solar-pump decided to stop working mid-brew, again. This time I disassembled it and cleaned it well inside - likely something that should be done every brew - given the amount of crud inside especially inside and around the shaft and housing.
dirtypump.jpg

Luckily it worked again - either because it was cleaned or simply because it was allowed to cool down for 30 mins - because the other one doesn't work now (after just a couple of brews with it). While they are cheap, I'm starting to think they are not worth the trouble, and will need to upgrade to a more substantial and dedicated brewing pump soon.
 

Latest posts

Back
Top