My New Brewery Build (pics)

Australia & New Zealand Homebrewing Forum

Help Support Australia & New Zealand Homebrewing Forum:

This site may earn a commission from merchant affiliate links, including eBay, Amazon, and others.
I dont like fixed pumps for the reason I like to move my system around as it doesn't have a fixed place.
I also like to turn them up to drain after the cleaning. One pump does all on my 3V system.
Nev
 
Gryphon Brewing said:
I dont like fixed pumps for the reason I like to move my system around as it doesn't have a fixed place.
I also like to turn them up to drain after the cleaning. One pump does all on my 3V system.
Nev
That's a good idea about turning them on the end to drain I like that.
The HERMS system I have in place at the moment thats the HERMS coin in the HLT that requires two pump to keep the HLT water consistent. so 1 recirculating the HLT water and 1 recirculating WORT. In future I'll be installing a standalone HERM or RIMS module which will eliminate the need for this.

Also just got some cheap $65 green pumps how can you NOT get two :) probably upgrade to either march or test out those chugger pumps.

Nev what's happened to your SS pumps? you stocking chugger now?

-Gav
 
I had some old jarrah wood lying around the place mate. Just made a stand up and bolted both the pumps to that. It just sits on the bottom shelf of my brew rig. The weight of the wood and the pumps make sure it doesn't move. At the end of brew day I just unplug the pumps and carry the wooden stand to the sink to flush and clean the pumps. Very basic but works a treat.
 
gava said:
That's a good idea about turning them on the end to drain I like that.
The HERMS system I have in place at the moment thats the HERMS coin in the HLT that requires two pump to keep the HLT water consistent. so 1 recirculating the HLT water and 1 recirculating WORT. In future I'll be installing a standalone HERM or RIMS module which will eliminate the need for this.

Also just got some cheap $65 green pumps how can you NOT get two :) probably upgrade to either march or test out those chugger pumps.

Nev what's happened to your SS pumps? you stocking chugger now?

-Gav
We stock the Chugger now and will have the SS pump at some time depending on supplier reliability.
With the $AUD dropping as it has, importing our SS pumps is not as competitive as it was.
Nev
 
Gryphon Brewing said:
We stock the Chugger now and will have the SS pump at some time depending on supplier reliability.
With the $AUD dropping as it has, importing our SS pumps is not as competitive as it was.
Nev
Yeah I was looking at the same pumps awhile ago also and thought the same thing.

-gav
 
Finally found some time on the weekend to mount my panel and get a wet test done.

My budget has dried up so I had to relax on some features, Like nice looking labels for one.. just got a label maker and did some temp ones so I know what I'm switching.

I've mounted my pumps and chiller with zip ties just to see how I like the position they will be mounted better once I'm happy with placement , I'll knock out a few beers before then I'd think.

I need to paint my wood I used to mount my control panel , I was in too much of a hurry to test to wait for paint to dry!!

The wet test went well, I calibrated the PID controllers, setup the correct alarm settings etc..

Was very happy with the 4800watt elements much better than my old 2200watt KK i'm use to.


wettest1.jpg


wettest2.jpg


Due to the pot width Limitation and me wanting a Low Density 4800 watt element which connects to a 2" tri-clover fitting I had to get one made up from wonderful Rob at romar elements (http://www.romarelements.com.au) great bloke to deal with.
In the end he made a 4800watt element with a dual 2200 watt LD combination.. And it works like a charm.

I think all up length is about 37cm~

element-triclover.jpg


Cheers
Gav
 
I could state at that control panel for hours mate. I did ask the sparkies at work about those plugs. No dice. Best I get is 15% off at Blackwood and 45% off at some other place called Atom. No good for Victorians. Keep those pics coming please. Living that build.
 
Cheers mate, I think I'm going to just get some clipsal connections when I get some $$ back.. At the moment they're hardwired which isn't to much of a worry but I'd love to be able to take the pots off. I'm still a touch to short to get my finger tips down the bottom to clean them up (Yeah im a short ass)

I've very happy with the panel, Impress that the lights have lined up and don't look like some are higher than others, the PIDS are off a touch but good enough..

Those cheap green pumps function pretty well, I was very impressed and surprised.. lets see how long they stand up to the test though.

I have a new LOVE/HATE relationship with tri-clover fittings.. LOVE the cleaning side of them and sanitation of no threads, HATE trying to take one off the Boil Kettle at the end of the boil without gloves.. think I'll learn to live with that though.

Waiting on some new tr-clover fittings so I can use the 2nd pump and my Chiller so i might find what grain I still have and make up a vienna ale I think.

Cheers
Gav
 
With the early starts getting up with the kids I've been able to nut out a few things and get my rig to a working state.
I've worked out all the info I need before a test brew so hopefully will get a brew on to it Friday night.

Lastnight I finished off the hard plumbing of the hot water IN for the HLT and the chiller water from my rain tank.


The plumbing is a little messy since I had to make it work with left over parts from previous builds (Apart from the electric ball valves got them at a good price from Nev at Gryphon Brewing Cheers again mate)
I've used cam-locks on the ball valves on both sides for quick disconnection from the wall if I need fixing them and on the other side for the hoses. this was helpful because I had some issues with sealing the threads I used way more tape than I usually do.
IMG_2129.JPG


Here is the coaxial counter flow chiller with the awesome zip tie mounting technique, Once I'm happy with placement I'll fix correctly. (I say that but we all know whats going to happen) :)
I've got two different type of cam-lock fittings on the WATER IN and WATER OUT so if i disconnect the hoses I know quickly which one goes where, counter flow chillers don't work as well with the WATER IN and WORT IN going in the same end.
IMG_2130.JPG


So my rig is now up to a working state so it's beer time!!

Although lastnight laying in bed I figured out a way to use my other two 10amp plugs in the wall so I can build a (40amp) back to back brewing version with little amount of changing so YES i'm already thinking of upgrading :)
Since Rob made my awesome element with 2 2200watt LD elements for the boil kettle I'm thinking of building a control breakout box with two 10amp inputs with SSR and Realy's inside. From this I'll change my 20amp out cable in my control panel to work directly from my PID's 12v OUT, this will run to my breakout box which will switch the SSR on. Of course I'll need a voltage down the line to switch my coil on the relay which I'll work out later on.

-Gav
 
Great build mate! How efficient does your CFC work? Have you had time to test it out yet?
 
_WALLACE_ said:
Great build mate! How efficient does your CFC work? Have you had time to test it out yet?
Yes I have, I have tested just with water 95c~ --> 30c~... was using my tank water on a 45c day so I didn't keep the numbers but it worked great (once i had the hose the right way hence putting those different cam locks on it)
I'll be doing a brew tomorrow night hopefully so I'll keep some better stats...

Just found the numbers on my dropbox.. here they are..
I'll adjust later, theses were taken on that week it was f'ing hot..

EDIT: Probe placement was in the front of the pot, water used was about 30lts

temp lid off
90 0.00 mins
85 0.80 mins
80 1.78 mins
75 2.22 mins
70 3.42 mins
65 4.03 mins
60 5.35 mins
55 6.87 mins
50 8.68 mins
45 11.73 mins
40 15.92 mins
35 25.22 mins
31 36.90 mins
edit:Formatting.
 
Just finished my first brew on the rig, went ok... didn't account for MLT dead space correctly which threw off my mashing and missed some points but was still happy..

the following are the numbers for the heat exchange

LID : ON
Wort : 23lt
Tap Full On..

0 mins 95.6 c
1 mins 89.2 c
2 mins 77.6 c
3 mins 67.9 c
4 mins 60.1 c
5 mins 53.7 c
6 mins 48.5 c
7 mins 44.2 c
8 mins 40.6 c
9 mins 37.5 c
10 mins 35 c
11 mins 32.8 c
12 mins 31 c

Got bored of it after 12mins because it started to go slower so i went and played TMNT on the arcade machine with my son.
came back at 30mins and it was 29c don't know the tank water temp which is annoying sorry.

Will post some pictures of the brew day later.

-Gav
 
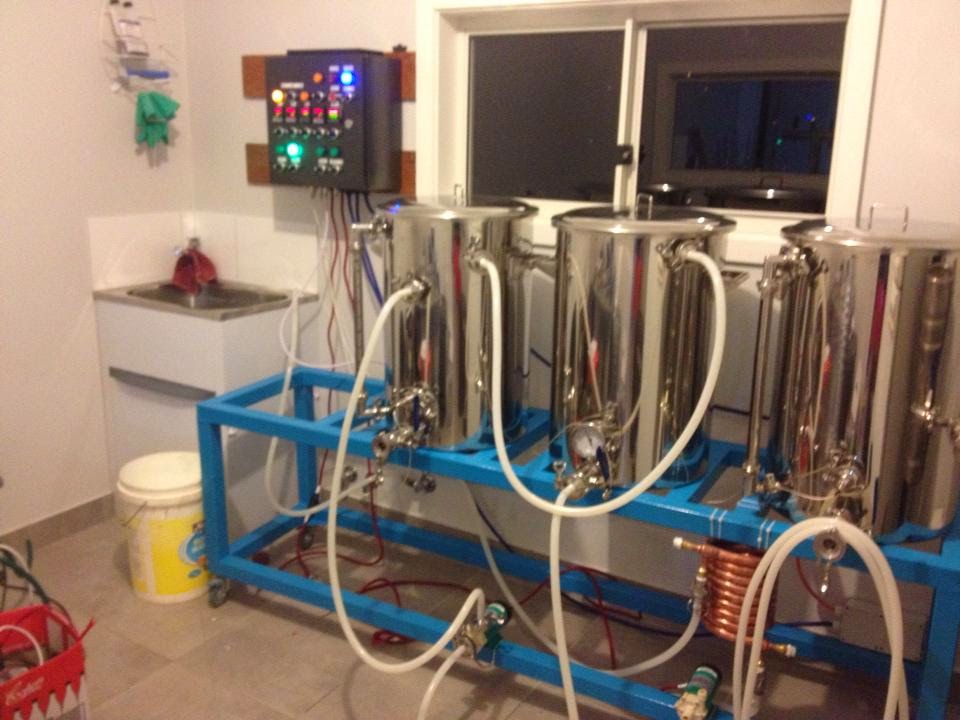
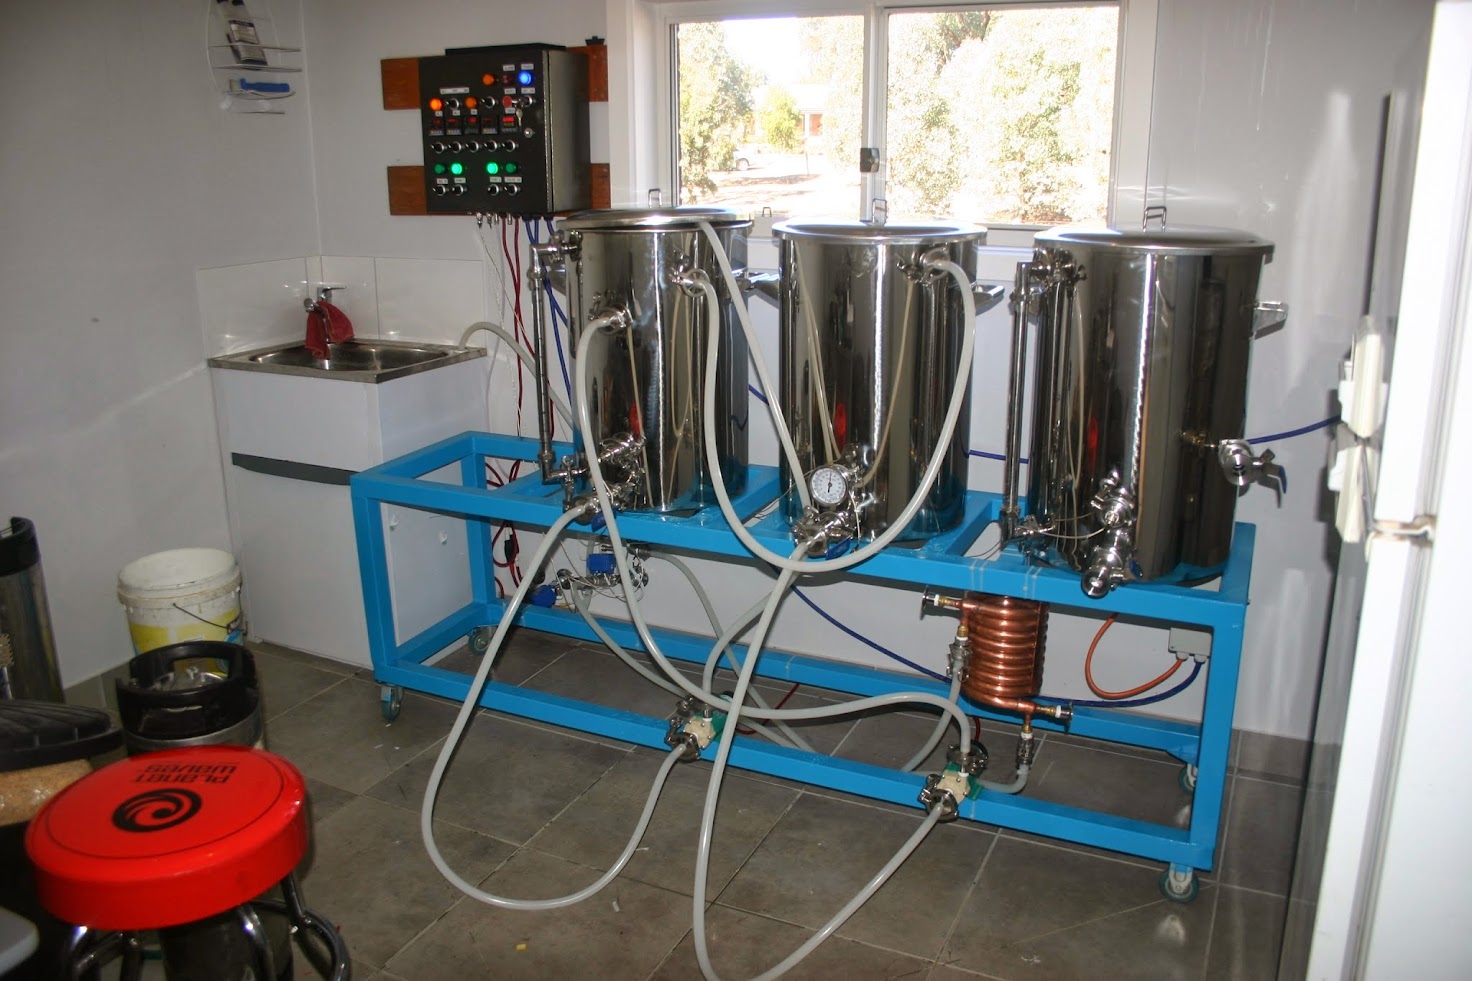
First brew of the rig...

Configured up my equipment within beersmith and knocked up a American Brown Ale Recipe

tyle : American Brown Ale
batch size : 23lt
Ingredients:
------------
Amount Item Type % or IBU
4.80 kg Vienna Malt (3.5 SRM) Grain 92.31 %
0.25 kg Chocolate Malt (350.0 SRM) Grain 4.81 %
0.15 kg Carapils (Weyermann) (2.0 SRM) Grain 2.88 %
30.00 gm Amarillo [7.80 %] (60 min) Hops 25.3 IBU
20.00 gm Amarillo [7.80 %] (25 min) Hops 11.7 IBU
15.00 gm Amarillo [7.80 %] (5 min) Hops 2.5 IBU
1 Pkgs SafAle American Ale (DCL Yeast ‪#‎US‬-05(56))Yeast-Ale

60min MASH 67.8 with a mash out
60min boil
10~days fermenter at 20c (maybe 18c)

The Crush.
In all my excitement I forgot to build a mount for my grain mill so i had to hold it over a bucket and hand mill.. This proved to be quiet hard but got there in the end.
The grain mill worked great and had a nice crush, will be a lot better with a mount and my mill motor connected up again.

Pre-heat
Put in enough liquid to cover the HERMS coil and got up to temperature, Once reached I dumped enough out to the MLT and refilled my HLT back over the HERMS started to push the MLT through the HLT to get up to temp.
Once up to temp i dumped in the grain and stirred,this went well and I started my mash.
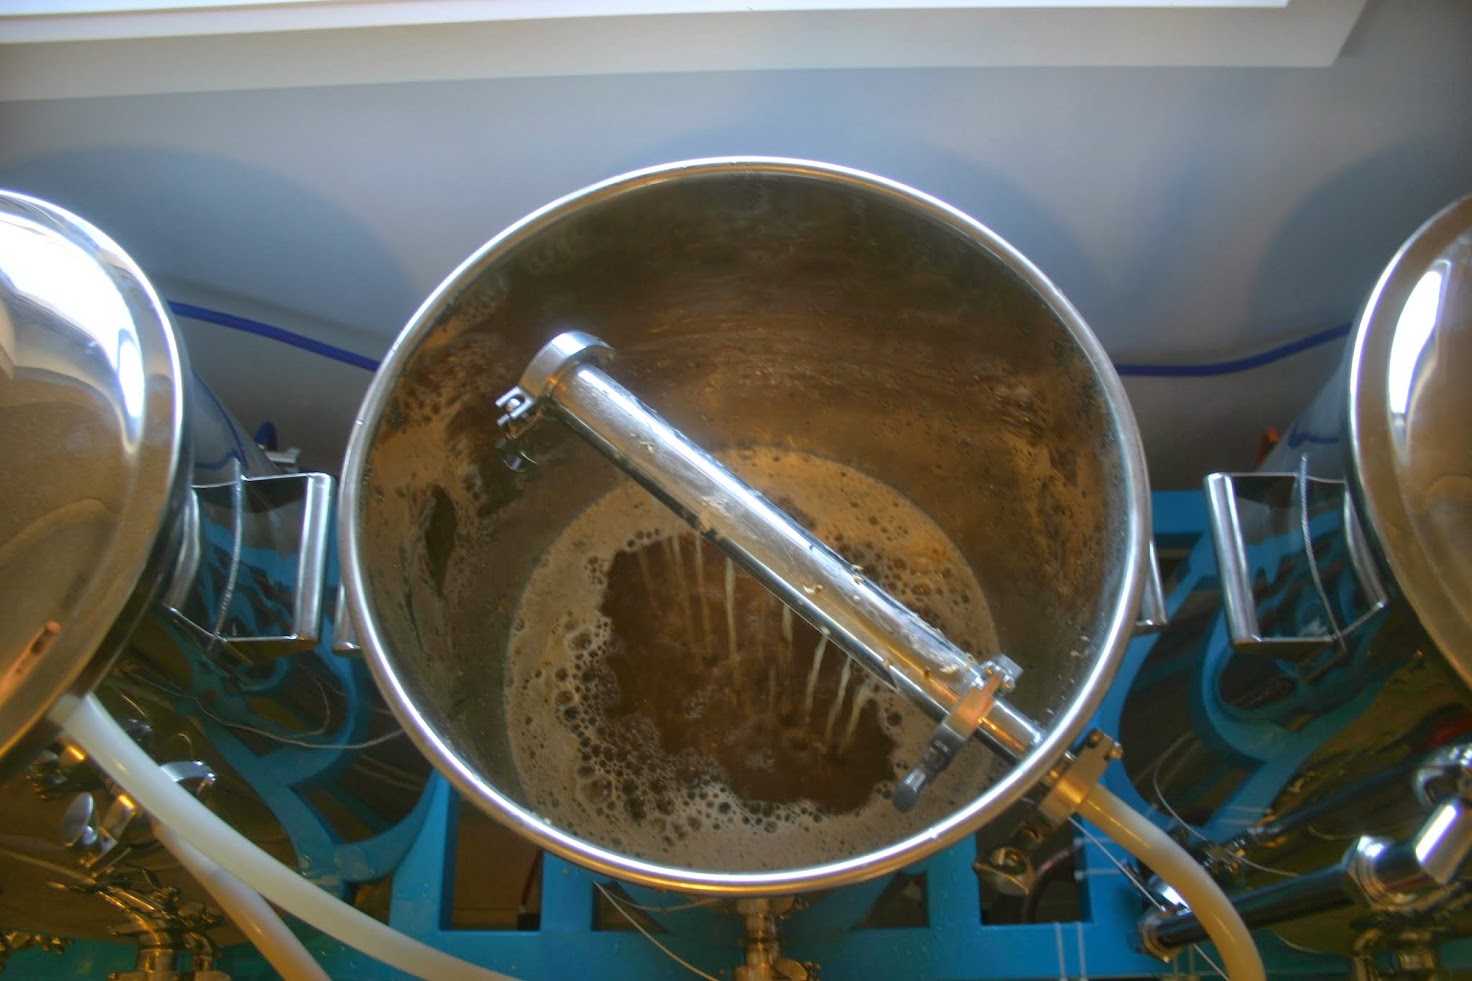
IMG_9655.JPG


Mashing
Pumps worked well, 1 pushing the hlt water around so it keeps the temperature constant and the other pushing the wort through the HERMS coil from the MLT. At this point I notice the temp probes not showing the same thing, I then remembered i didn't calibrate ANY of my probes and pretty much thought this beer isn't going to work to well, didn't mind since it was more about working the rig out.

IMG_9666.JPG


Mashout
Did a mashout and allowed 15mins for the mash to get to mashout temp (75c) the HERMS functioned beautiful once temp reached I did a 10min mash-out. the auber instruments timer worked great.

Fly-Sparging
Since I've never had a system setup for fly-sparing I've never tried it before, After doing my first one I thought "Why does't everyone do this!?" pumps on, water matched speed into the kettle and just turn it off once you get to your pre-boil level.. great!
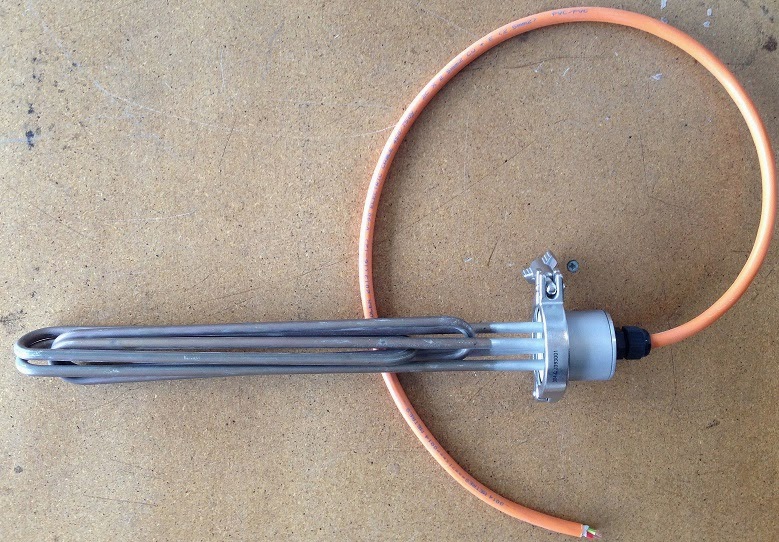
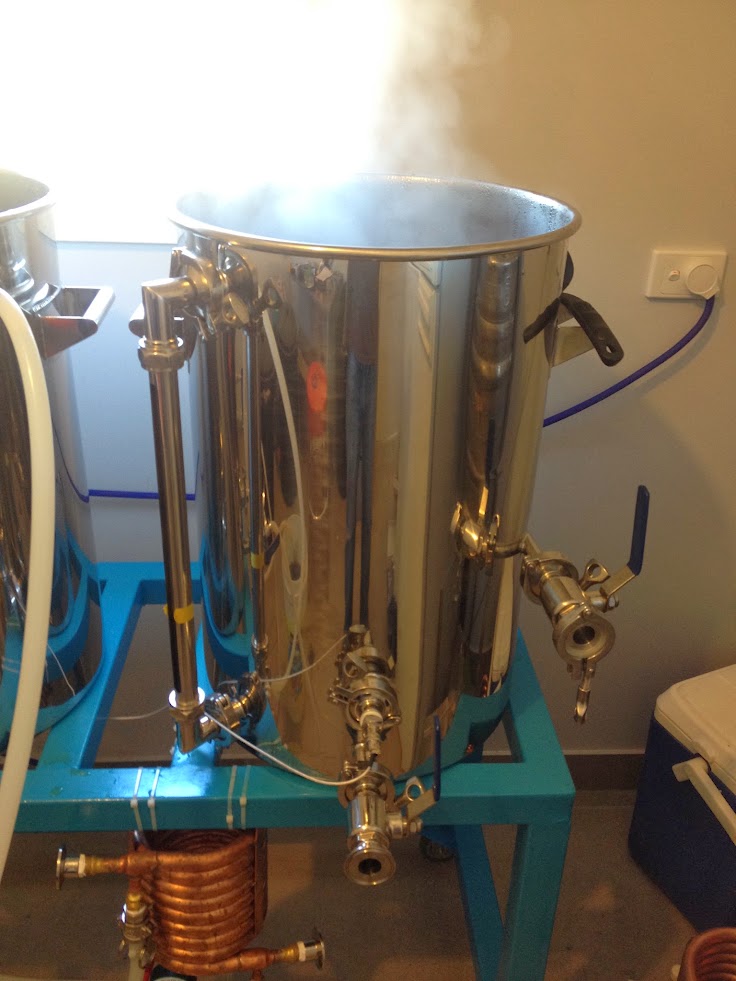
Boiling
While I was sparging and after the wort is over the element I turned on the BK element (4800watt) This got the wort up to boiling within about 15minutes which was a lot better than my last pot. Since it was only 27lt in the pot the 4800 element had a very aggressive boil so I had to set my PID to 97% since helped. The whirlpool return port was fantastic, previous pot I had to dump it over the lid for the return, with the return port I could put the lid on.
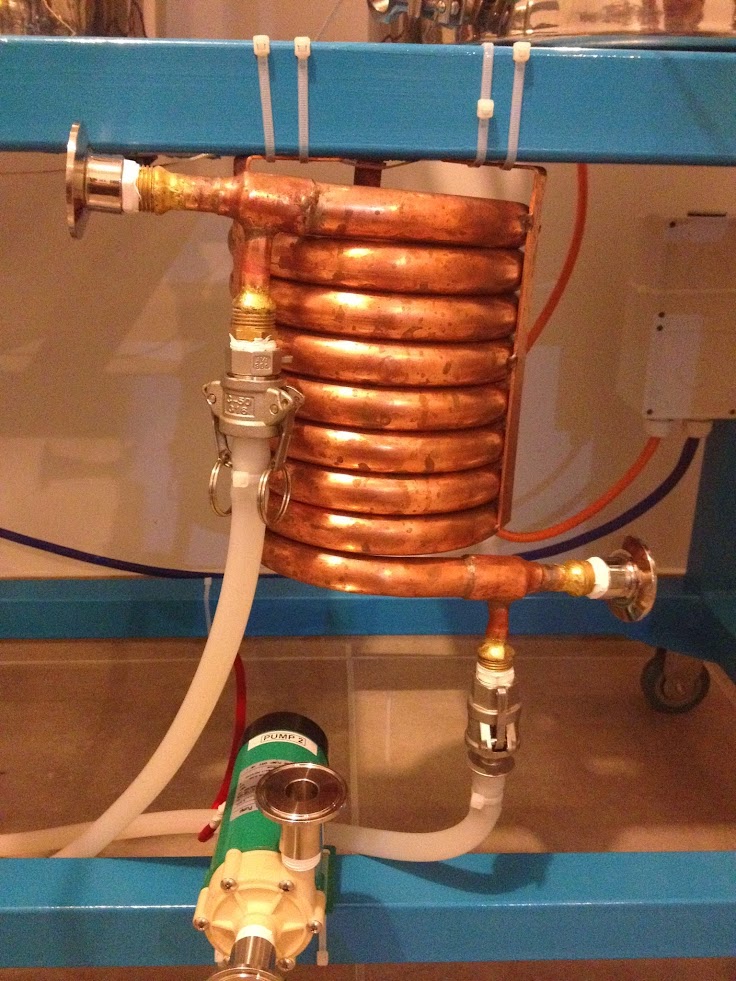
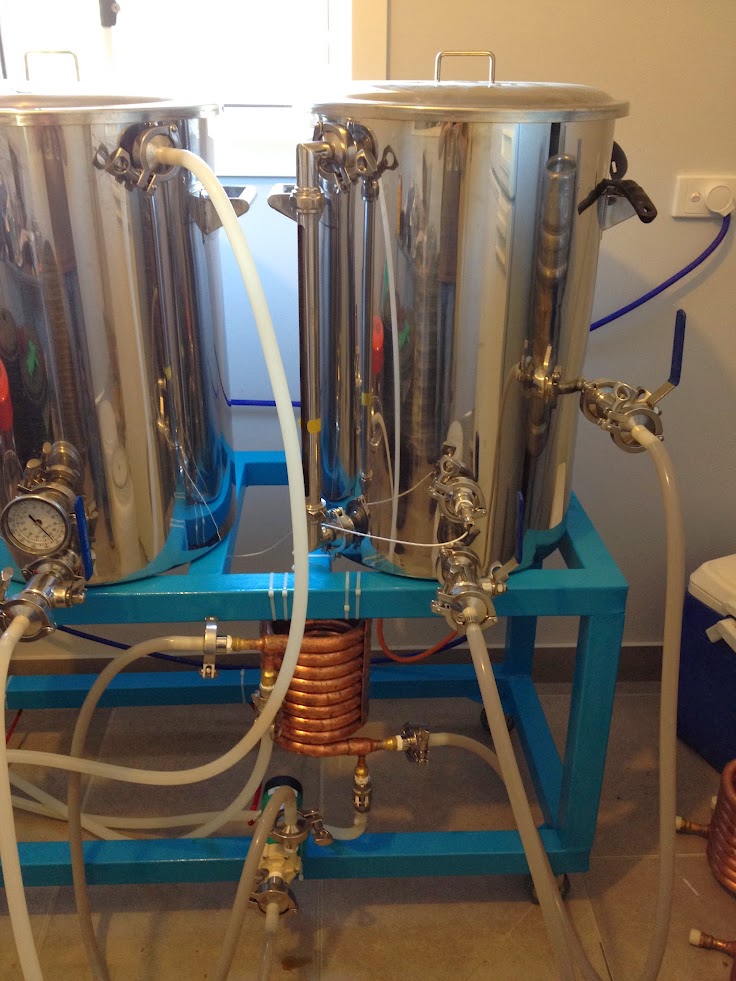
IMG_2147.JPG


Chilling
I've hard plumbed my chiller into my tank and all i had to do is turn the switch on the control panel which was awesome! no moving hoses, no connecting anything was bliss.. The chiller (as you can see above) worked great! since my tank water isn't really cold it slowed down a-lot down to the top 20's but I think if I had a pre-chiller or from mains it could be quicker but it was quick enough.
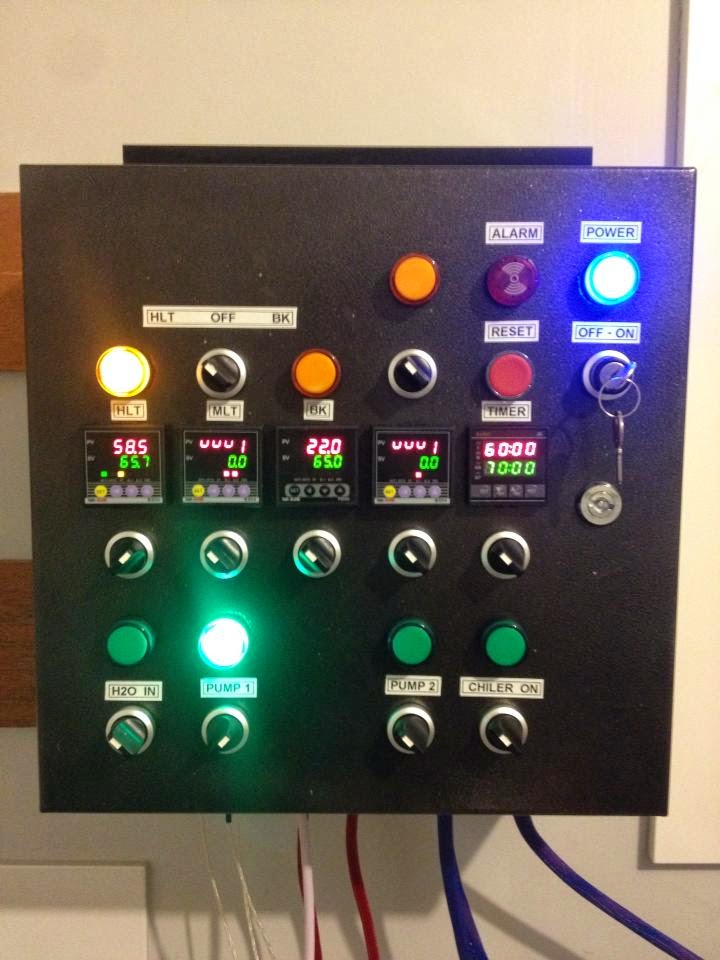
IMG_2148.JPG


Control Panel
The "the electric brewery' clone control panel worked great! everything was in a logical place, I tried to keep the switch in the same type of location as my rig.. i.e. first switch down the bottom in "hot water in" because the port in the wall is on the far left of the brewery.. then Pump 1, Pump 2 and then Chiller.. So when I look at the rig I know where it should be on the control panel.. same goes with the elements.. Works in my mind anyway :)
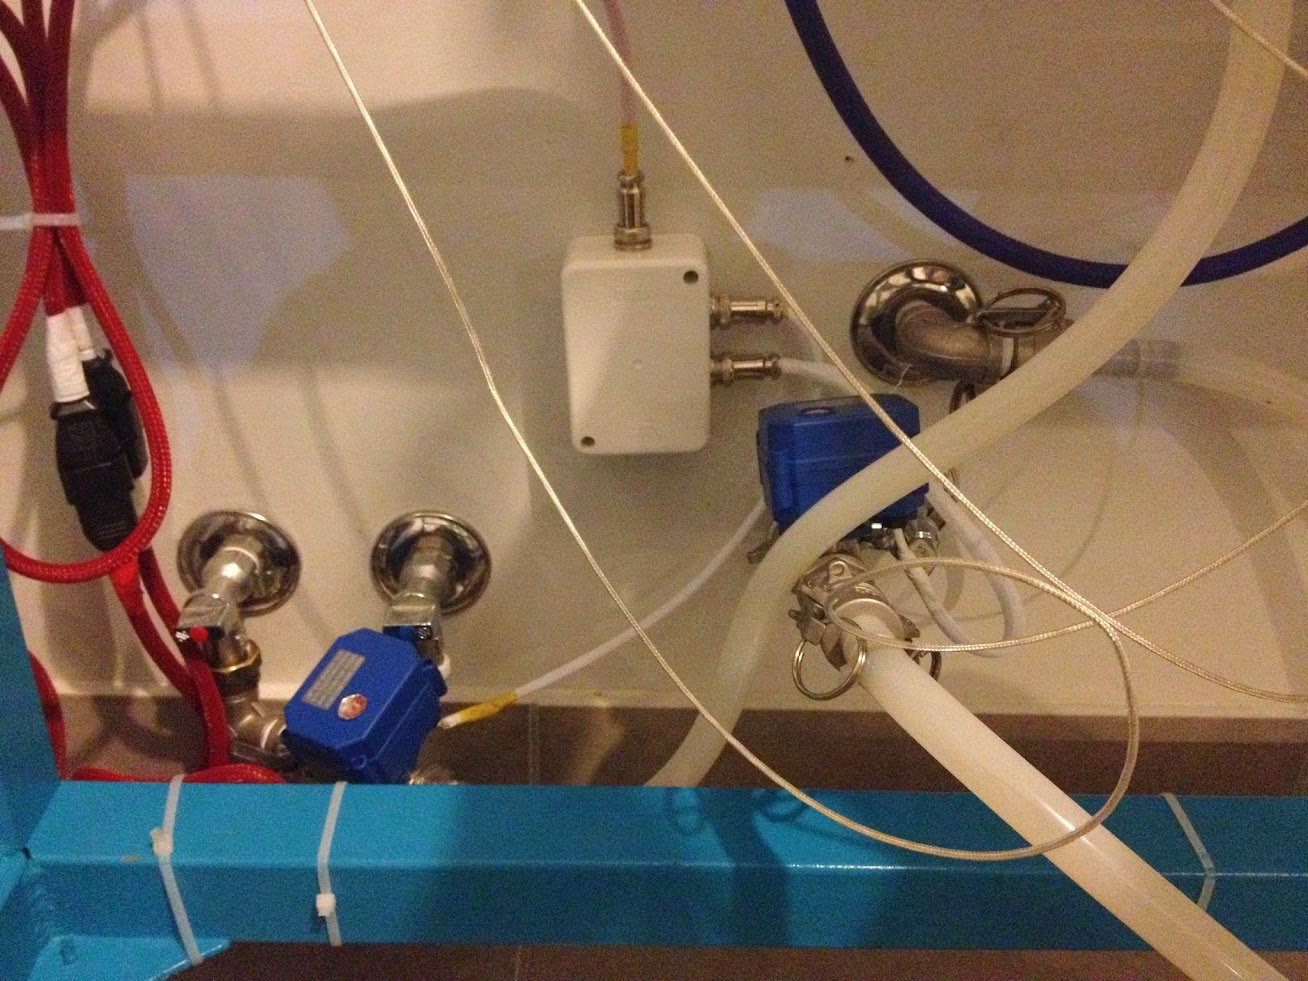
Tri-Clover Fittings
The fittings were a little fiddly on the first few swaps but I got the hang of it, The time tri-clovers really shine is in the clean up.. Just take the fittings off and you can see everything.. none of this wondering if the threads have stuff in it.. love it for that!

Conclusion
This is a great unit and I'm very happy with it... it performed very well it was just the operator who stuffed up some water/grain ratio due to not correctly judging the MLT dead space. I will also need to calibrate ALL the temperature probes and dial which will take the second guessing away and let me relax.

All my other breweries were weld-less fittings and leaked a little bit, Having full welded fittings was a dream, no check to see if something is leaking not turning the ball valves to hard just encase I unscrewed the bulk head enough it gets a leak. It certainly was another level in my brewing, Now I just have to produce some sweet beers off it.

I think I'll keep this a quick write up since I'm yet to dial my rig in, but the first look is very impressive.

Cheers

Gavin.
 
djar007 said:
Sounds great and looks great. That sparge arm is awesome.
Oh yes forgot about the sparge arm, The BEST for cleaning.. I just take it apart and dump all parts in the MLT bottom when I'm pushing the cleaner through my pots.. I then recirculate the cleaner in the MLT for about 10mins.. comes out sparkling..

-gav
 
aydos said:
How much were the elements?
Give Rob a call on 0418 543 201 and ask him, say its like Gavin's Tri-Clover 4800watt elements.. there are different configurations etc..

-Gav
 
Hi Gav,

What type of circuit breakers did you use in the build? The 240 one coming in and the ones on the elements?
 
WOW, what an awesome rig, the only thing I'd ask Gava is are you not concerned about all that splashing when recirculating with that flash looking sparge arm?

cheers

Browndog
 

Latest posts

Back
Top