You are using an out of date browser. It may not display this or other websites correctly.
You should upgrade or use an alternative browser.
You should upgrade or use an alternative browser.
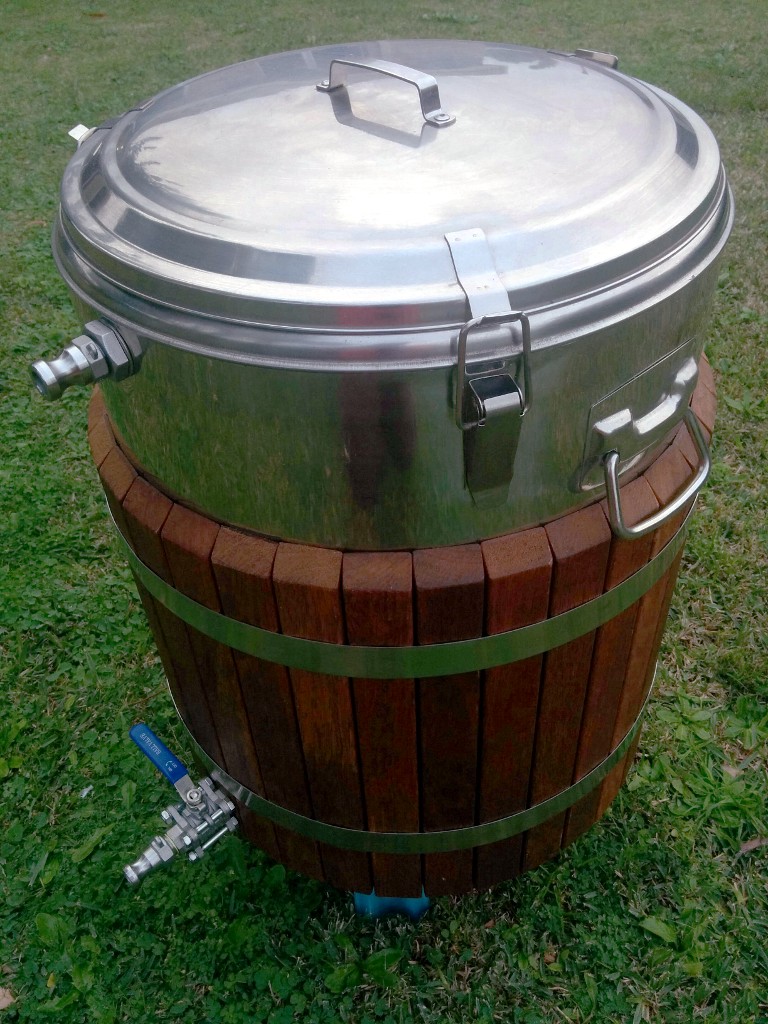
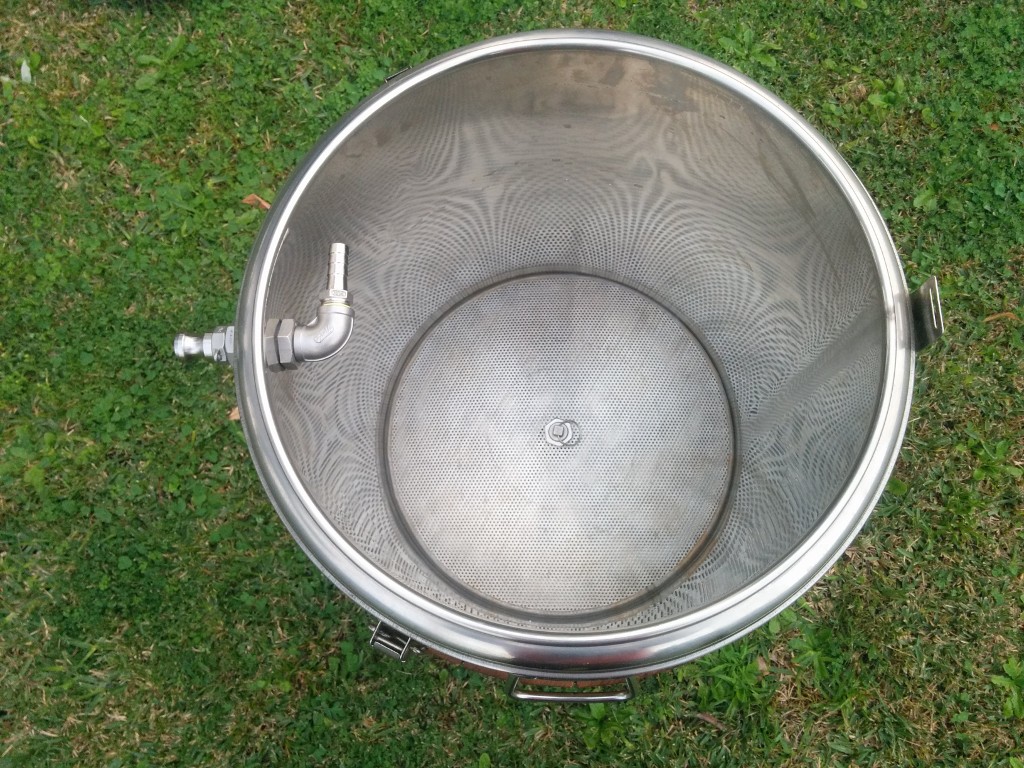
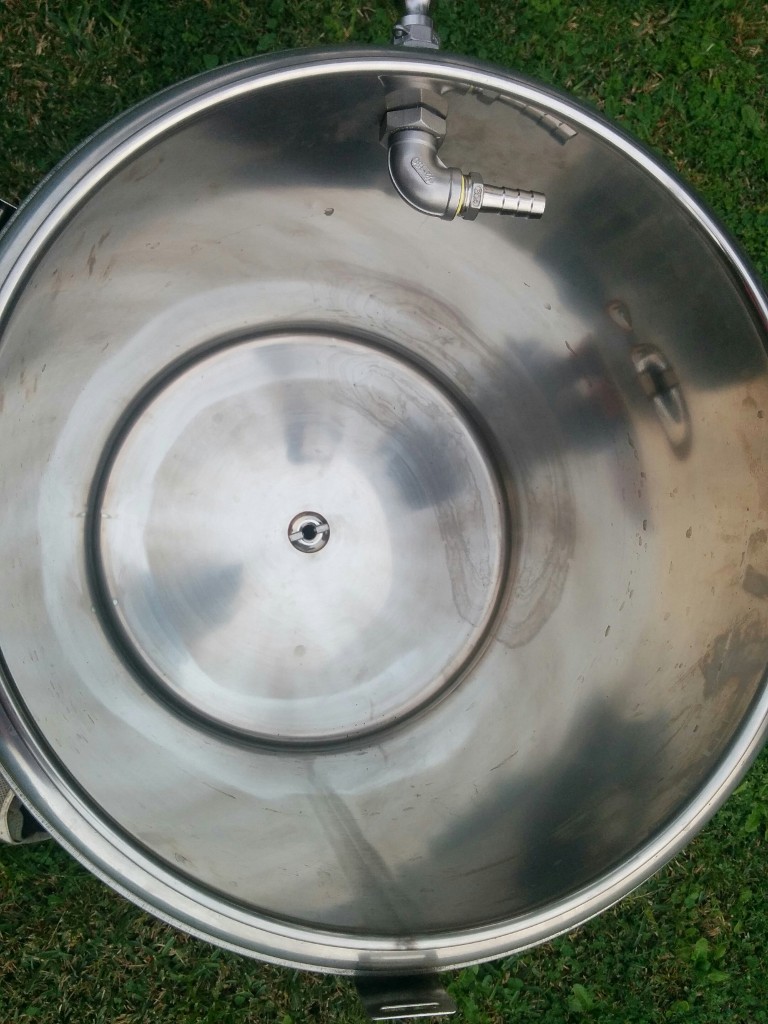
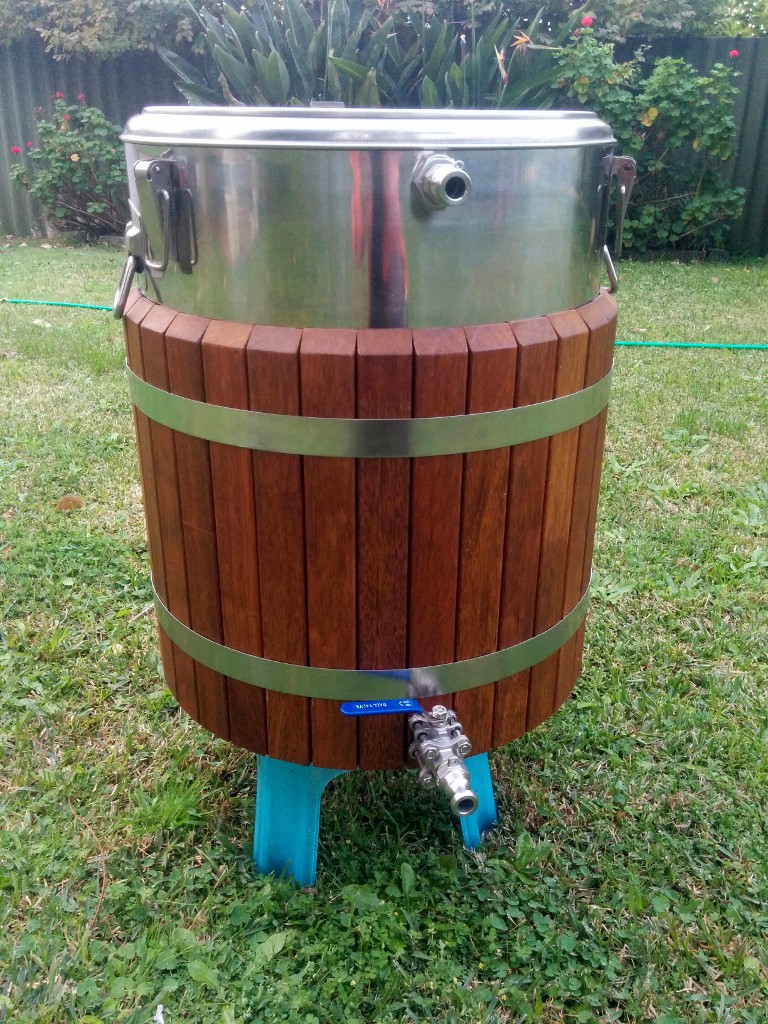
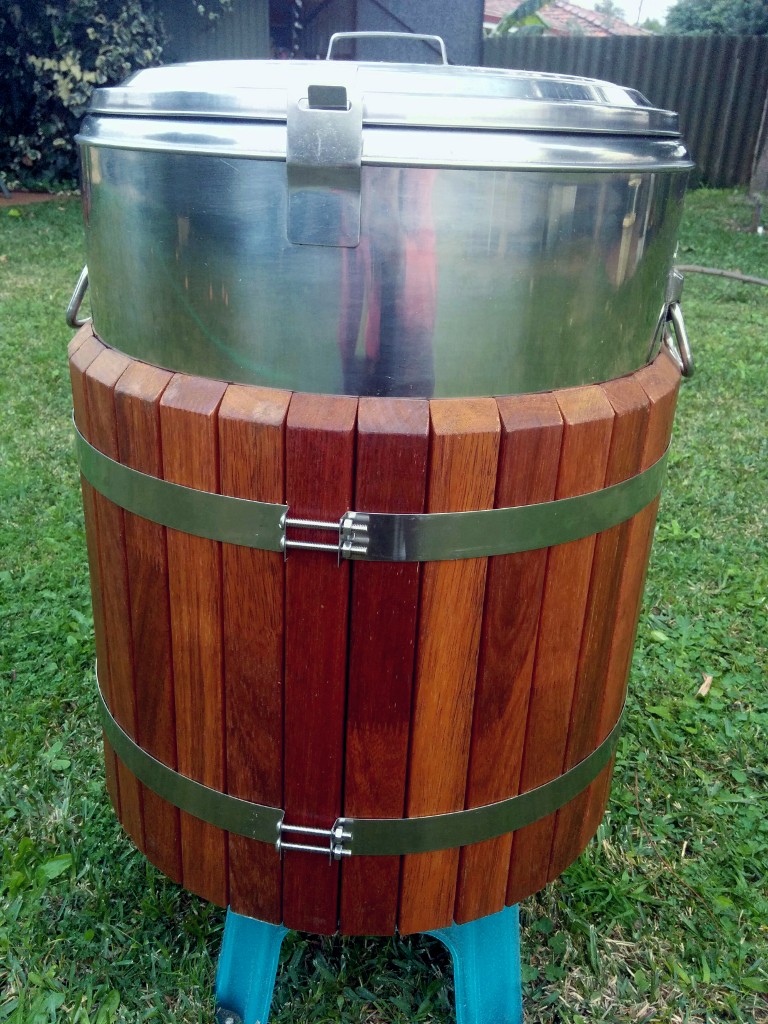
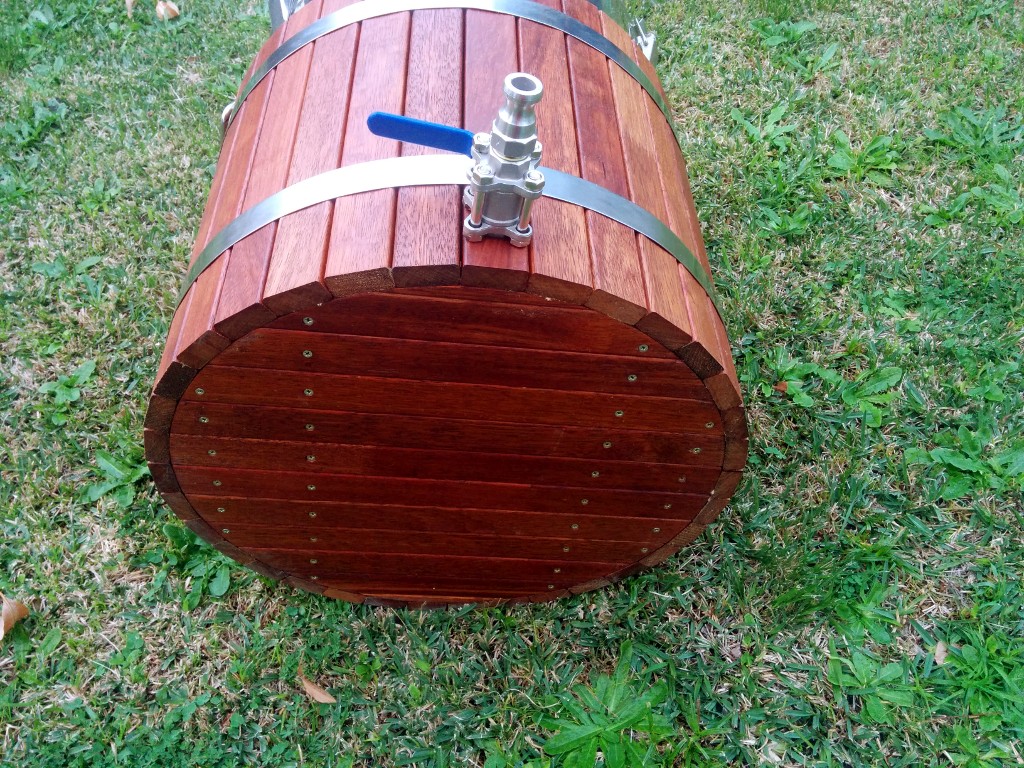
Finished my new mash tun - wall to wall false bottom, centre draining,
- Thread starter shoobs
- Start date

Help Support Australia & New Zealand Homebrewing Forum:
This site may earn a commission from merchant affiliate
links, including eBay, Amazon, and others.
Belgrave Brewer
Well-Known Member
- Joined
- 18/4/06
- Messages
- 577
- Reaction score
- 453
Sexy!
Danscraftbeer
Well-Known Member
Fwahh!  lordi lordi lordi.
They were already a part of the thermo pot. If you're looking for something similar, do a quick search for "toggle latch".Judanero said:Very nice, very very nice. Can I ask where you got the stainless latches from?
Tilt
Well-Known Member
- Joined
- 31/7/07
- Messages
- 175
- Reaction score
- 28
Awesome job, bet your itching to put it to good use.
If I'm seeing right it looks like you've gone bottom draining and built your timber cladding to cover the workings on the base.
I'm keen to do something similar. What fittings did you use to go through the bottom of your pot and hold the false bottom in place?
Any chance of some pretty pics ?
If I'm seeing right it looks like you've gone bottom draining and built your timber cladding to cover the workings on the base.
I'm keen to do something similar. What fittings did you use to go through the bottom of your pot and hold the false bottom in place?
Any chance of some pretty pics ?
Yep, bang on. I used a marine skin fitting to go through the base. From there a SS elbow, compression fitting, SS tube, another compression fitting and the ball valve. Nothing is holding the false bottom in place other than gravity. The hardware in the middle of the false bottom is just a keyring running through a drilled SS end plug to make it easy to lift the bottom out.tilt said:Awesome job, bet your itching to put it to good use.
If I'm seeing right it looks like you've gone bottom draining and built your timber cladding to cover the workings on the base.
I'm keen to do something similar. What fittings did you use to go through the bottom of your pot and hold the false bottom in place?
Any chance of some pretty pics ?
I'll grab some disassembly pics next time I clean it to show you what is underneath the cladding.
Mardoo
Noob What Craps On A Bit
Sweet! Well built. Thanks for the link on the marine skin fitting. I'm in the process of getting the bits for a bottom draining mash tun and that'll be perfect.
sp0rk
Mayor of Pooptown
Saw this on Reddit this morning, great build mate!
Nice!
Mistake I made on my build originally was to not make the jacket removable. I found out that any wort that gets in the cladding stays there and festers. A good addition would be to change out those tensioners for latches so the jacket can be removed easily for cleaning.
Mistake I made on my build originally was to not make the jacket removable. I found out that any wort that gets in the cladding stays there and festers. A good addition would be to change out those tensioners for latches so the jacket can be removed easily for cleaning.
Just a few loose pumps and hoses at the moment, with some grand plans for something more "put together".welly2 said:Smart! You've got some recirculating system for this to go into?
I'll be going digital on this one. I have a temperature sensor array and liquid level sensor board that I need to test. It should give me temperatures from top to bottom, as well as a liquid level right to my tablet. Build time is scarce at the moment, though.Steve said:Indeed, that is very nice. Just needs a weldless dial thermometer half way up between the steel belts above the ball valve.
Cheers
Steve
Yep, I had that thought but figured I'd start with the nuts and bolts I had lying around. It's easy enough to remove at the moment. Just put an occy strap around the lot, remove the bolts and bands, take out the front stave with the hole in it for the ball valve, then the whole thermopot just lifts right out.The Judge said:Nice!
Mistake I made on my build originally was to not make the jacket removable. I found out that any wort that gets in the cladding stays there and festers. A good addition would be to change out those tensioners for latches so the jacket can be removed easily for cleaning.
Tilt
Well-Known Member
- Joined
- 31/7/07
- Messages
- 175
- Reaction score
- 28
Thanks, haven't seen those skin fittings before. I reckon they'll come in handy. I'm thinking I may be able to tap a thread inside one and use a modified SS nipple and cap to hold the FB down - I'm keen to keep it in place while I'm stirring the mash.shoobs said:Yep, bang on. I used a marine skin fitting to go through the base. From there a SS elbow, compression fitting, SS tube, another compression fitting and the ball valve. Nothing is holding the false bottom in place other than gravity. The hardware in the middle of the false bottom is just a keyring running through a drilled SS end plug to make it easy to lift the bottom out.
I'll grab some disassembly pics next time I clean it to show you what is underneath the cladding.
Cosh
Well-Known Member
Where did you get the Thermo pot from?
I've been meaning to take some photos of my jacket and its removability for a while, so when I get around to it i'll let you know. Might give you an idea if you find there's any issues down the track with cleaning. Great looking build though shoobs ;-)shoobs said:Yep, I had that thought but figured I'd start with the nuts and bolts I had lying around. It's easy enough to remove at the moment. Just put an occy strap around the lot, remove the bolts and bands, take out the front stave with the hole in it for the ball valve, then the whole thermopot just lifts right out.
Germany. I bought it when I was over there for work and brought it back on the plane.Cosh said:Where did you get the Thermo pot from?
Similar threads
Withdrawn
[MELB] 65L SS Insulated Mash Tun
- Replies
- 2
- Views
- 1K
Equipment For Sale
Ss 100l mash tun inc false bottom, 65l Digiboil + Fermenters
- Replies
- 0
- Views
- 1K
- Replies
- 11
- Views
- 995
- Replies
- 2
- Views
- 1K


