Using An Urn For Brew In A Bag - Tutorial

Australia & New Zealand Homebrewing Forum

Help Support Australia & New Zealand Homebrewing Forum:

This site may earn a commission from merchant affiliate links, including eBay, Amazon, and others.
Status
Not open for further replies.
sorry missed your post.

I'm no electrician but if it's out of China I guess it could be a custom element for that model and not equivalent to anything in the general trade.

However you can get a hand held immersion heater (I use mine all the time for extra grunt) and whilst pricey, would be a good tool to have in the brewery whatever system you go to.
 
Welcome to the dark side, Ken :beerbang:

Bill I believe genesbovill is Northside or whatever you'd call that in Newcastle, on the way out towards Port Stephens as opposed to down the coast - usually only takes me about 90 mins to hit Heatherbrae on the way down, so if you're up for a run I'm more than happy to put on a bru day.
How far are you away from Newy champ? As soon as I get my license back around the 6th of Feb I could always do a run to your shack for a demo;)
 
A copy of the spreadsheet would be great. Water volume is the one 'wobbly' factor I have come across with BIAB using a 40 L urn, as it's a full volume method. For example using a 3.5 k grain bill for a mild leaves you, after hoisting and squeezing, with far more wort pre-boil than a 6k bill for an American Amber and like you I've resorted to sparge in a bucket etc to build up the volume so, after a 90 min boil it will fill a Willow cube. Also it's not just a straight "x kg of grain will absorb y kilos of water so work it out stupid" - I often use a fair whack of adjuncts and find that, say 4 k of grain plus a kilo of rice ends up giving you more pre boil wort than 5 k of straight grain - the rice (or maize) seems to mostly disappear into soluble sugars.

Hey Bribie. Hopefully this isn't too cheeky but did you notice a rule to follow when working out volume in the urn. I.e say 10mm to every litre for example.

Taken inspiration from this thread I've bought myself a 40l birko today and looking to go all grain within a few weeks. All giddy with excitement.
Giddy up.
 
I just used a measuring jug to make 5 litre nikko marks on the sightglass. Once you get your measurements sorted, makes getting water ready so much quicker.
 
Kumamoto_Ken said:
Just got my first ever AG brew in the cube and have to say thanks to Bribie G and his tutorial for the inspiration (after 120-odd K&K/extract/partials etc).

I went with a pretty simple recipe for my first attempt: 95% pale ale malt and 5% crystal, hop additions all Cascade (~35IBU).
Both my FVs are currently in use...but I can't wait to get it into the bottle (and my belly).

Edit: grammar
An update

It went into a FV on the 19th of Jan.
Spent two weeks in the fermentation fridge at about 17C (BRY-97).
Bottled 2nd of Feb.
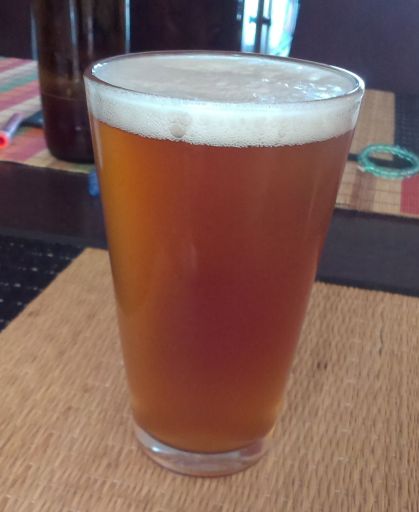
Couldn't help myself and tasted it today after 6 days in the bottle...cloudy as, but rapt with the outcome on my first AG brew.

IMAG0213%20-%20Copy.jpg
 
Did my first AG brew in a 40L crown urn yesterday. A big thanks to Bribie G for the instructions and the confidence to give it a go.

The very simple Maiden brew is in cube and will going into the FV in 2 weeks!
 
Mattwa said:
Did my first AG brew in a 40L crown urn yesterday. A big thanks to Bribie G for the instructions and the confidence to give it a go.

The very simple Maiden brew is in cube and will going into the FV in 2 weeks!
2 weeks? Get it in the fv asap. Will blow your mind :) Seriously though, nice one. It's actually not that hard to make really good ag beer.
 
lukiferj said:
2 weeks? Get it in the fv asap. Will blow your mind :) Seriously though, nice one. It's actually not that hard to make really good ag beer.
Haha yeah I can't fit it in with the two and a half brews already in the fermenting chamber. I wasn't planning to start AG this soon, but the wife went away unexpectedly for the weekend, and you know what they say about idle hands!
 
I'm not sure if it has been mentioned in this thread(wasn't going to read all 300ish posts)

You can buy an upgraded "cut off switch" from crown that will allow a
Rolling boil and still protect your urn from overheating the element.

I believe it is around $15 now
I got mine last year for $7 so I guess they are onto us brew folk.
 
Here is a pic of the element I blew when I bypassed the wiring instead of upgrading the switch.

Lesson learnt.

To replace the switch simply undo the cover plate on the bottom of the urn and then pop off the two connectors, remove the switch by unscrewing the little nut and replace plug wiring back on and you are done.

ImageUploadedByAussie Home Brewer1392524343.350032.jpg
 
Just ordered the replacement boil dry cut-out switch that takes the cut-out to 150C.

Spoke to Graham at Crown who was very helpful and very enthusiastic about using the urn for homebrew. They are very aware of homebrewers using their equipment and are happy to support it which is great to hear.

The part was U-6205-150 and as per the pricelist Rob linked to was $15.35 + GST with $6.60 postage.
 
So, I need 40L urn + bag (grain and maybe hop sock?) + hose + no-chill cube and I'm good to go?
 
Status
Not open for further replies.
Back
Top