slcmorro
87 Warning Points. Bad Boy!
Hey guys,
Although I'm very new to brewing and making my own stuff at home, I thought about putting together a quick tutorial type thing about how I'm making hard cider at home. I'm not one for buying expensive equipment or trying to complicate things, so this is how I do it right out of the original bottles you buy the juice in.
My techniques might not be the most advanced, nor even the best out there (undoubtedly someone will disagree with some or even all of this at one point or another), but this has worked for me so far. The beauty of the way I'm doing it, is it's very simple, very quick and not very scientific at all. No hydro readings, no exact measurements, nothing hard. I even let these sit on a table in the study at ambient temperature. Our house stays around 20c all year round, so it's perfect in my opinion. There's not even any sterilisation to worry about at this stage. Just make sure the juice you buy is preservative free.
Any advice I give is just that, advice. Be safe, be careful and if you don't know what you're doing - ask!
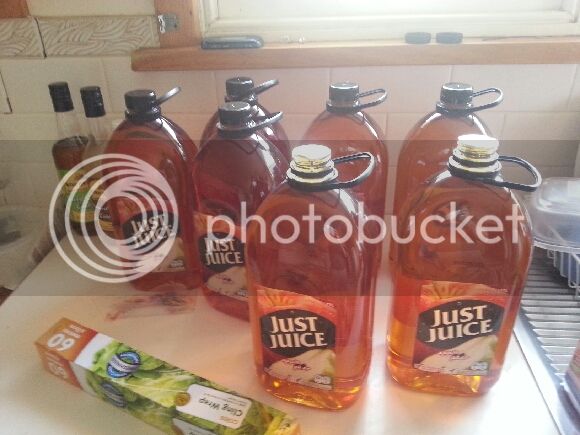
I got these for $2.25 per 3L bottle from the SPC outlet here in Ballarat. Winner!

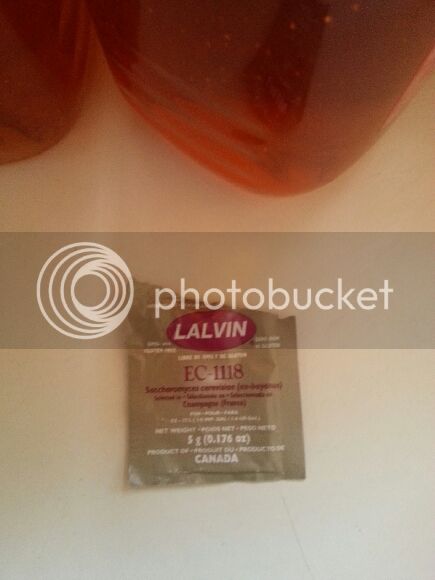
I'm using a dry yeast called Lalvin EC1118 which cost me $4 from my LHBS. It's only a 5 gm packet, yet as you can see in the pictures above and below, I've used it for 21L of apple and pear juice. It works, trust me. This stuff ferments out in around 5 days if you like your cider sweet, 7 for mid and 9 onwards for dry.

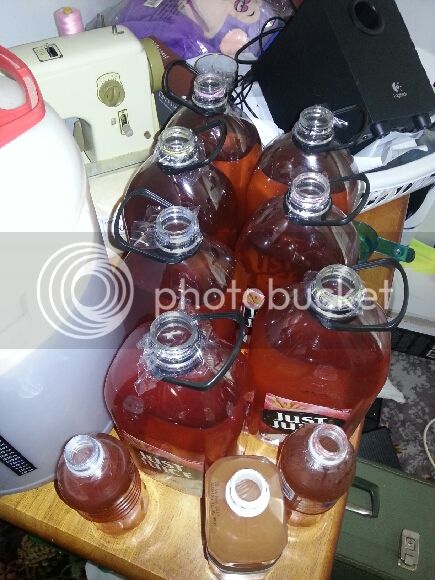
All I've done, is taken about 150ml out of each bottle. Then, I've sprinkled on top (yes, you can rehydrate if you want, but it's easier to sprinkle in this case) carefully measured out equal quantities of the yeast onto the surface of the liquid in the original bottles. When I say carefully, my eyes are brilliant. Promise.
Then, I've replaced the caps, Michael J Foxed the buggery out of the bottles and removed the caps. Finally, all you need to do is cut small squares of cling wrap to fit over the bottles and put an elastic band around it so it stays in place (I steal the missuses really small hairties). Give the bottle a small squeeze to see if you've created a decent seal. The cling wrap should bubble upwards. After that, a small pin prick in the wrap and they're good to sit in my study for about a week. We like ours not sweet nor dry.

Further, for those that want to complete the process, it's as simple as adding in some more sugars at the end, once you're happy with your cider in terms of the fermentation. I used powdered dextrose, mostly because I have a very very good supply of it. Be careful when you do this. The bottles will fizz up mega fast, so be ready with a cap (not too tight, just enough to seal but let air out) to throw on before it spills everywhere. Same principle now applies in terms of letting it carbonate. I usually leave the lids slightly unscrewed overnight and then tighten them in the morning. Once the bottles are pretty tight, I then throw them in the fridge to put the yeast to sleep, and that's that!
Do NOT leave these lying around at anything above 6c. The yeast will start re-fermenting the added sugars (or remaining sugars if you stopped it short of using them all) in the juice and things will start getting very messy!
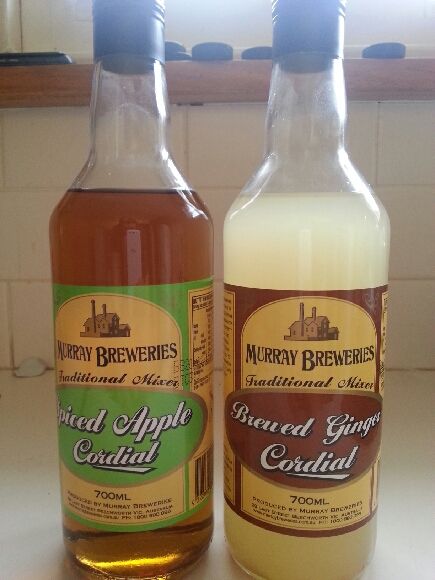
You can go into the secondary fermentation process and rack/bottle off the original if you want to, but I'm too lazy. You can drink it right away once it's carbonated to your liking, or you could even drink it flat and warm (some ciders, especially in winter, taste awesome warm!) as is... or... you could add in a secret ingredient like I do... I'll share it with you. $6 a bottle from the SPC outlet again, this stuff is the best.

Spiced Apple is basically apple and cinnamon cordial (excellent though) and the Ginger speaks for itself.
I hope this was of some use to someone. Happy brewing!
P.S - I have used Just Juice Apple and Pear (as seen above), Apple, Apple and Raspberry and Apple and Mango with good results.
Although I'm very new to brewing and making my own stuff at home, I thought about putting together a quick tutorial type thing about how I'm making hard cider at home. I'm not one for buying expensive equipment or trying to complicate things, so this is how I do it right out of the original bottles you buy the juice in.
My techniques might not be the most advanced, nor even the best out there (undoubtedly someone will disagree with some or even all of this at one point or another), but this has worked for me so far. The beauty of the way I'm doing it, is it's very simple, very quick and not very scientific at all. No hydro readings, no exact measurements, nothing hard. I even let these sit on a table in the study at ambient temperature. Our house stays around 20c all year round, so it's perfect in my opinion. There's not even any sterilisation to worry about at this stage. Just make sure the juice you buy is preservative free.
Any advice I give is just that, advice. Be safe, be careful and if you don't know what you're doing - ask!
I got these for $2.25 per 3L bottle from the SPC outlet here in Ballarat. Winner!

I'm using a dry yeast called Lalvin EC1118 which cost me $4 from my LHBS. It's only a 5 gm packet, yet as you can see in the pictures above and below, I've used it for 21L of apple and pear juice. It works, trust me. This stuff ferments out in around 5 days if you like your cider sweet, 7 for mid and 9 onwards for dry.

All I've done, is taken about 150ml out of each bottle. Then, I've sprinkled on top (yes, you can rehydrate if you want, but it's easier to sprinkle in this case) carefully measured out equal quantities of the yeast onto the surface of the liquid in the original bottles. When I say carefully, my eyes are brilliant. Promise.
Then, I've replaced the caps, Michael J Foxed the buggery out of the bottles and removed the caps. Finally, all you need to do is cut small squares of cling wrap to fit over the bottles and put an elastic band around it so it stays in place (I steal the missuses really small hairties). Give the bottle a small squeeze to see if you've created a decent seal. The cling wrap should bubble upwards. After that, a small pin prick in the wrap and they're good to sit in my study for about a week. We like ours not sweet nor dry.

Further, for those that want to complete the process, it's as simple as adding in some more sugars at the end, once you're happy with your cider in terms of the fermentation. I used powdered dextrose, mostly because I have a very very good supply of it. Be careful when you do this. The bottles will fizz up mega fast, so be ready with a cap (not too tight, just enough to seal but let air out) to throw on before it spills everywhere. Same principle now applies in terms of letting it carbonate. I usually leave the lids slightly unscrewed overnight and then tighten them in the morning. Once the bottles are pretty tight, I then throw them in the fridge to put the yeast to sleep, and that's that!
Do NOT leave these lying around at anything above 6c. The yeast will start re-fermenting the added sugars (or remaining sugars if you stopped it short of using them all) in the juice and things will start getting very messy!
You can go into the secondary fermentation process and rack/bottle off the original if you want to, but I'm too lazy. You can drink it right away once it's carbonated to your liking, or you could even drink it flat and warm (some ciders, especially in winter, taste awesome warm!) as is... or... you could add in a secret ingredient like I do... I'll share it with you. $6 a bottle from the SPC outlet again, this stuff is the best.

Spiced Apple is basically apple and cinnamon cordial (excellent though) and the Ginger speaks for itself.
I hope this was of some use to someone. Happy brewing!
P.S - I have used Just Juice Apple and Pear (as seen above), Apple, Apple and Raspberry and Apple and Mango with good results.


