New Toy Drum Smoker

Australia & New Zealand Homebrewing Forum

Help Support Australia & New Zealand Homebrewing Forum:

This site may earn a commission from merchant affiliate links, including eBay, Amazon, and others.
from what i was told when i looked in to it, is that it doesnt go low enough to smoke low and slow.
hey grant that looks awesome, now all you need is to get the mix of chips, sawdust and chunks to where you like them.
try hickory soaked in ether port, bourbon or even beer.
 
So I've built myself one of these puppies - gonna smoke a snapper this weekend. Any tips on doing veggies? Do they brown up ok at the lower heat? Anyone hazard a guess how long to leave a 2kg fish in there at 100c?
 
A 2kg whole fish? I would give it at about an hour.
Fillets will cook much quicker.
 
I've made 2 drum smokers in the last 12 months......

The first one had lots of welding and plasma cutting taking place and was a little bit of a fail........

the second one was kept far most simple and I think will stand the test of time a lot better.....The first one ended up a pile of rust in no time flat.....

Pics of the first one:

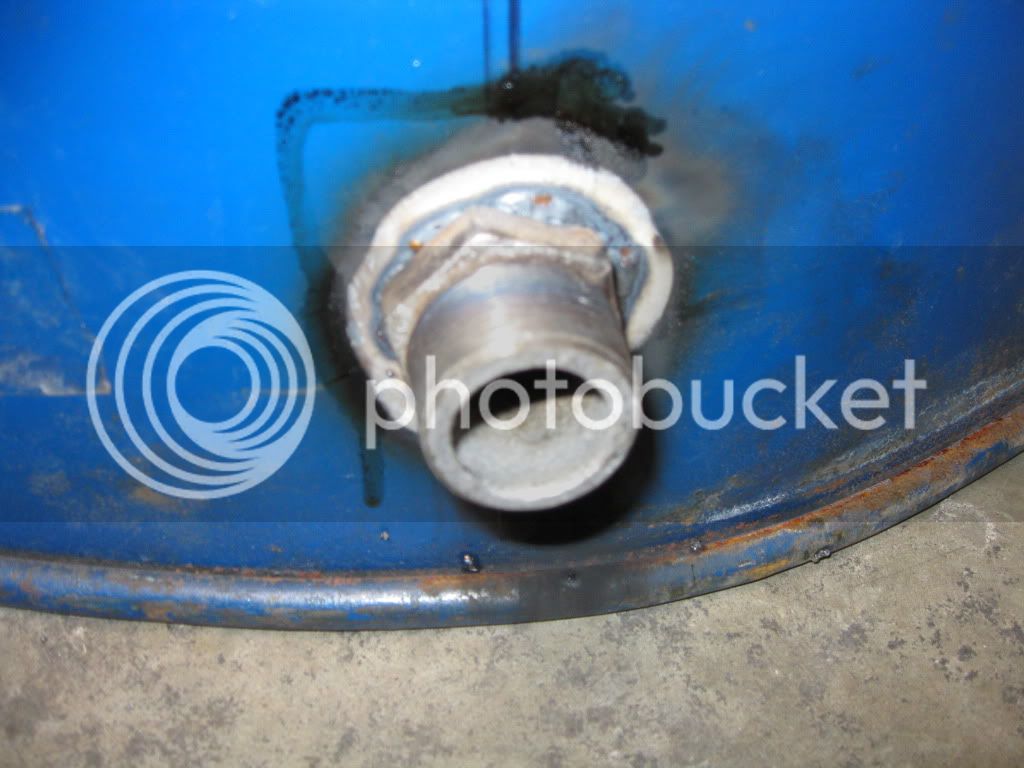
As you can see I welded most holes
IMG_1032.jpg


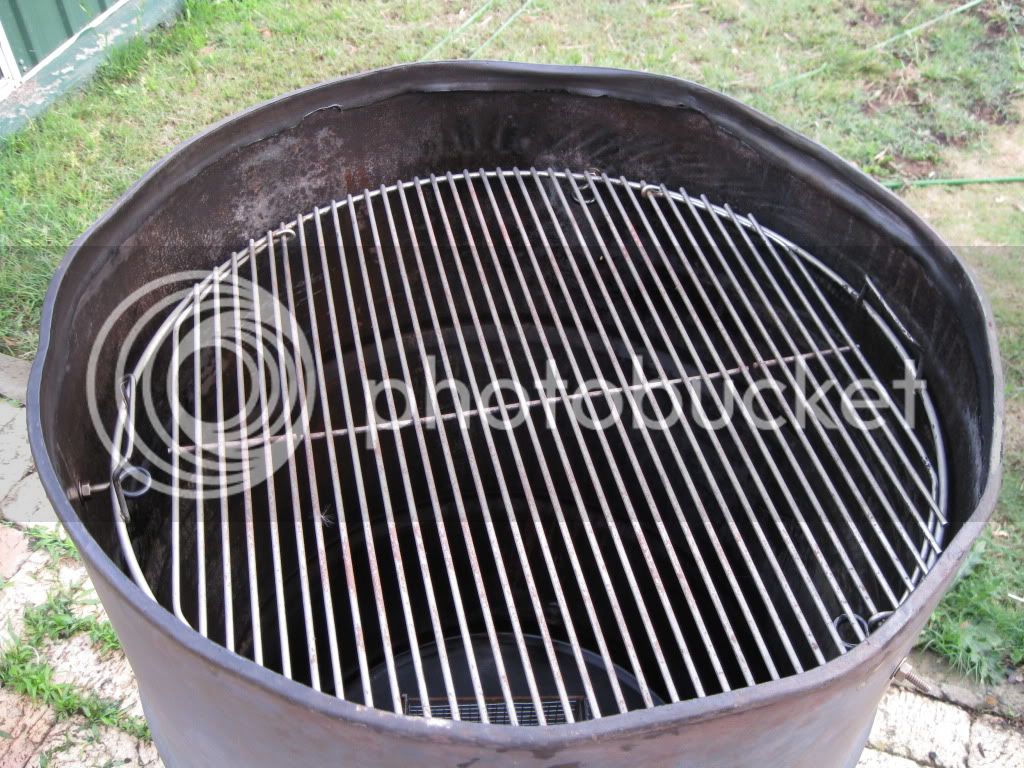
It was a really crappy drum and was all bent out of shape so it didn't seal very well.....
IMG_1052.jpg


I had it so the top AND bottom could come off - which at the time I thought was a brillant idea-----FAIL
IMG_1050.jpg


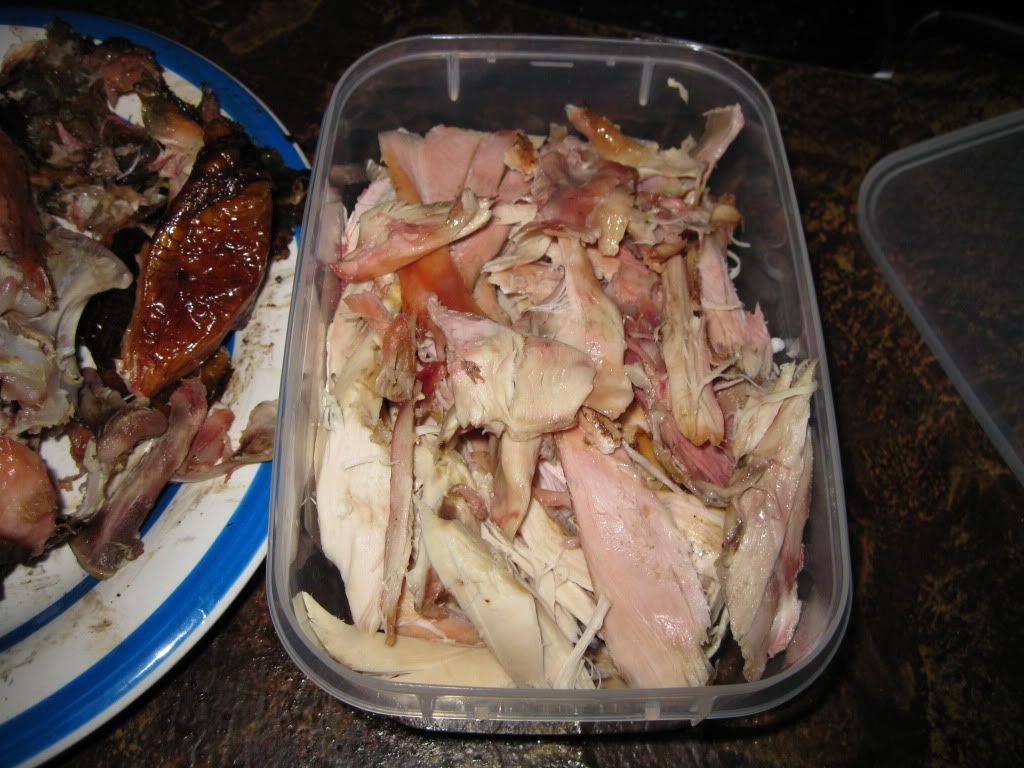
But the food that came out of it was bloody lovely......Nice and pink from the hickory smoke
IMG_1187.jpg
 
UDS No.2 was a WHOLE lot better than No.1......Lots of lessons learnt and I kept it far more simple.

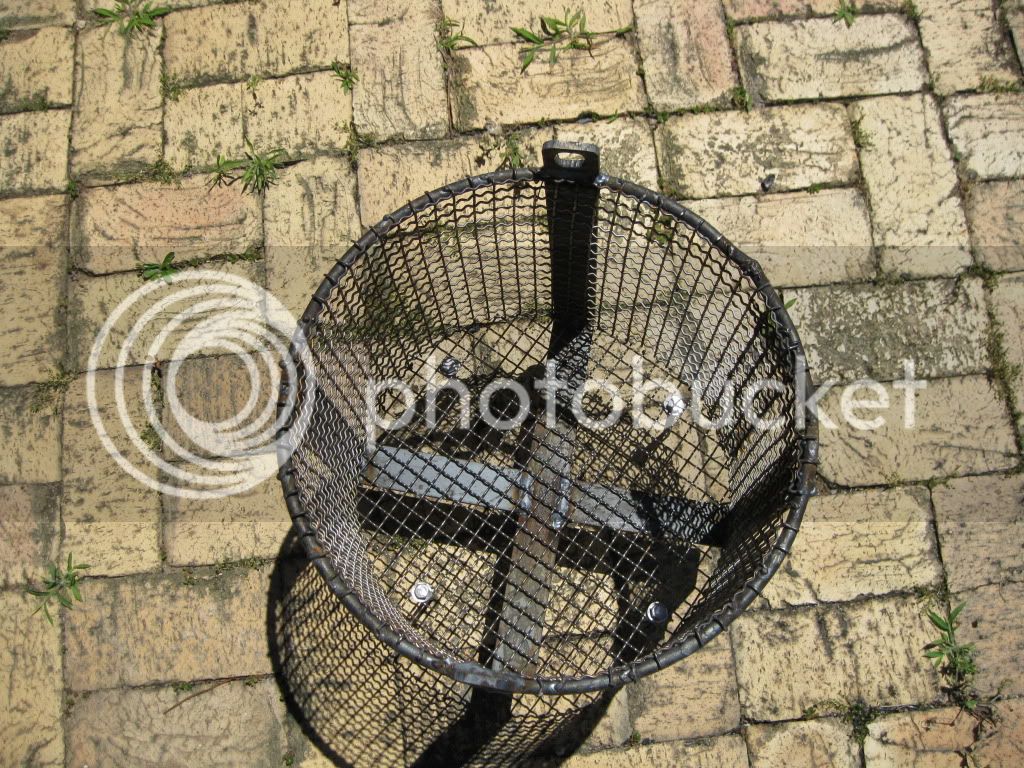
Shot of the basket-----Thanks to my well trained contractors at work
IMG_1556.jpg


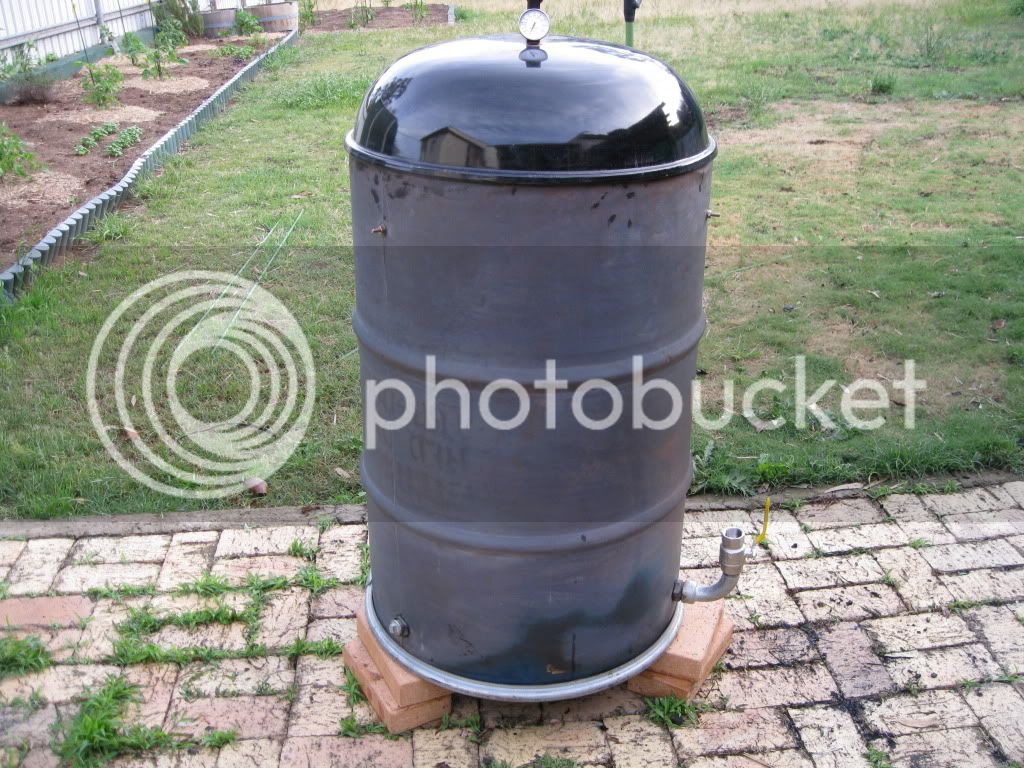
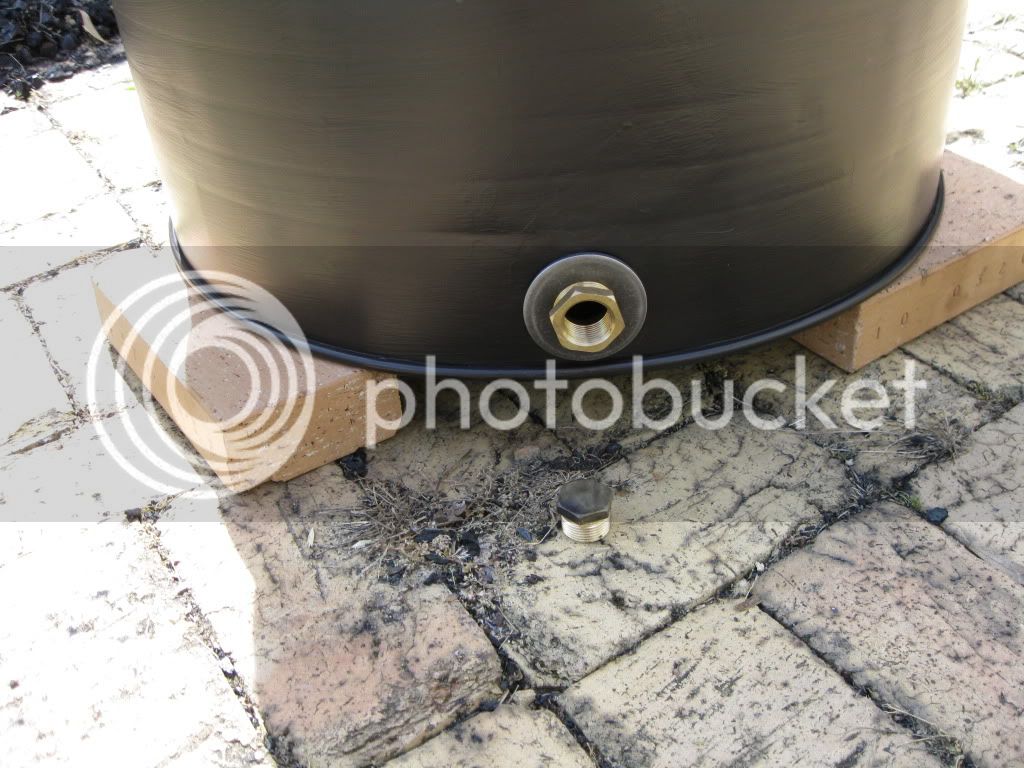
The 3 holes at the bottom just have a brass fitting screwed in and a male brass plug to close the hole on 2 and a 1 inch ball valve on the other
IMG_1552.jpg


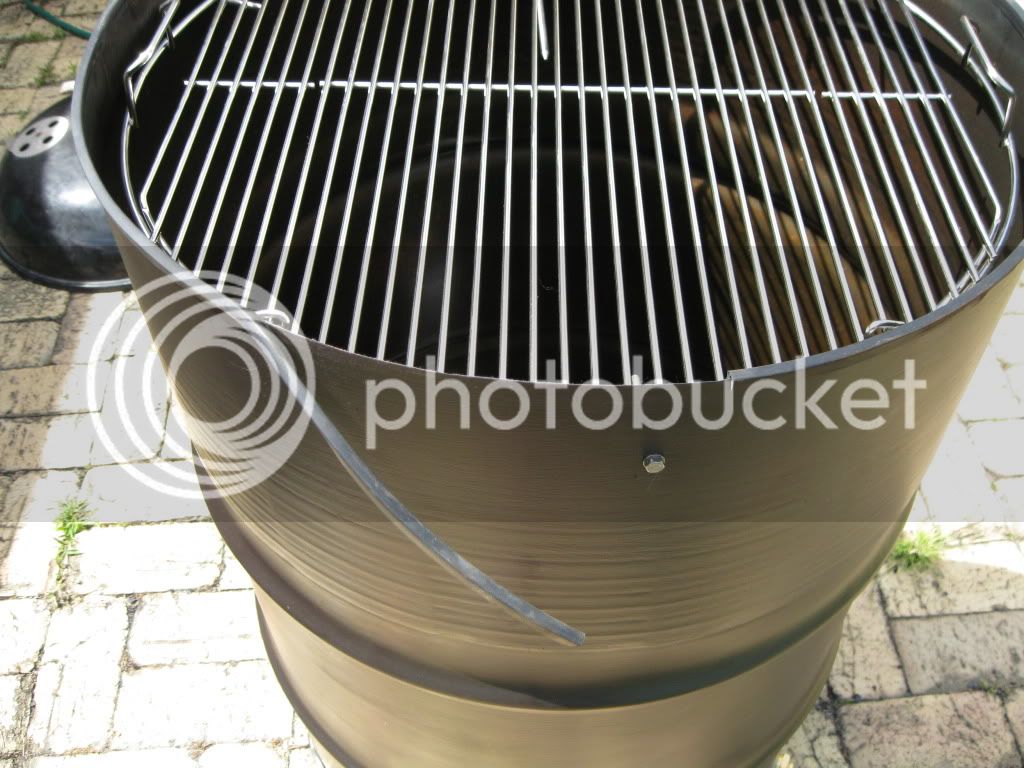
I found a heat proof rubber (not really rubber but I'll be stuffed if I can remember the name of it) seal that has 2 purposes. First is to seal the webber lid absolutely perfectly on the drum and secondly it stops me cutting the hell out of myself on the sharp edge
IMG_1554.jpg


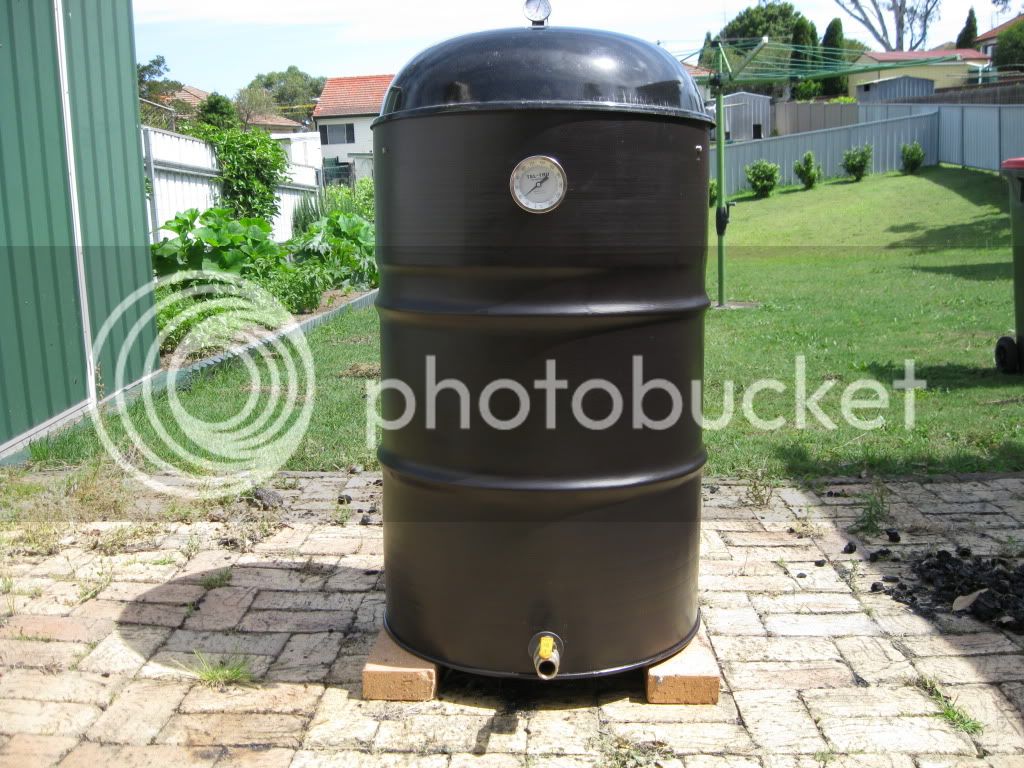
Finished product......with thanks to Tony05 (brother) for the gauge....
IMG_1551.jpg


I lined the inside of the drum with cooking oil about 3 times over a week then fired it up and after it's first cook I re oiled it 2 or 3 times and now I only have to look at it every so often and no rust is ever around.........
 
And the food from the second UDS!!!!!!!!!!!!!!! Yummy.....

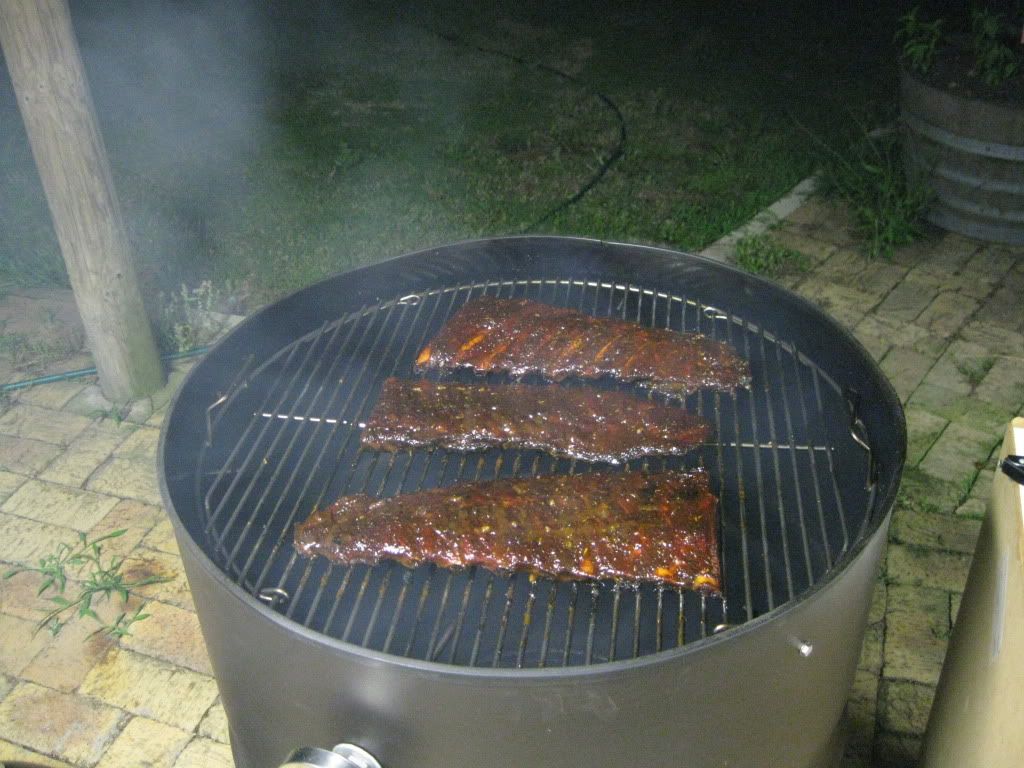
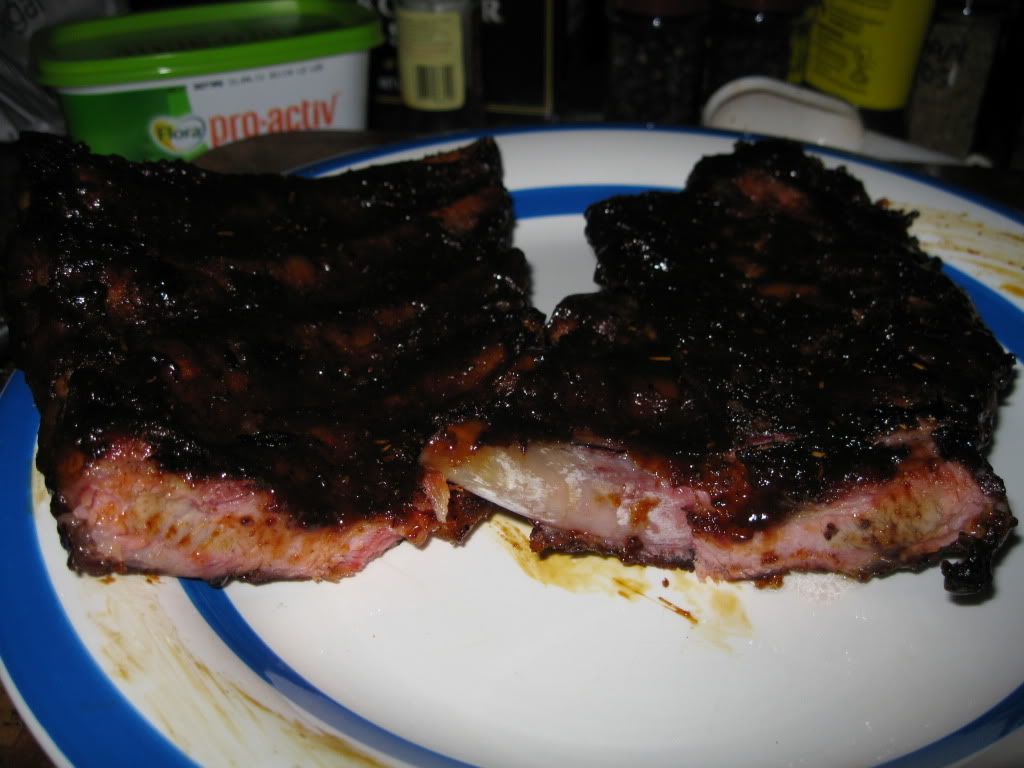
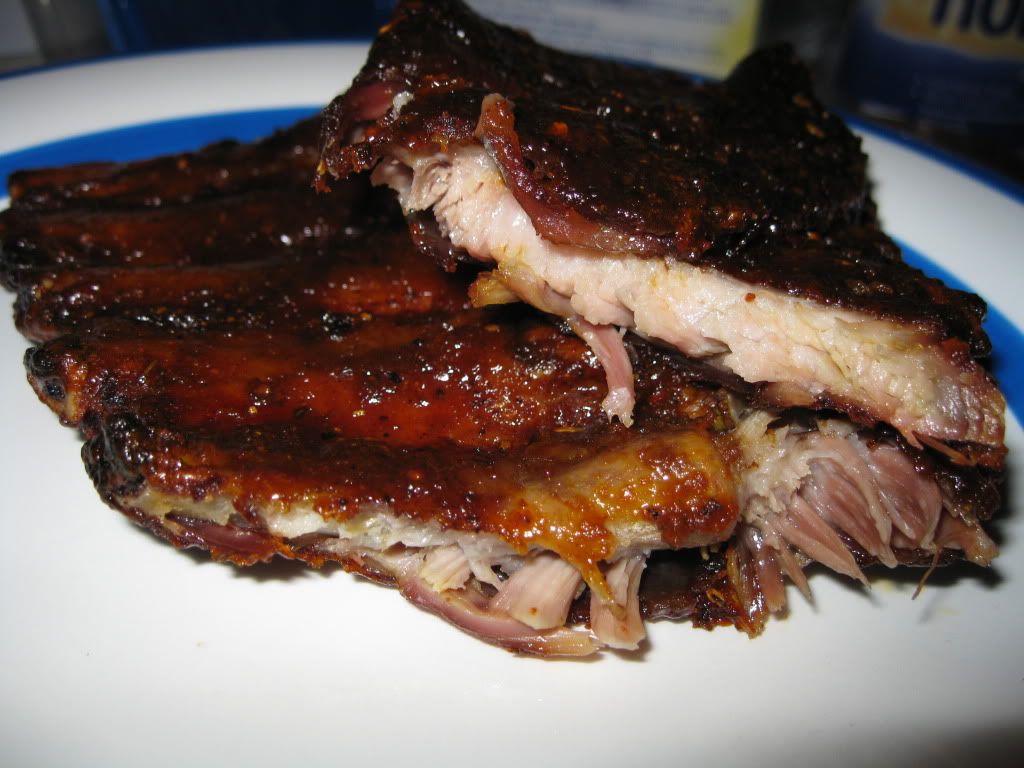
Ribs.........Oh my sweet Jesus....
IMG_1591.jpg


IMG_1592.jpg


IMG_1605.jpg


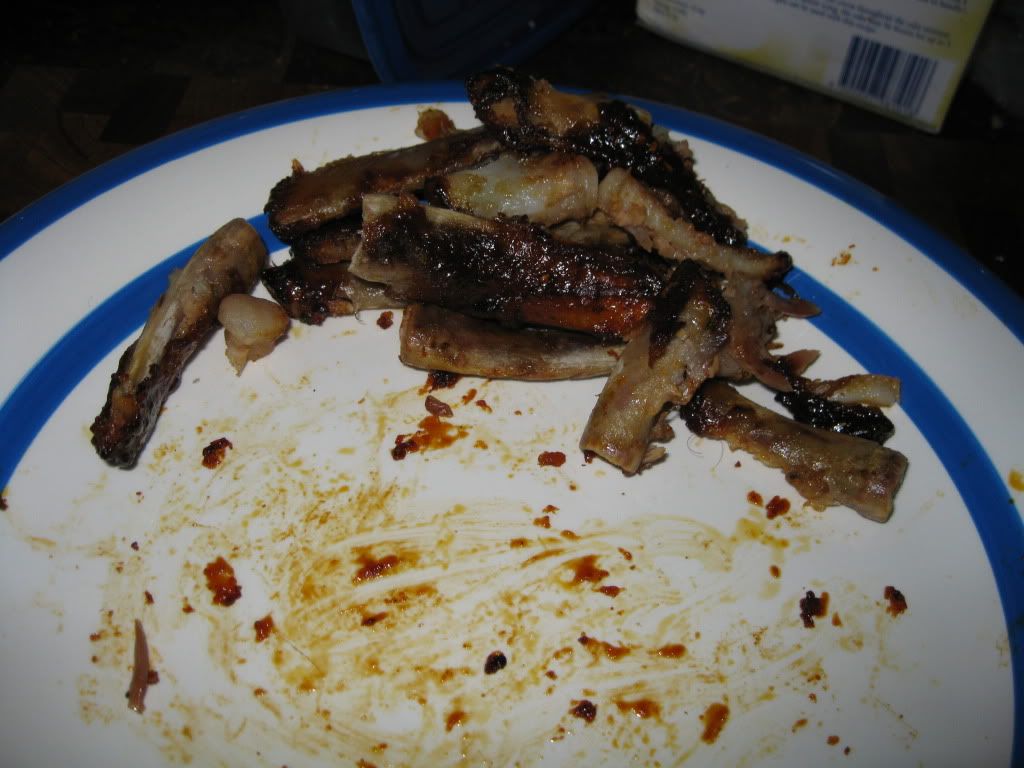
and this is how much I enjoyed the ribs..... :)
IMG_1606.jpg


Anyway guys just thought I'd share......Cheers
 
Ask and you Shall receive :)

Kansas City Classic Barbecue Sauce

Recipe
Yield: 6 cups.

Ingredients
2 tablespoons chili powder
1 teaspoon ground black pepper
1 teaspoon table salt

2 cups ketchup (NOT TOMATOE SAUCE, they are different. most supermakets will sell ketchup but tomatoe sauce will still work if you can't get it)
1/2 cup yellow ballpark-style mustard (american mustard)
1/4 to 1/2 cup cider vinegar**
1/3 cup Worcestershire sauce
1/4 cup lemon juice
1/4 cup steak sauce
1/4 cup dark molasses
1/4 cup honey
1 teaspoon hot sauce
1 cup dark brown sugar (you can use light brown sugar if that's all you have)

3 tablespoons vegetable oil or butter
1 medium onion, very finely chopped
4 medium cloves of garlic, crushed or minced

Optional. If you are cooking indoors, or if your meat does not have a lot of smoke flavor, or if you just want more smoke flavor, you can add 1 teaspoon of liquid smoke. (I have done this when cooking in the oven and it works great. Remember when it comes to liquid smoke, a little goes a long way)

About the chili powder. Not all chilli powders are the same. Many of the common grocery store chilli powders are lifeless and dumbed down for the general consumer. Buy your chili powder from a Mexican grocer or online. I used a Chipotle chilli powder and it is so awesome

**About the vinegar. I use a 1/4 cup as I don't like my sauce to tart but if you want it to last longer or you like the stronger flavour then go 1/2 cup. Best thing to do is start with 1/4 cup then taste and adjust slowly to get the taste you like..

About the steak sauce. There are many different brands and they all have different flavor profiles, but what we want here is the meaty depth of savoriness that they call umami, so use whatever you have on hand. also don't go over board with this sauce as it can make or break the end produce.

Secret ingredient. Add 2 tablespoons of tamarind paste. This exotic ingredient isn't really that exotic. It shows up on the ingredient lists of a lot of great BBQ sauces. It has a sweet citrusy flavor and really amps up a sauce. If you can't find it in an Asian grocery, it is available online. Worth looking for. (you don't need this and I have made this sauce without it and with it. Both are nice but with the paste is the next level of nice

Do this
1) In a small bowl, mix the chili powder, black pepper, and salt. In a large bowl, mix the ketchup, mustard, vinegar, Worcestershire, lemon juice, steak sauce, molasses, honey, hot sauce, and brown sugar. Mix them, but you don't have to mix thoroughly.

2) Over medium heat, warm the oil in a large saucepan. Add the onions and saute until limp and translucent, about 5 minutes. Crush the garlic, add it, and cook for another minute. Add the dry spices and stir for about 2 minutes to extract their oil-soluble flavors. Add the wet ingredients. Simmer over medium heat for 5 - 10 minutes with the lid off to thicken it a bit. DO NOT STOP STIRRING IT OR IT MAY BURN AT THE BASE AND THE SAUCE WILL GET A BAD TASTE (I learnt this the hard way....)

2) Taste and adjust. Add more of anything that you want a little bit at a time. It may taste a bit vinegary at first, but that will be less obvious when you use it. Strain it if you don't want the chunks of onion and garlic. I prefer leaving them in. They give the sauce a home-made texture. You can use it immediately, but I think it's better when aged overnight. You can store it into clean bottles in the refrigerator for a month or two.

-----------------------------------------------------------------------------------------------------------------------------------------------

Memphis Dust Recipe

Yield. Makes about 3 cups. (I usually half this recipe and it still does about 8 or 9 big sets of ribs)

I typically use about 1 tablespoon per side of a slab of Pork spare ribs. Store the extra in a zipper bag or a glass jar with a tight lid.
Preparation time. 10 minutes to find everything and 5 minutes to dump them together.

Ingredients
3/4 cup firmly packed dark brown sugar
3/4 cup white sugar
1/2 cup paprika
1/4 cup kosher salt (yes this is actually a type of salt. Read what I put below about sugar and salt)
1/4 cup garlic powder
2 tablespoons ground black pepper
2 tablespoons ground ginger powder
2 tablespoons onion powder
2 teaspoons rosemary powder (you can use fresh if you like, but better to use dried if you have it)

About the sugar and salt. they are in the recipe for more than flavor enhancement, they help form the crust (a.k.a. called "the bark" by the pros), an important part of the texture of the surface of ribs and slow smoke roasted pork. The salt pulls some moisture to the surface to form a "pellicle" and the sugar mixes with the moisture, caramelizes, and also contributes to the crust. There's only about 2 tablespoons of rub to a large slab. Of that about 1 tablespoon is sugar, and 1/2 teaspoon of salt. If you eat half a slab, you're not eating much sugar and salt. I recommend you leave them in. And for those of you who object to white sugar for non-dietary reasons, and use brown sugar instead, you need to know brown sugar is just white sugar with molasses added. It is not unrefined sugar. I use brown sugar for the flavor and white sugar because it improves the bark. You can substitute table salt, but beware that if you do, you should use about 2/3 as much.

About the rosemary. I know that some people don't like it but trust me, it hides in the background and you will never know it is there. Substitute thyme or oregano if you must, but I think rosemary is the best choice. If you can find ground rosemary, good for you. It's hard to find. So just grind the rosemary leaves in a mortar and pestle or in a coffee grinder. It will take 2 to 3 tablespoons of leaves to make 2 teaspoons of powder. If you have it fresh and want to dry it so the rub lasts longer then get a few sticks, remove the leaves and put all the leaves on a flat baking tray and have the oven on low with the fan on high and leave the door open. You will have dry leaves in about an hour or so. just put them in the mortor and pesel (spelling??)

About the paprika. I have used Hungarian paprika before with great results, but last batch I did I used sweet smoked paprika from www.herbies.com.au with awesome results........When I use the Hungarian paprika I always replace a few tablespoons of it with chipotle powder which gives a great flavour and adds some nice heat. I usually go pretty hard on the chilli powder but remember not everyone like the heat so adjust according to the people that will be eatiing it....

About the ginger. I think it is a very important ingredient. If you don't have any, get some. simple

Do this
1) Mix the ingredients thoroughly in a bowl. If the sugar is lumpy, crumble the lumps by hand or on the side of the bowl with a fork. If you store the rub in a tight jar, you can keep it for months. If it clumps just chop it up, or if you wish, spread it on a baking sheet and put it in a 250F oven for 15 minutes to drive off moisture. No hotter or the sugar can burn.

2) For most meats, sprinkle just enough on to color it. Not too thick. For ribs that you will not add sauce to, apply the rub thick enough to make a crunchy crust, about 3 tablespoons per side (remember to Skin 'n' Trim the back side). To prevent contaminating your rub with uncooked meat juices, spoon out the proper amount before you start and seal the bottle for future use. Keep your powder dry. To prevent cross-contamination, one hand sprinkles on the rub and the other hand does the rubbing. Don't put the hand that is rubbing into the powder.

3) Massage the rub into the meat at least an hour before cooking. Better still, rub them up, wrap them in plastic wrap, and refrigerate them overnight before cooking.
 
Now for the cooking

I use the dry rub to Marinate the ribs. After coating both sides (making sure to get the rub into every little space) I put them on a plate, cover in glad rap and let sit for anything from 4 hours to over night. The reason I use a dry rub with my ribs is that you want to draw out a lot of the liquid from the meat. My dry rub has salt and sugar in it which helps get rid of the liquid and at the same time some of the liquid is locked into the rub which forms a lovely layer on the meat (bark)........I make sure to drain the excess liquid off the plate every so often.

I get my smoker to 120 degrees C and slow smoke/cook my ribs for about 3.5 - 4 hours. You can use your oven or even your BBQ for this as well, with no real change to finished product but you will not get that smokey flavour and nice pinky colour to the meat that the smoke gives. If using the oven make sure you have a drip tray under the ribs as they WILL drip. don't increase the heat thinking that it will cook faster. yes it will cook faster but the meat will be crunky on the outside and nowhere near as soft and juicy on the inside.....

After the 3.5 - 4 hours of cooking I then get my home made BBQ sauce (specifically for ribs but can be used for other stuff) and coat the ribs with a oil brush then I put it back in the heat for about 20 minutes to bake the sauce into the ribs. Repeat this process once more (you only want 2 coats of sauce. anymore will be to much depending on the sauce) then let the ribs cool for about 15 minute so they don't burn you then RIP IN!!!!!!

I haven't been doing ribs all that long compared to some but in my short time I have found this dry rub / sauce combination to be heavenly in it creation............I'm sure this combo was handed to moses after the 10 commandments and who am I to argue with such devine power......hahahaha :D
 
now thats a recipe! Will be having a crack at it this weekend. What weight of ribs can a hungry person eat?
 
Well I usually smoke about 4 - 5kg worth (including bones), so I can enjoy them for a day or 2 and also I'm usually expected to share :( lol

I think I also forgot to add a step when preparing the ribs........

Before you apply the rub, you need to remove as much excess fat as possible, not only for health reasons but because you will find that a lot of you rub will drip off with the fat if you leave to much on............Also you need to remove the thin layer of skin off the bone side of the ribs. Firstly so you can remove the fat under it and secondly so you get better contact with the rub on the meat.....plus this layer of skin doesn't break down well in the heat so you get that not so pleasant feel when you eat it.....

I find the best way to remove the layer of skin is to cut it in a few places with a knife and then use paper towel to grip it and it comes off semi easy
 
Cooked up about 3kg today. I really need to make some kind of rib rack to be able to fit more than that in the drum standing up... shouldn't be too hard to weld something up!

I found the ribs a little on the dry side but I think it was just the ribs I got were a little smaller, probably because they were from wild pig. Or do they cut them a bit differently sometimes? Anyway the flavour was definitely there, sweet/smokey/savory/chilli and nice and sticky.
26022011781.jpg
 
just a comment......Your rack seems to be very low in the UDS? After much research (US smoking forums) i've found that the rack has to be a minimum of 42 inches from the top of the heat source.

Having your rack that low will reduce your cooking time and as such will reduce the amount of flavour that is adsorbed, and will also not give the meat that soft fall apart feeling that a slow cooked food should have. This will alos account for the dryness because ribs at the depth in the UDS would probably only need 2.5 hours max.........

You would find your food will become sooo much better if you raise the rack up about 18 inches.....

Just a thought

and in regards to the rib racks, you need to cook the ribs a little longer due to the ribs being on there side.
 
Wouldn't it work the same as long as the temperature at cooking height is the same? I had 120C at the level of the grill the whole time.

Still, I am planning on adding a higher rack as well - think it would be useful to have 2 in there.
 
hey chop dog was looking at one of those the other day. looked fairly complete and ready to go.
 
anyone one out there in sydney got a spare weber lid and rack???????????
 
just got my new smoker. its from aldi which is the rebadged hark. works beautifully. smoking a beef roast tomorrow.
 
anyone one out there in sydney got a spare weber lid and rack???????????

I bought a brand new rack from BBQ's Galore for 20 odd bucks, and used the flat lid of a 44 gallon drum with exhaust valves built into it (see my pics earlier in this thread) - until I found an old webber lid on the footpath.
 
just got my new smoker. its from aldi which is the rebadged hark. works beautifully. smoking a beef roast tomorrow.

Is that one of the tall upright jobs they had in the stores some time back Barls? If so I'd be interested to see how it performs.

cheers

Browndog
 

Latest posts

Back
Top