Can I ask why these are the only two options? Is it not possible to drill through the chest freezers as you can with the fridge?
Im looking at a keg setup next year possibly, just gathering info atm.
As long as you know where the cooling lines are you could go through the freezer wall. Most build collars so they don't need to drill through, plus it allows them to put kegs on the compressor hump so can fit more kegs in.
With fridges there aren't any cooling lines in the door so that's why you see taps mounted on the door.
@mxd; Neither at this stage. Still early days so meh. I'm leaning towards a collar so i can at least put it back together again if I ever want to use it for other things.
@Mark^Bastard; Yeah that's my study so it's beer + network lab. Speaking of which I need to book my ICND1 test.
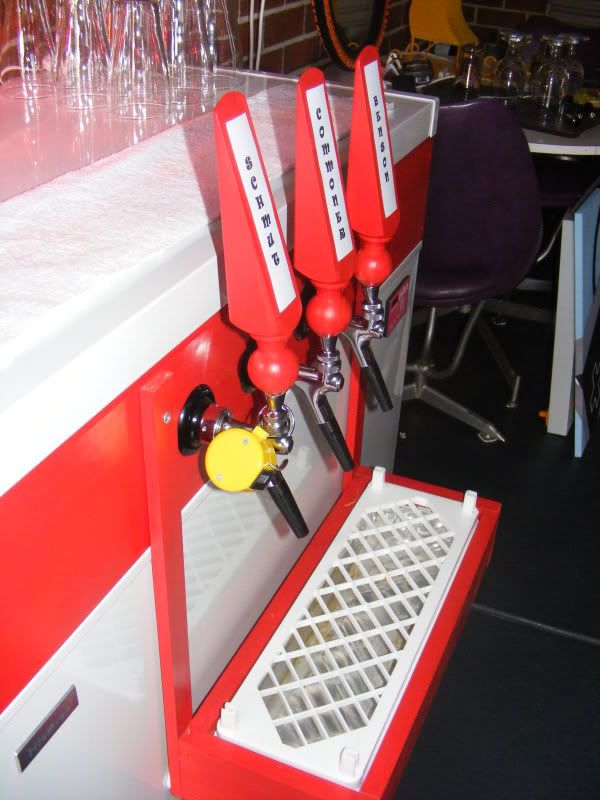
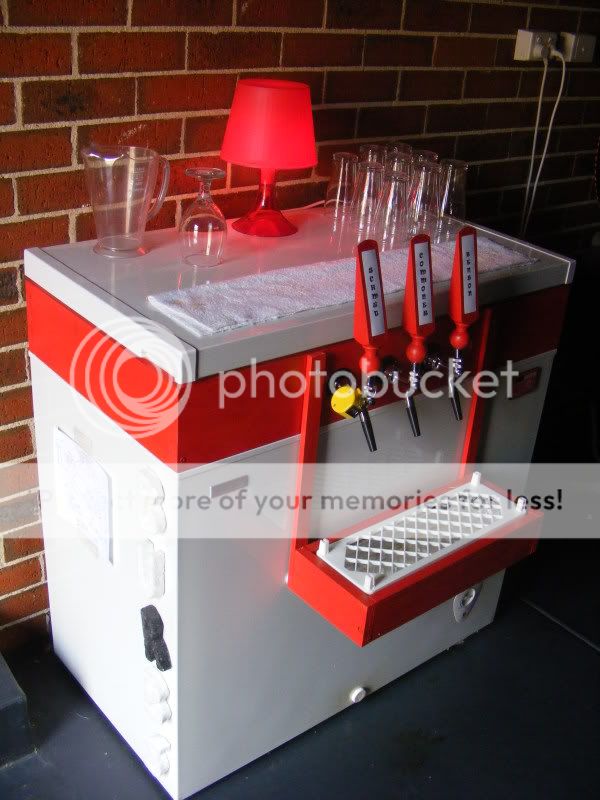
More additions to my keezer, its starting to look really good. :beerbang: :beerbang:
Painted up some door stops for beer tap handles. Still need to make up some colour name tags and laminate them but this will do for now. $5 ea from Bunnings.
More additions to my keezer, its starting to look really good. :beerbang: :beerbang:
Painted up some door stops for beer tap handles. Still need to make up some colour name tags and laminate them but this will do for now. $5 ea from Bunnings.
haha we used 3 of those clickers on my bucks weekend. one for alcohol, one for greenery and one for errr..."other" things...they were at huge numbers by sunday night it was just madness.
i like it as a keg counter only problem is getting pissed ppl to remember to click it. would be great if you could hook it directly to taps.
More additions to my keezer, its starting to look really good. :beerbang: :beerbang:
Painted up some door stops for beer tap handles. Still need to make up some colour name tags and laminate them but this will do for now. $5 ea from Bunnings.
Well, since my freezer died, I ended up buying a kegmate... and since you've all seen a million photos of those, and mine's no different, I thought I'd post a nice 3D anaglyph of my taps:
Put your red/cyan 3d glasses on and pour yourself a beer. *Apparently doesn't work with the glasses from Avatar... and since I haven't seen it, I don't know what type they are.
Two images from slightly different positions (one next to each other. the closer the subject, the closer the gap.). I use the gimp, but photoshop can do it too. You want to layer the left image on top of the right, then put a red layer between them, and a cyan layer (invert a red layer is the easiest method) on the very top. Set the red and cyan layers' modes to "screen", then make only the top two layers visible, and merge the cyan and left layers together (in gimp, it's "merge visible layers" hence the reason for making the other layers invisible) and set the resultant layer to mode "multiply". Then make the other two layers visible and move the top layer so the separation creates a pleasing 3D image in the glasses.
That's only one method, but it's an easy method. Another method I've used involves decomposing to RGB layers and recomposing with the other image as one of the layers, but it's complicated, and annoying, and the above method is just as good, but easier to do.


")