As with most things yeast related, there are many ways to achieve the same result, but here the process I use to reculture yeast from a slant and grow it up to a starter of suitable pitching volume.
In this example I'm using a 6m old home-made slant of Wyeast Klsch yeast (2565) and I wanted to make a starter that was 2L in volume.
The starter was stepped up from about 15ml, to 100ml, 400ml and then 2L.
First step was to let the slant come up to room temp, gather the ingredients and clean and clean/sanitise everything:
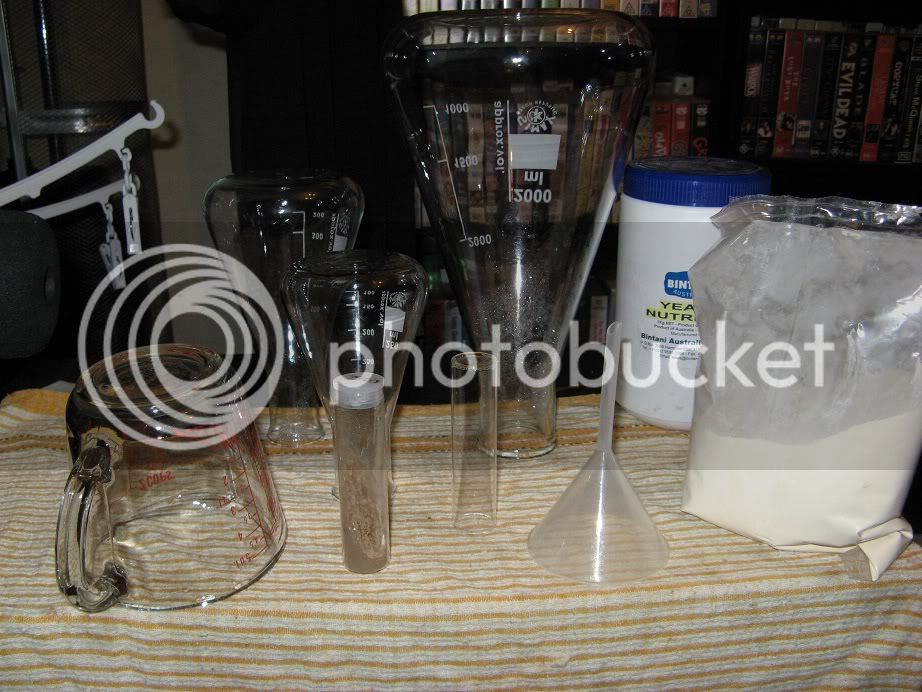
The saved wort I had kept in the fridge for a couple of months was a bit gunky, so I made the starter wort by boiling about 175g of LDME (and some yeast nutrient) in a little more than 2L of water - aiming for an OG a bit above 1.030.
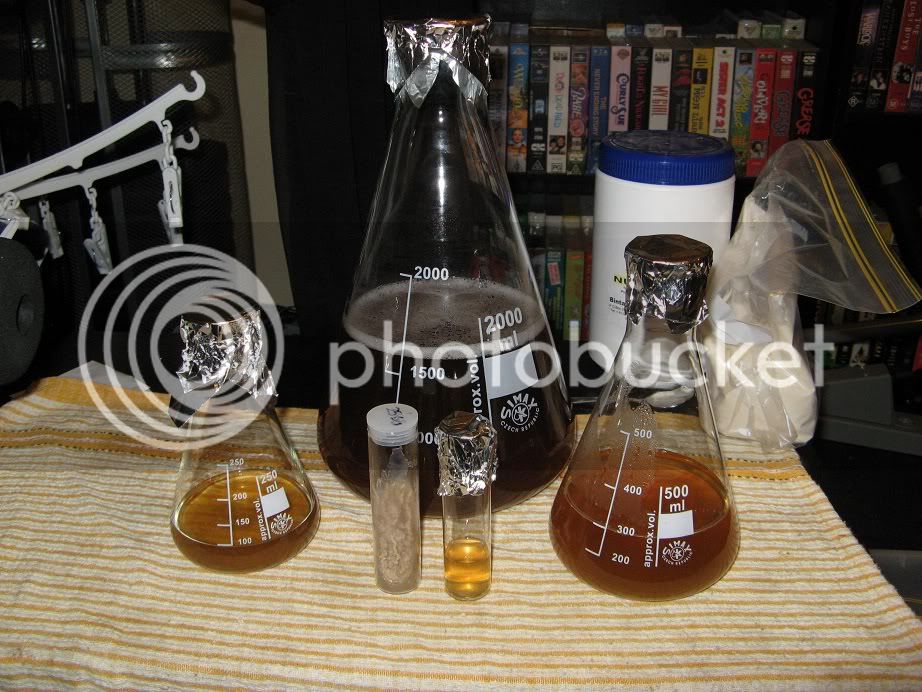
While the wort was still boiling hot I carefully tipped it into the various containers, topped them with aluminum foil and left them to cool:
The 15ml test tube of wort was quickly cooled in some cold water and then added to the slanted yeast.
Using a (plastic) inoculation loop I carefully scraped the yeast from the surface of the slant, trying to remove all the yeast but leave the solid agar mix behind:
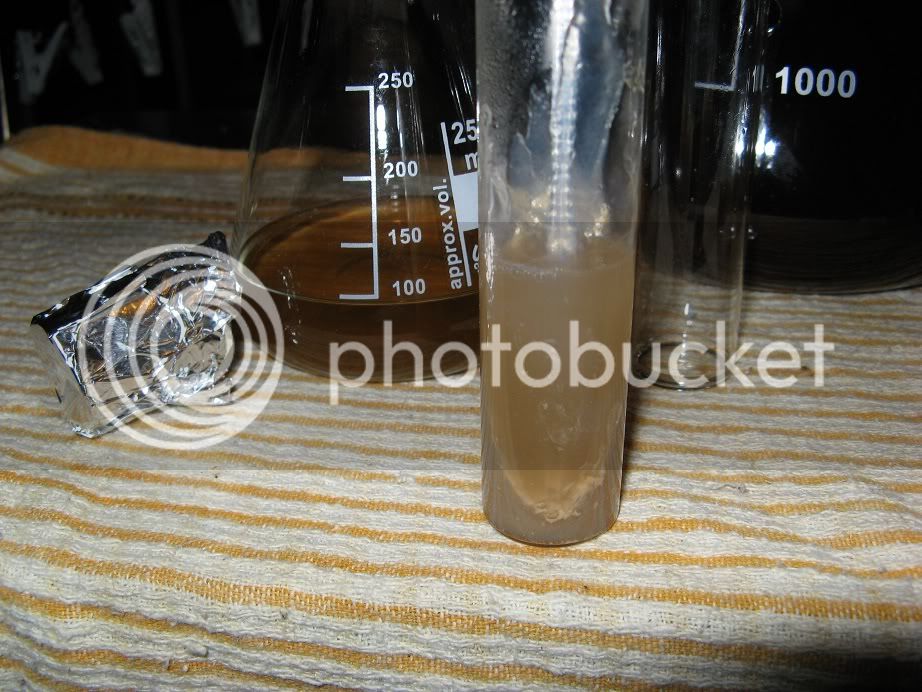
After tipping the 15ml wort and yeast back into the clean test tube, I kept it on my computer desk, so I'd be reminded to shake it often.
The temperate was generally about 20C and the stater was allowed to ferment out for 24 hours, before stepping up to 100ml:
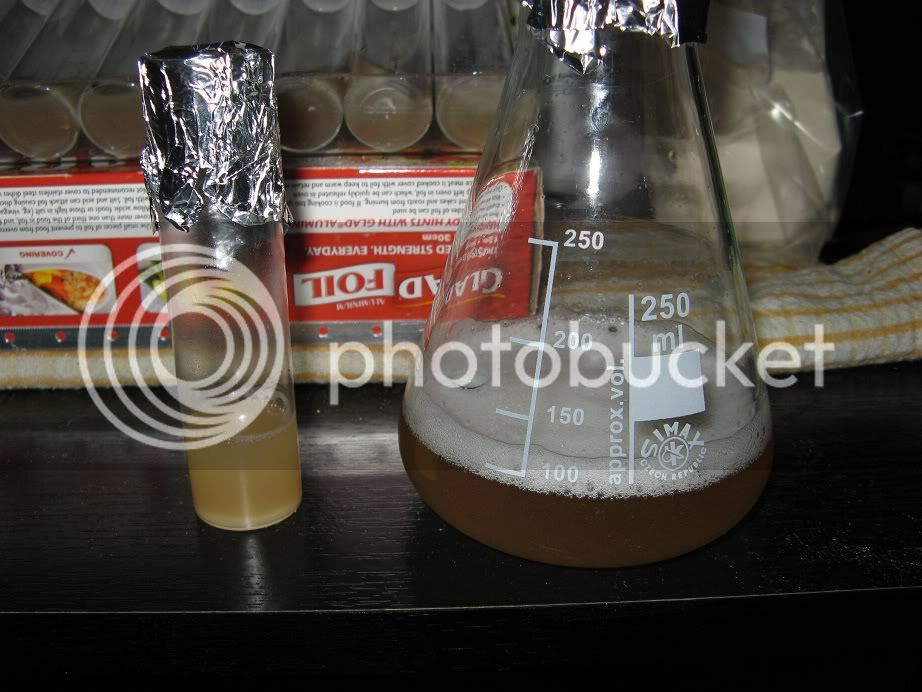
There is already a small layer of yeast on the bottom of the test tube.
At this stage due to the very small volume of beer a smell/taste test is not going to tell you much, as I suspect there were a few dead yeast cells scraped off the slant.
The 100ml starter was put onto my el-cheapo DIY stir plate and allowed to ferment out for another 24h, before stepping it up to 400ml:
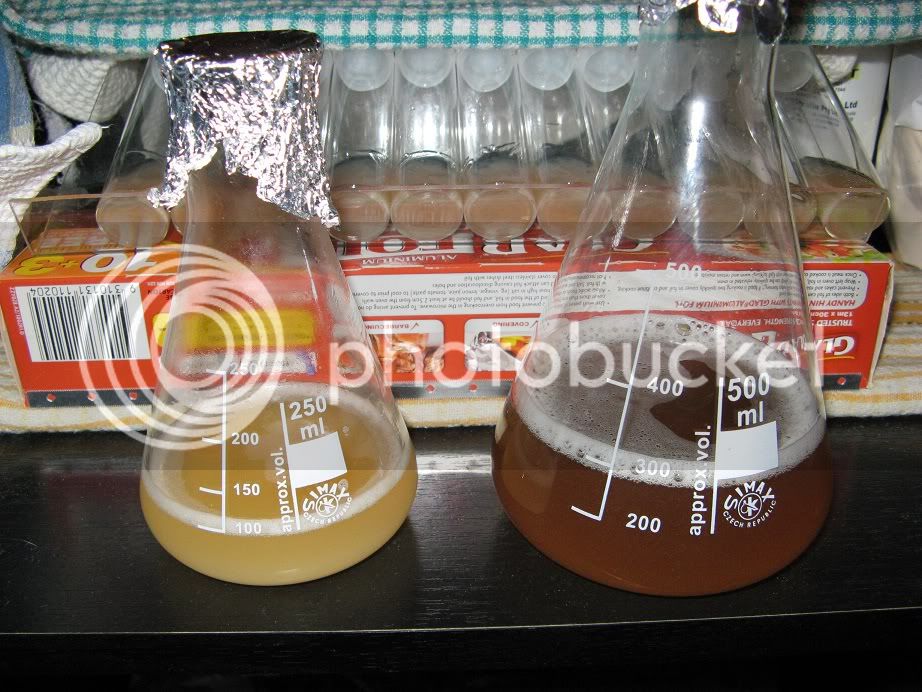
The foam on the yeasty-starter on the left is from yeast fermentation, and the plain wort on the right from me shaking the crap out of it for about 15 mins before pitching the yeast.
(I had a little left over wort so I added some agar agar and made the new blank slants that can be seen in the background.)
After another 24h on the stir plate, the 400ml starter had created a nice layer of yeast, which I left to settle out for a little while so I could take a taste/smell sample:

Klsch yeast is not the nicest tasting stuff so I wanted to try to sample some beer without too much yeast in it.
After it had passed the taste-test it was pitched into the final 2L volume:
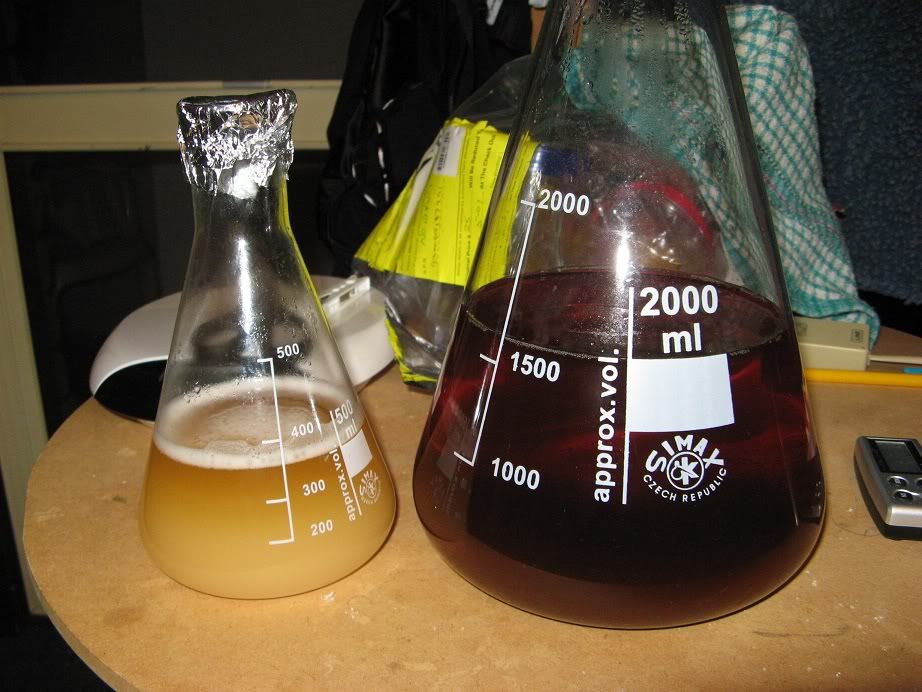
The yeast was still crawling out of the top of the flask after 24 hours, so I left it on the stir plate for another day to let it complete fermenting.
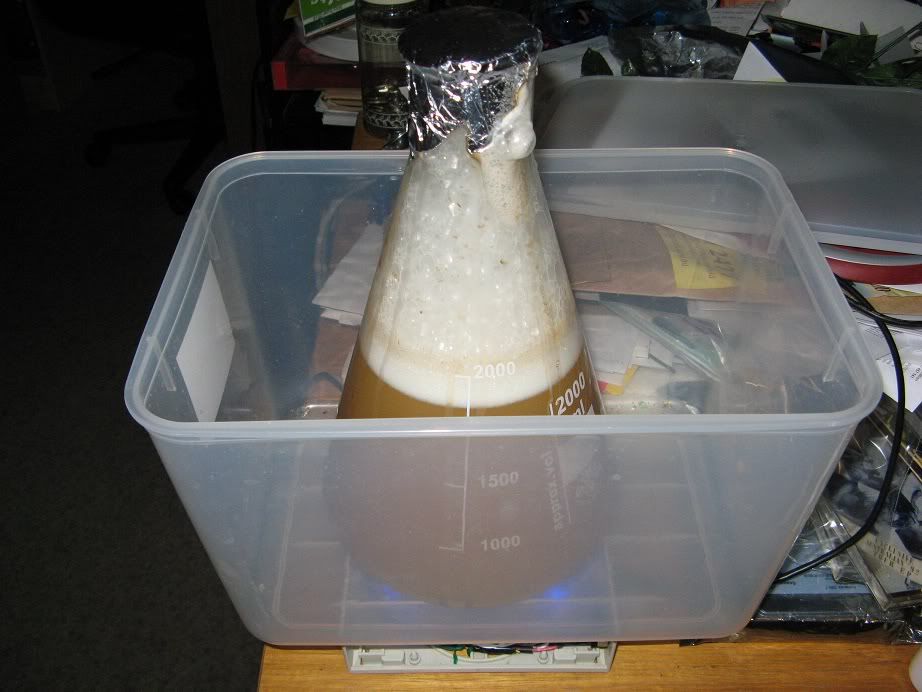
The 9l square plastic container may look ugly, but there is no way the yeast can over-flow it and short out the electronics in the stir plate.
After one more day - this time in the fridge:
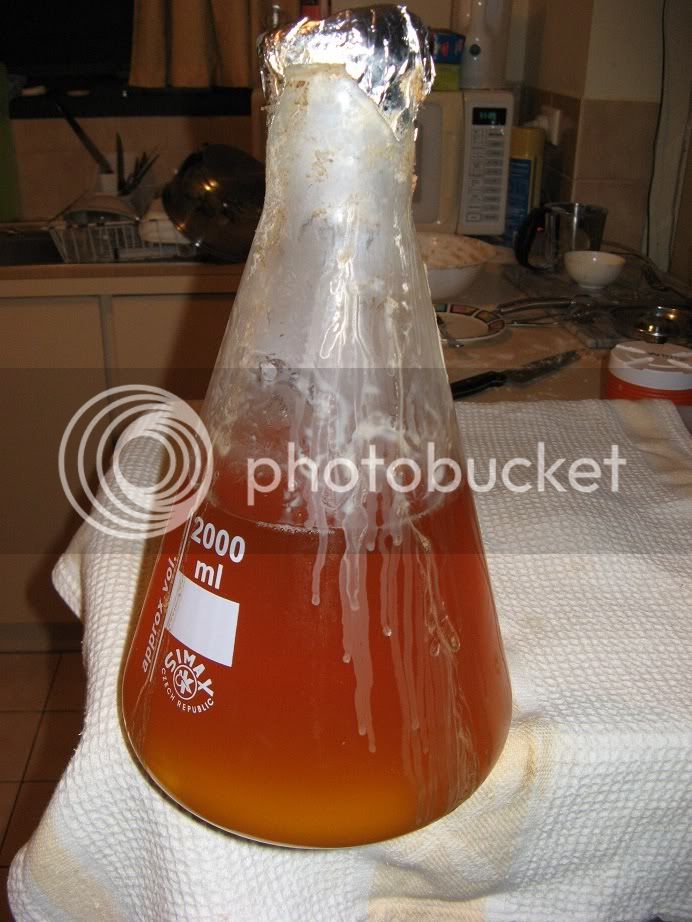
Any yeast that did not escape in the previous step settled to the bottom of the flask:
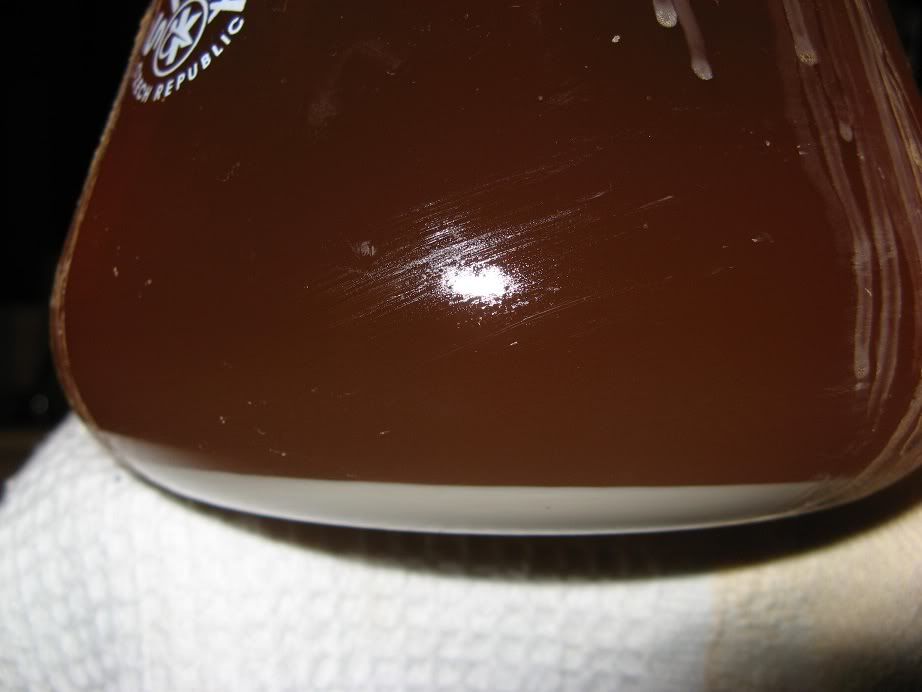
The spent beer is now ready to be decanted, so yeast can be pitched into a batch of beer.
In this example I'm using a 6m old home-made slant of Wyeast Klsch yeast (2565) and I wanted to make a starter that was 2L in volume.
The starter was stepped up from about 15ml, to 100ml, 400ml and then 2L.
First step was to let the slant come up to room temp, gather the ingredients and clean and clean/sanitise everything:

The saved wort I had kept in the fridge for a couple of months was a bit gunky, so I made the starter wort by boiling about 175g of LDME (and some yeast nutrient) in a little more than 2L of water - aiming for an OG a bit above 1.030.
While the wort was still boiling hot I carefully tipped it into the various containers, topped them with aluminum foil and left them to cool:

The 15ml test tube of wort was quickly cooled in some cold water and then added to the slanted yeast.
Using a (plastic) inoculation loop I carefully scraped the yeast from the surface of the slant, trying to remove all the yeast but leave the solid agar mix behind:

After tipping the 15ml wort and yeast back into the clean test tube, I kept it on my computer desk, so I'd be reminded to shake it often.
The temperate was generally about 20C and the stater was allowed to ferment out for 24 hours, before stepping up to 100ml:

There is already a small layer of yeast on the bottom of the test tube.
At this stage due to the very small volume of beer a smell/taste test is not going to tell you much, as I suspect there were a few dead yeast cells scraped off the slant.
The 100ml starter was put onto my el-cheapo DIY stir plate and allowed to ferment out for another 24h, before stepping it up to 400ml:

The foam on the yeasty-starter on the left is from yeast fermentation, and the plain wort on the right from me shaking the crap out of it for about 15 mins before pitching the yeast.
(I had a little left over wort so I added some agar agar and made the new blank slants that can be seen in the background.)
After another 24h on the stir plate, the 400ml starter had created a nice layer of yeast, which I left to settle out for a little while so I could take a taste/smell sample:

Klsch yeast is not the nicest tasting stuff so I wanted to try to sample some beer without too much yeast in it.
After it had passed the taste-test it was pitched into the final 2L volume:

The yeast was still crawling out of the top of the flask after 24 hours, so I left it on the stir plate for another day to let it complete fermenting.

The 9l square plastic container may look ugly, but there is no way the yeast can over-flow it and short out the electronics in the stir plate.
After one more day - this time in the fridge:

Any yeast that did not escape in the previous step settled to the bottom of the flask:

The spent beer is now ready to be decanted, so yeast can be pitched into a batch of beer.


