First Brew, Freaking Out!

Australia & New Zealand Homebrewing Forum

Help Support Australia & New Zealand Homebrewing Forum:

This site may earn a commission from merchant affiliate links, including eBay, Amazon, and others.
Smoop, for what it's worth, this is what I've learnt in 4 months of brewing:

1. Don't panic, it's really hard to screw up a kit beer. You've accidently done this brew a favour by keeping the temps low. I wouldn't go any lower though as kit yeast goes to sleep below 16 degrees.

2. Toss the lid and airlock and use glad wrap instead. There is plenty of info here about using cling wrap. All the airlock does is confuse new brewers.

3. I haven't got to the stage of brewing in a temperature controlled fridge but I have got a heater pad and an stc-1000 thermostat (plenty of info here about them). I suggest you do the same. I've got mine set to 18 degrees and it's set and forget... When summer rolls around and I don't need the heater pad, I might look at grabbing an old fridge to continue brewing at a constant temperature. It's good for your beer and good for your sanity :)

4. You will quickly graduate from kit and kilo (your current brew) to kit and bits (substituting the kilo of dextrose/brew booster with malt extract and maybe chucking in some extra hops) to doing fresh wort kits (that's were I'm at) to all grain brewing.

5. For you first few brews you will be checking the gravity every other day. You will soon realise that all that does is waste good beer :rolleyes: especially as you have to pour off a bit out of the tap and chuck it (gunk accumulates in the neck of the tap and will throw off your reading) before you take a sample. I leave my brews in the fermenter for 2 weeks and only take 2 readings, 1 when I first put it down to check OG and one on bottling day to check FG so I can work out the alcohol content. I've never had a brew that wasn't at an acceptable FG after 2 weeks.

6. Even the worst kit beer is better than VB :icon_cheers:
 
Also, if I am going to be leaving my beers for up to 3 weeks it looks like I am going to have to buy another barrel so I can brew one ever 1 and a half weeks. Haahahahaha WHEEEEEEE!!!!

search for Bunnings fermentor, including tap <$20
 
You guys are awesome. Thank you all for your information. You have definitely put my mind at ease and saved me from bottling a brew too early and given me information on making my first brew a lot better than it would have :)
 
Here's another tip- don't expect your first brew to taste really awesome. It will be drinkable, but remember you can't expect to pour in a can of goop and some sugar and water and expect it to taste exactly like the commercial offering.

So relax, it's only your first of many brews to come! If you happen to make some that you don't like, never fear- you can make more!

My other recommendation is- despite the instructions saying you can drink it after 2 weeks, it will likely not taste very good and will definitely not be carbonated properly yet.

If you can, and especially in this weather, wait a month before cracking one. The wait will be worth it.

My last tip- go to one of the forum sponsors and buy some Star San no rinse santiser. It lasts FOREVER and is the easiest way of sanitising your bottles. And after you pour out a beer, rinse the bottle out with water straight away, then all it will need is a spray of Star San next time you're ready to bottle and you're done! Easy!
 
I found what got me up to speed on all things brewing was a book - How to Brew by John Palmer.
I have read that book front to back at least 10 times and still sit down with it to brush up on my brewing skills.
you can get it from good homebrew stores, amazon http://www.amazon.com/How-Brew-Everything-...rds=how+to+brew , or the first edition is available free on the net http://www.howtobrew.com/

This is hands-down the best brewing resource out there. Read it, love it, know it back to front. Your future beer will thankyou
 
Last edited by a moderator:
What does this mean, if you dont' mind me asking.

I'd assume a bog stock LHBS fermenter

fermenter-30lwindow-lid-complete.jpg
 
as opposed to an open brewing kit, such as a yorkshire square :lol:

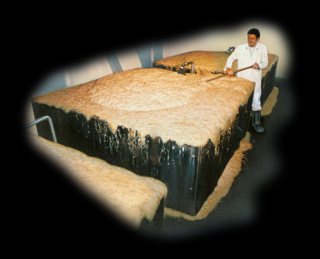
yorkshire-square.jpg


Was curious, because someone mentioned to me a style of coopers fermenter that sounded like it had no airlock or screw on lid, just an outer sleeve that pushed upwards when co2 was produced. Sounded gimmicky. But yea, smoop, as mentioned before, bunnings sell perfect fermenting barrels for around 15 bucks. Get a couple, so you can run a few brews at different stages, and never run out.

The new coopers kits in Big W use a "collar" where it just lifts up once the pressure gets high enough instead of mucking around with an airlock. Couple of my mates use them - but I don't think they'd be very good past primary fermentation. I know one friend actually didn't get to his brew for a week or so after it "fell" and he got an infection out of it.

You'd be better off with a trip to the big green shed and some glad wrap than those things...

Going OT here but thought I'd throw this in. I've got one of those new Coopers fermenters, it's called the "DIY" fermenter. Got it off a mate unused for a carton of VB (unwanted present). I used it a few times and it works but has both really clever and really dumb design features.

Really clever: Clear rather than opaque plastic so you can clearly see what your brew is doing. Click to detach tap that easily comes apart for thorough cleaning. No bubbling airlock to confuse new brewers. It works on positive pressure to keep carbon dioxide in and oxygen out, much like glad wrap.

Really dumb: The Krausen collar. As if a coopers kit brew would ever need the extra height of a removable collar to stop the thing overflowing. Never used it, never needed it, just one more thing to clean. The tap is too high in the fermenter. You have to start tipping the fermenter to get the beer out a lot earlier than a traditional LHBS fermenter hence stirring up the trub earlier than necessary. I found that I got one less longneck out of the DIY compared to a standard fermenter due to all the crap being stirred up. Also it has little legs molded into the plastic that might make it nice and stable but makes a heating pad all but useless...
 
search for Bunnings fermentor, including tap <$20

This. I bought a Coopers kit from Big W mainly because of the accessory's in it.
I then bought a fridge, a temp controller and 2 of the square 30L water containers from bunnings.
I strongly urge you to spend the $50-100 on a fridge (ebay, gumtree, papers) that you can fit 2+ fermenters in as well as the $15 on a temp controller.
With a fridge you can brew your ale's at a good temp then once theyre done you can cold condition them for a week or two, all in one unit, without having to move them or rack to secondary.
A fridge will also let you brew lagers, and brew them all through summer.
 
What does this mean, if you dont' mind me asking.


There are two types of brew barrels I believe. One witch is sealed and has a bubbler and the other is open with just a cloth draped over it. I believe it was in a book a read and thought it was important to add as much info in my post as possible.
 
This. I bought a Coopers kit from Big W mainly because of the accessory's in it.
I then bought a fridge, a temp controller and 2 of the square 30L water containers from bunnings.
I strongly urge you to spend the $50-100 on a fridge (ebay, gumtree, papers) that you can fit 2+ fermenters in as well as the $15 on a temp controller.
With a fridge you can brew your ale's at a good temp then once theyre done you can cold condition them for a week or two, all in one unit, without having to move them or rack to secondary.
A fridge will also let you brew lagers, and brew them all through summer.


I already have a temperature controller that I bought from the brew shop for a style of cooking called Sous Vide so all I need now is a fridge :)
 
search for Bunnings fermentor, including tap <$20

25L $15 + $2 for tap
30L $20

I got one the other day - and posted the pic and I'm as happy as they come with it - needed it for a 20L Weissbier using 3638 (no 3068 at the time).

Most of my beers are 25L or so, so I get some excellent head room in it for the non-agressive yeasts.
 
Going OT here but thought I'd throw this in. I've got one of those new Coopers fermenters, it's called the "DIY" fermenter. Got it off a mate unused for a carton of VB (unwanted present). I used it a few times and it works but has both really clever and really dumb design features.

Really clever: Clear rather than opaque plastic so you can clearly see what your brew is doing. Click to detach tap that easily comes apart for thorough cleaning. No bubbling airlock to confuse new brewers. It works on positive pressure to keep carbon dioxide in and oxygen out, much like glad wrap.

Really dumb: The Krausen collar. As if a coopers kit brew would ever need the extra height of a removable collar to stop the thing overflowing. Never used it, never needed it, just one more thing to clean. The tap is too high in the fermenter. You have to start tipping the fermenter to get the beer out a lot earlier than a traditional LHBS fermenter hence stirring up the trub earlier than necessary. I found that I got one less longneck out of the DIY compared to a standard fermenter due to all the crap being stirred up. Also it has little legs molded into the plastic that might make it nice and stable but makes a heating pad all but useless...

I have one of these kits, and i agree with this assessment 100%. Using as a primary is no problem at all. Using it for racking, where fermentation has slowed or stopped, might be a bit risky because it relies on the positive pressure created by the CO2 production.
 
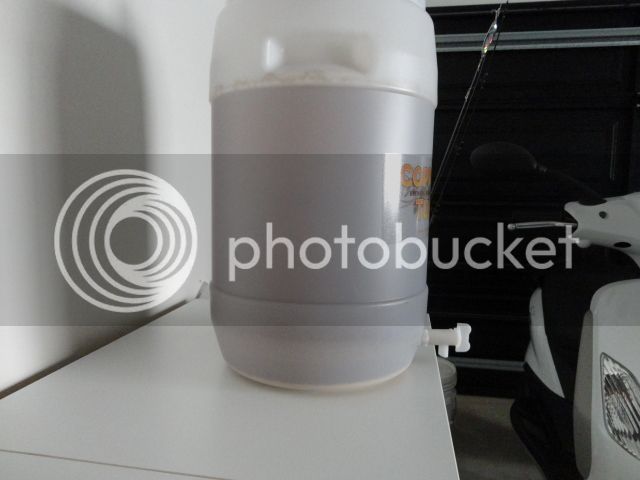
OK, I woke up this morning and had a look in at my brew just to make sure my baby was still there :) and I found something interesting. there has been a small layer of sediment on the bottom and I knew this was normal but this morning I woke up to a 2 - 3 inch layer of cloudy stuff above the sediment.
What could this be ?
Is this normal ?
Is this the reason you guys have told me to leave my brew longer to get a clearer beer ?
This is exciting stuff and I need to know.


I hope to can see it here.


DSC00665.jpg
 
what yeast did you use? Could just be break material etc...

dont fret, if it's edible the yeast willl get to it, if it isnt it'll drop out

Yob
 

Latest posts

Back
Top