Using A Kettle Element....covering Wires Etc

Australia & New Zealand Homebrewing Forum

Help Support Australia & New Zealand Homebrewing Forum:

This site may earn a commission from merchant affiliate links, including eBay, Amazon, and others.

pokolbinguy

The Pokolbin Brewhaus and Winery.
Joined
7/4/06
Messages
3,027
Reaction score
11
G'day All,

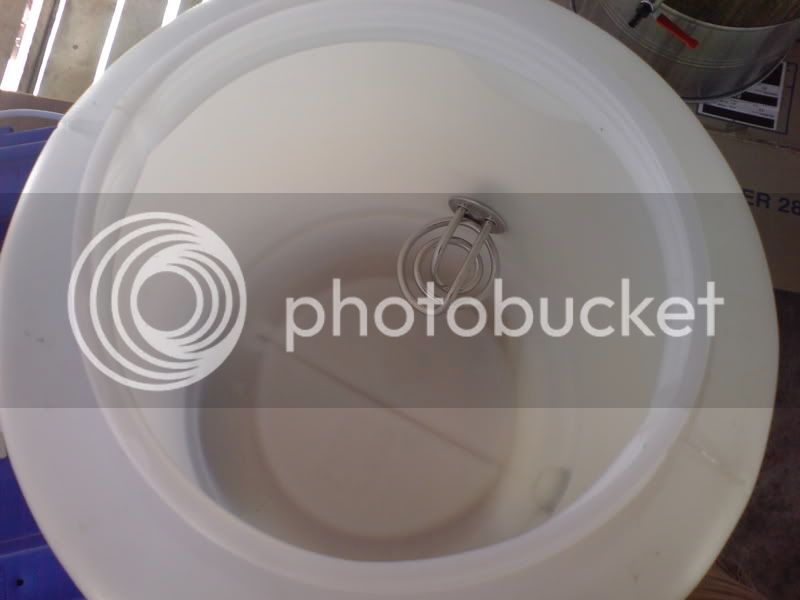
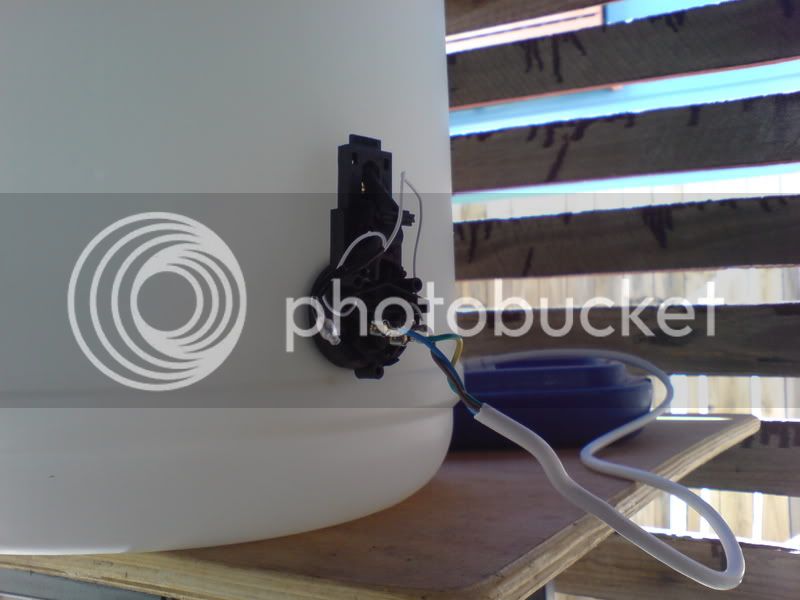
I just pulled apart a cheap corded kettle to get the element out to put in my hlt and I was wondering what others have done to cover up the wiring and ugly plastic housing that will sit on the outside.

I hope this makes sense.

Cheers, Pok
 
Use a cheap project box from the dick or jaycar. These things usually require a non circular mounting hole, cut identical holes in the hlt and box, the silicon grommet from the jug normally accommodates the wall thickness of both the box and HLT in the groove.

Screwy
 
Use a cheap project box from the dick or jaycar. These things usually require a non circular mounting hole, cut identical holes in the hlt and box, the silicon grommet from the jug normally accommodates the wall thickness of both the box and HLT in the groove.

Screwy

Thanks for the info Screwtop, I just asked the gf what she thought and she came up with the same idea....good to hear we are on the same track :D

Cheers, Pok
 
no, use a quality project box from dick smith or jaycar. the quality ones are made out of ABS plastic and/or polycarbonate, have IP67 (read:good against dust and liquid ingress) seals and ratings, and temperature ratings suited to the task. The cheap black plastic ones will melt, leak, break, or a combination of all three.
 
A box.. now that would look neat. Maybe I should call my brewery the death trap lol
 
I used a hacksaw to trim back any unnecessary plastic from the element housing and it just sits on the outside of the kettle. I brew under cover, so rain isn't an issue and it would have to be a pretty serious leak to get water on the cabling itself. The circuit breaker should take care of that if it's an issue... but I don't think it will get to that.
 
When cutting the hole for the kettle element, did you cut one big hole? or a pattern of holes ????

I had the impression that you had to cut a number of holes however at closer inspection of the donor kettle it has one big hole.....now im a little confused...I would now assume one big hole will be best....this will be fun to drill!!

Pok

Problem Solved. Hole cut, element installed. Now to test the baby.

Pok's Brewery is finally coming along :D

Cheers, Pok
 
When cutting the hole for the kettle element, did you cut one big hole? or a pattern of holes ????

I had the impression that you had to cut a number of holes however at closer inspection of the donor kettle it has one big hole.....now im a little confused...I would now assume one big hole will be best....this will be fun to drill!!

Pok

Bit late on this query Pok.

I just drilled one hole using a holesaw (almost burnt out my cheapo drill!) and the three screws pressed against the silicone gasket that came out of the kettle. Not a drop has leaked since it was installed...
 
Bit late on this query Pok.

I just drilled one hole using a holesaw (almost burnt out my cheapo drill!) and the three screws pressed against the silicone gasket that came out of the kettle. Not a drop has leaked since it was installed...

Yep thats what I did, I figured it was the most logical way. Just finished test running it and all works fine. Not sure how long it will take to heat the whole keg of water up but I'll test that when I have all the wiring for the temp controller done.

Got to make a lid for my HLT....who ever cut the hole in the top of the keg im using cut a damn dodge hole. So I used some hose with a cut down one edge to cover it over.....might see if I can find an old big pan lid.

:D
 
forgot to mention - you'll need a cable gland for your box as well, to grip and seal around the cable. Also at Jaycar or dick's.

You could also get really carried away and use an IEC (kettle style) plug with a built in fuse and power switch built in to the box
 
forgot to mention - you'll need a cable gland for your box as well, to grip and seal around the cable. Also at Jaycar or dick's.

You could also get really carried away and use an IEC (kettle style) plug with a built in fuse and power switch built in to the box

I will just make a cover for it, to keep water at bay. I will put all my other wiring (fuses etc) in the control box that the temp controller will be mounted in but between now and then I have got to get my sparky mate to take a look.

Cheers, Pok
 
I've got a couple of questions regarding this setup,

is it just a std run of the mill kettle element fitted to a 50 litre keg ?

how long approx would it take to bring 45 litre to strike temp ?

Cheers
Yardy
 
This is my death bucket, it's a bunnings 'fermenter' and a $8 crazy clark kettle element.

It'll get from 20 to the boil within 60 minutes, insulation will help. I just use it for strike and sparge.

hltelement.jpg


death.jpg
 
Why didn't you use the kettle cord there Kram?? The dangerous bit looks like the wiring lugs??? If you replaced the cable it would atleast make it somewhat safer.

Pok

Waiting for Kram to get Flamed :ph34r:
 
I've got a couple of questions regarding this setup,

is it just a std run of the mill kettle element fitted to a 50 litre keg ?

how long approx would it take to bring 45 litre to strike temp ?

Cheers
Yardy


Hi Yardy,

When you finally get over here for a brewday you will see mine in operation. Saturday 21st is the next brewday, fancy coming?
36 lt @ 20 up to 74 in about 70 minutes, my HLT is insulated.

Cheers
Andrew
 
This is my death bucket, it's a bunnings 'fermenter' and a $8 crazy clark kettle element.

It'll get from 20 to the boil within 60 minutes, insulation will help. I just use it for strike and sparge.

hltelement.jpg


death.jpg


That's a bit deadly Kram, I would seriously consider at least using the correct cord.

Cheers
Andrew
 
Why didn't you use the kettle cord there Kram?? The dangerous bit looks like the wiring lugs??? If you replaced the cable it would atleast make it somewhat safer.

Pok

Waiting for Kram to get Flamed :ph34r:
Was expecting one of these posts, I like living on the edge... of death. <sarcasm

That is the kettle cord, it was a cordless kettle. So I stretched the lugs over to fit, they're on tight. The cord actually doesn't even heat up as much as my main kettle which is an old copper boiler with a 15amp cord.

I've got plenty of experience with stupid electrical work so i'm not worried. I'll be getting an RCD in the near future and i'll be fixing it up one day.

I wouldn't recommend this to anyone unless they are confident and know what they're doing.
 
DeathJr.jpg
This is my death bucket, it's a bunnings 'fermenter' and a $8 crazy clark kettle element.

It'll get from 20 to the boil within 60 minutes, insulation will help. I just use it for strike and sparge.

hltelement.jpg


death.jpg


Holy Moly mate!

DeathJr.jpg

Cover up those wires...some sparkies here must be feeling a bit wheezy

Batz
 

Latest posts

Back
Top