Small Batch Single Vessel Recirculating BIAB (for cheap?)

Australia & New Zealand Homebrewing Forum

Help Support Australia & New Zealand Homebrewing Forum:

This site may earn a commission from merchant affiliate links, including eBay, Amazon, and others.
All the parts have arrived. Time to start putting it together. Before I started drilling anything I had to give the 9v battery etching a go. The lines are not as sharp on the numbers due to running out of good quality masking tape, but turned out well and was ludicrously easy.

One thing I found with the fittings. The 12mm fittings I linked are too small for 12mm ID tubing. I've had to buy a 13mm hosetail to bridge a gap i couldn't fill with spare parts I had lying around.

FzD27YZ.jpg
 
Impy said:
Awesome setup Taki, with a lot of really creative improvisation. Mine will probably be over $300 once i add in all the control box elements.

The two areas for the biggest savings on my rig I can see would be the pot and the false bottom.

Where did you get the hop spider from? I'm looking for something exactly like that but all the ones i can find are ridiculously expensive, or the wrong size.
Hop spider is just a generic KegKing one with the arm bent to anchor it better to the side of the pot. The cheaper pots really do save quite a bit and with the inner false bottom setup it works quite well.
 
Alrighty. After a 6 month hiatus this project is almost finished!

Mistakes have been made and lessons learnt.

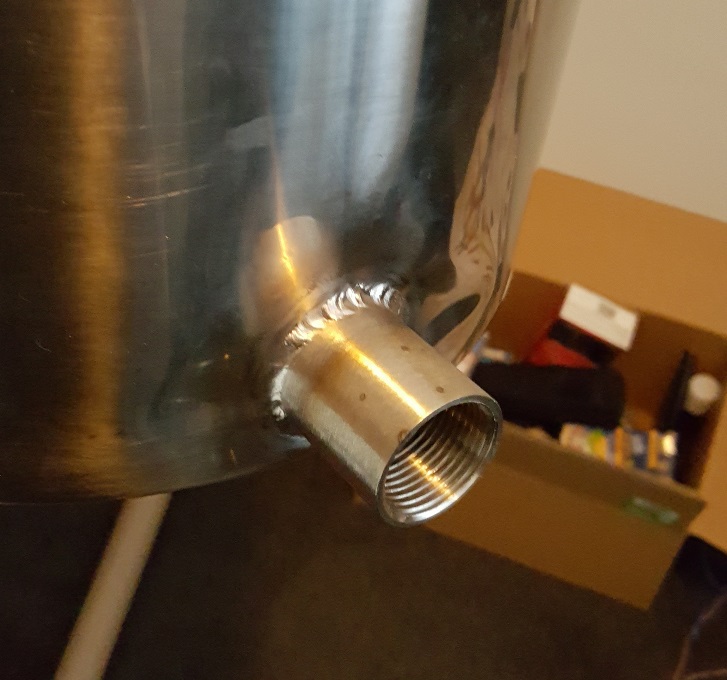
First of all, I learnt to not try to hand drill large (>1") holes in stainless steel. I was impatient and found a perfectly sized hole saw and arbor rather than buy and wait for a hole punch. So the 32mm hole needed to pass the heating element through was.. imperfect. This lead to issues with getting it water tight so I eventually got a plumber friend to weld on a 1"socket to the pot. Problem solved! (the warping of the pot is due to the weld pulling on the metal as it cools and it's a very thin pot)

nfpq9FH.jpg


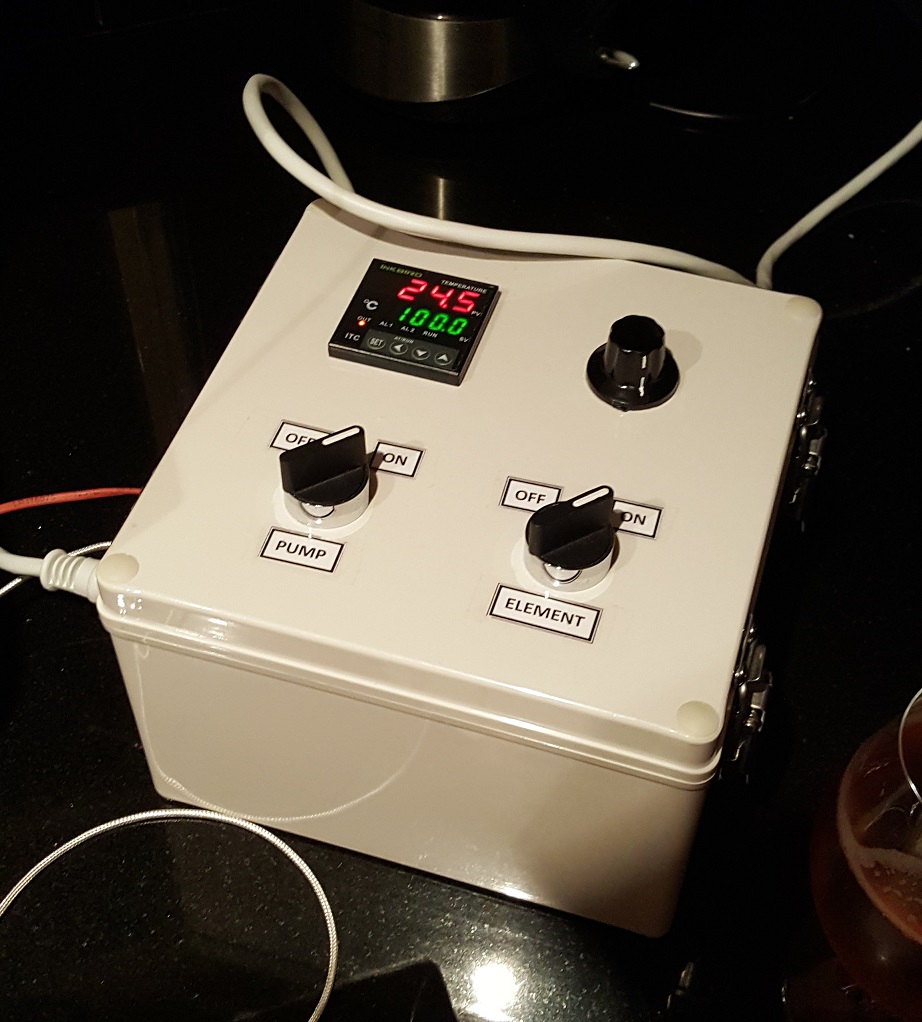
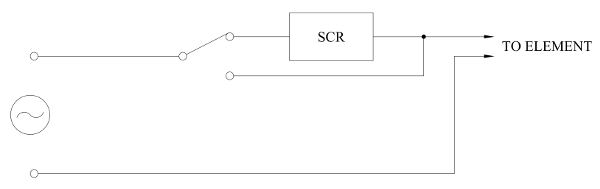
The wiring of the control box was daunting and it took me ages to get around to actually doing it. but in the end it turned out really great (first test run was last night)

Progress pics of control box - http://imgur.com/a/7oVhK

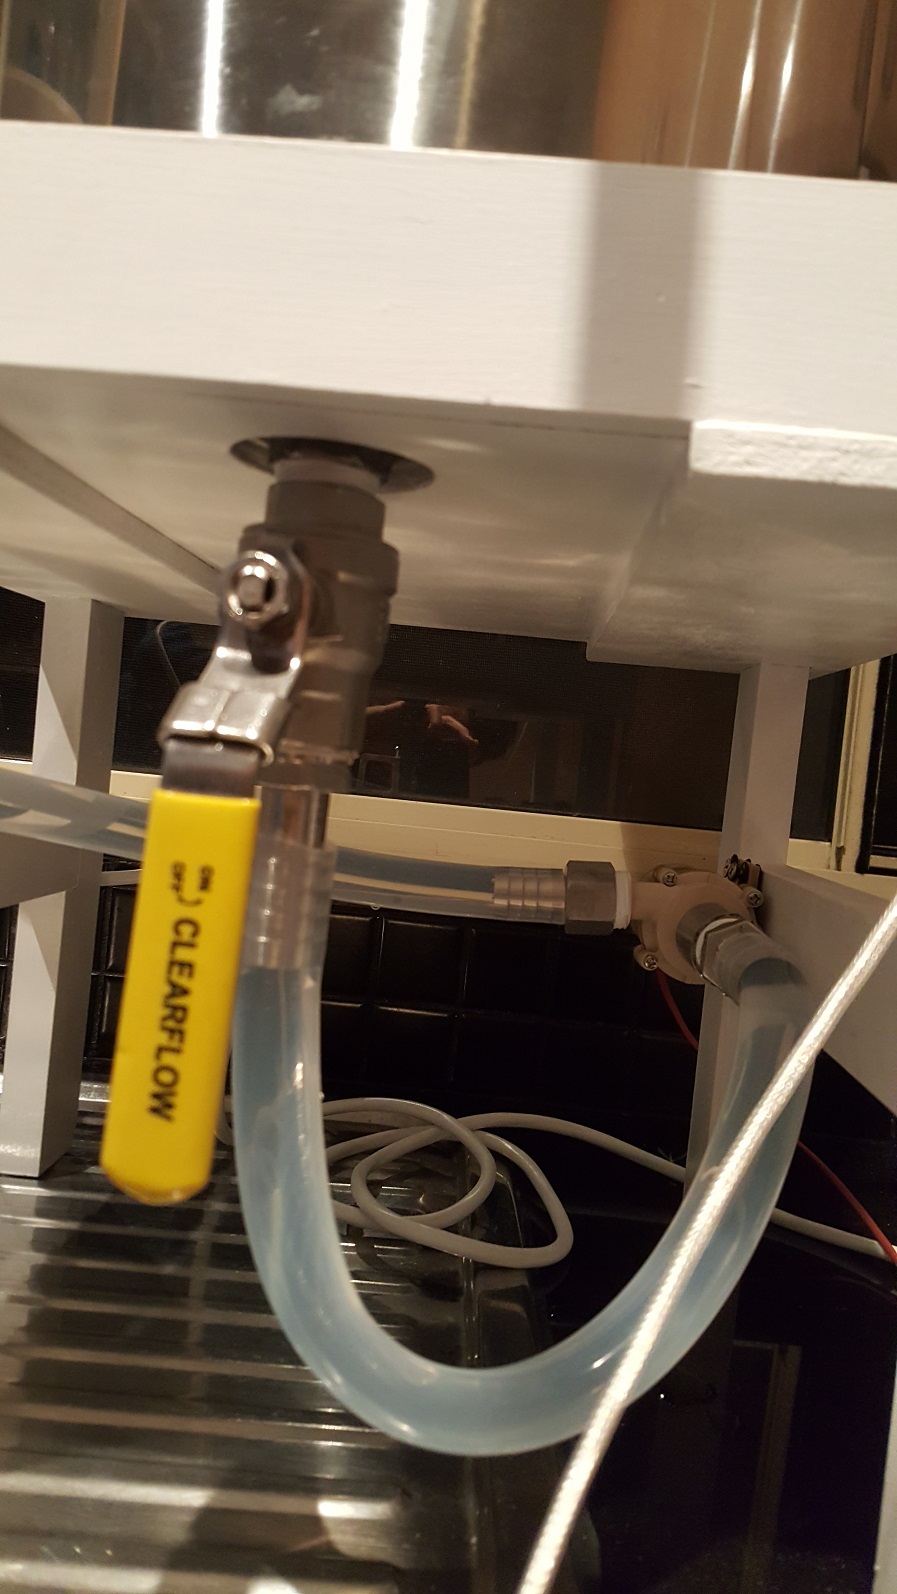
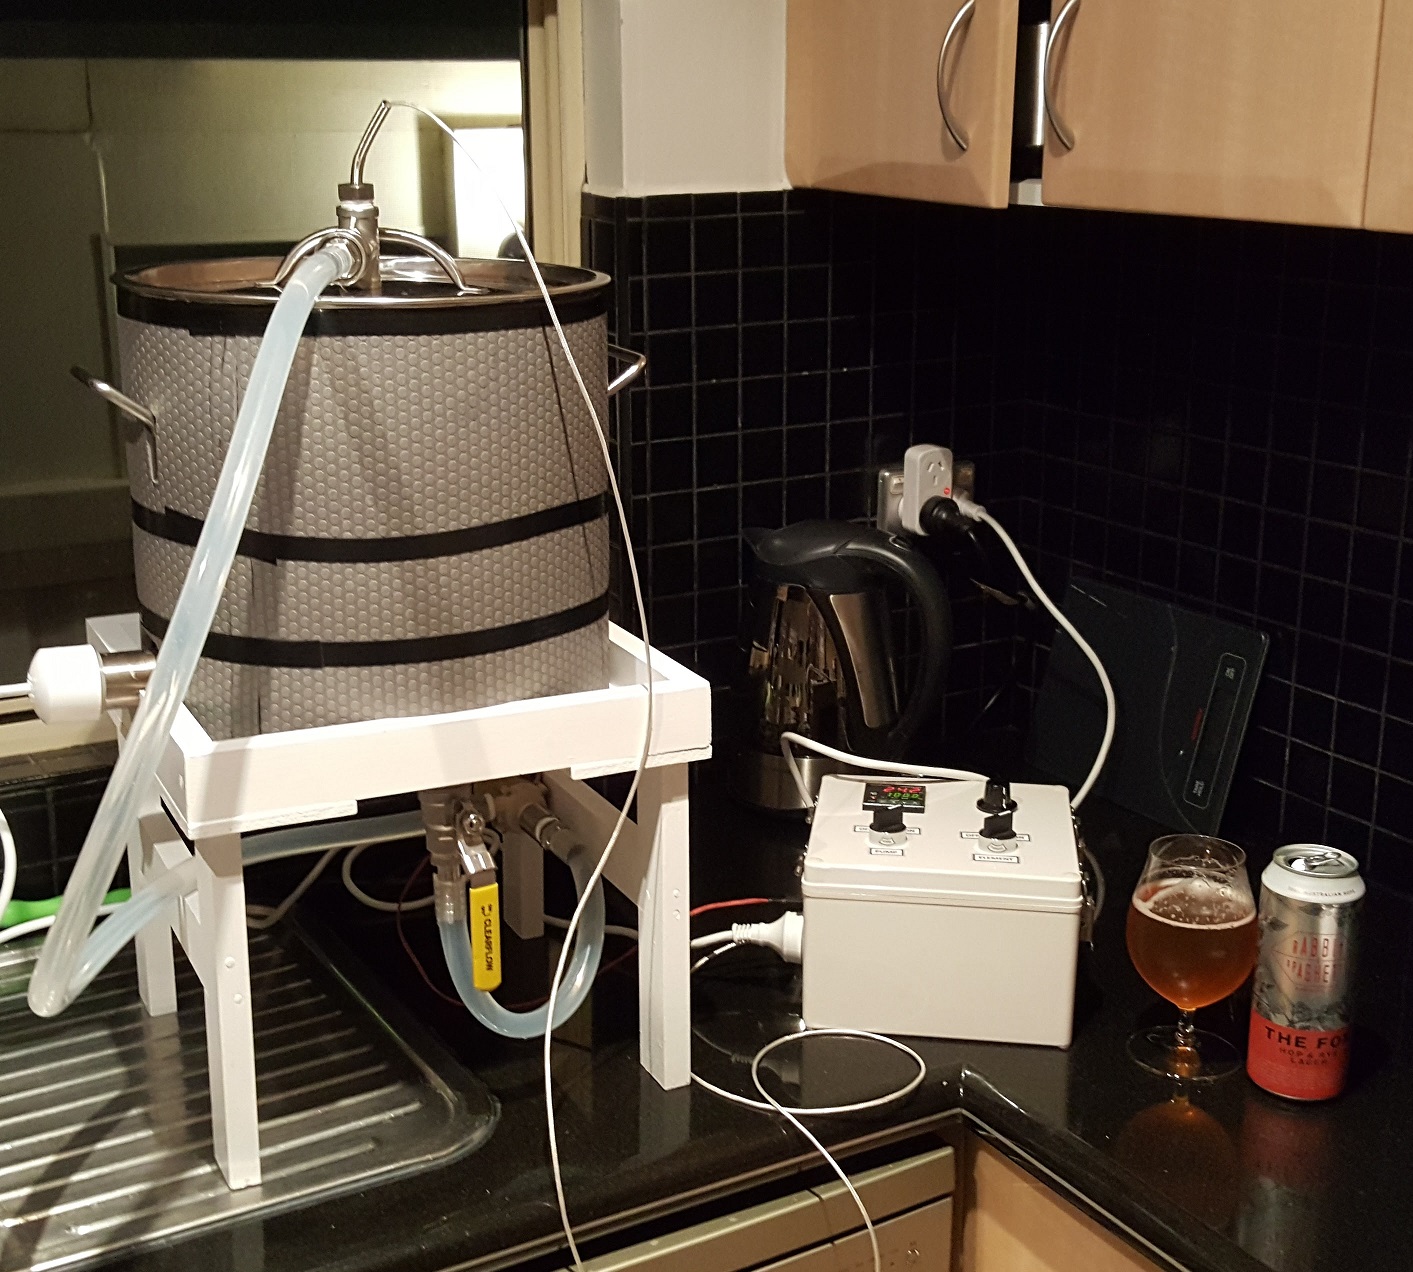
I stupidly haven't taken wide angle shots to show the whole thing, but you can see in some of the pics that I made a little wooden table from cheap wood to give clearance to the tap underneath and have somewhere to mount the pump.

8iFwJs6.jpg


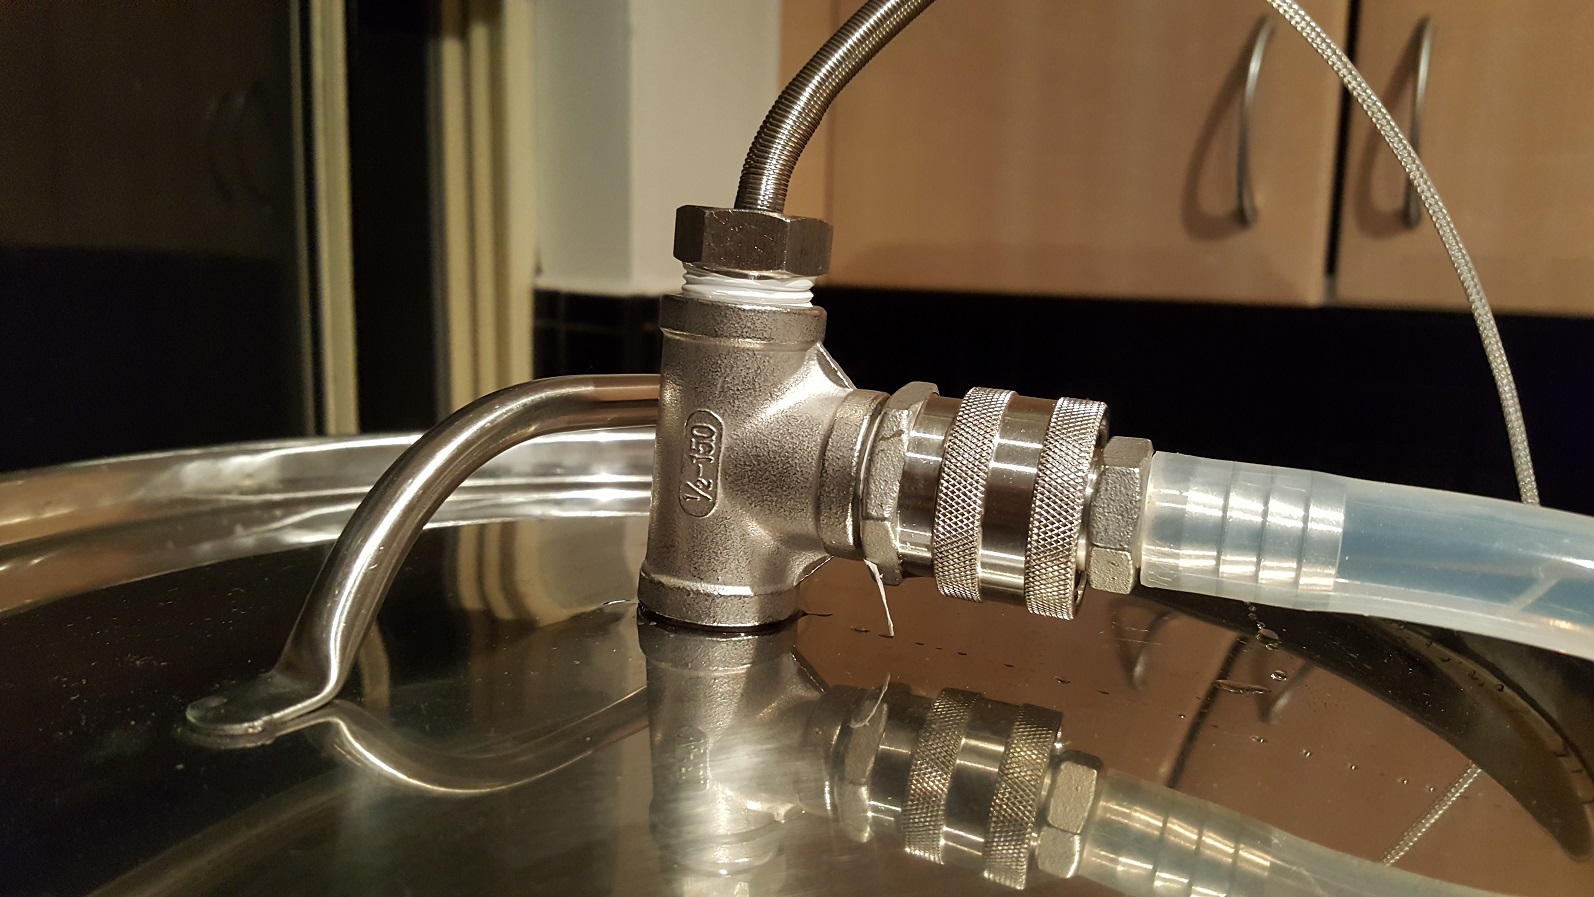
Other than that, all the fittings are watertight and work well. The quick disconnect fittings on the lid got unbearably hot when I was testing the time it took to get the system up to boiling. But at mash temperatures it was easy to disconnect with bare hands and i'm really happy with such a compact solution.

JqKhXw8.jpg


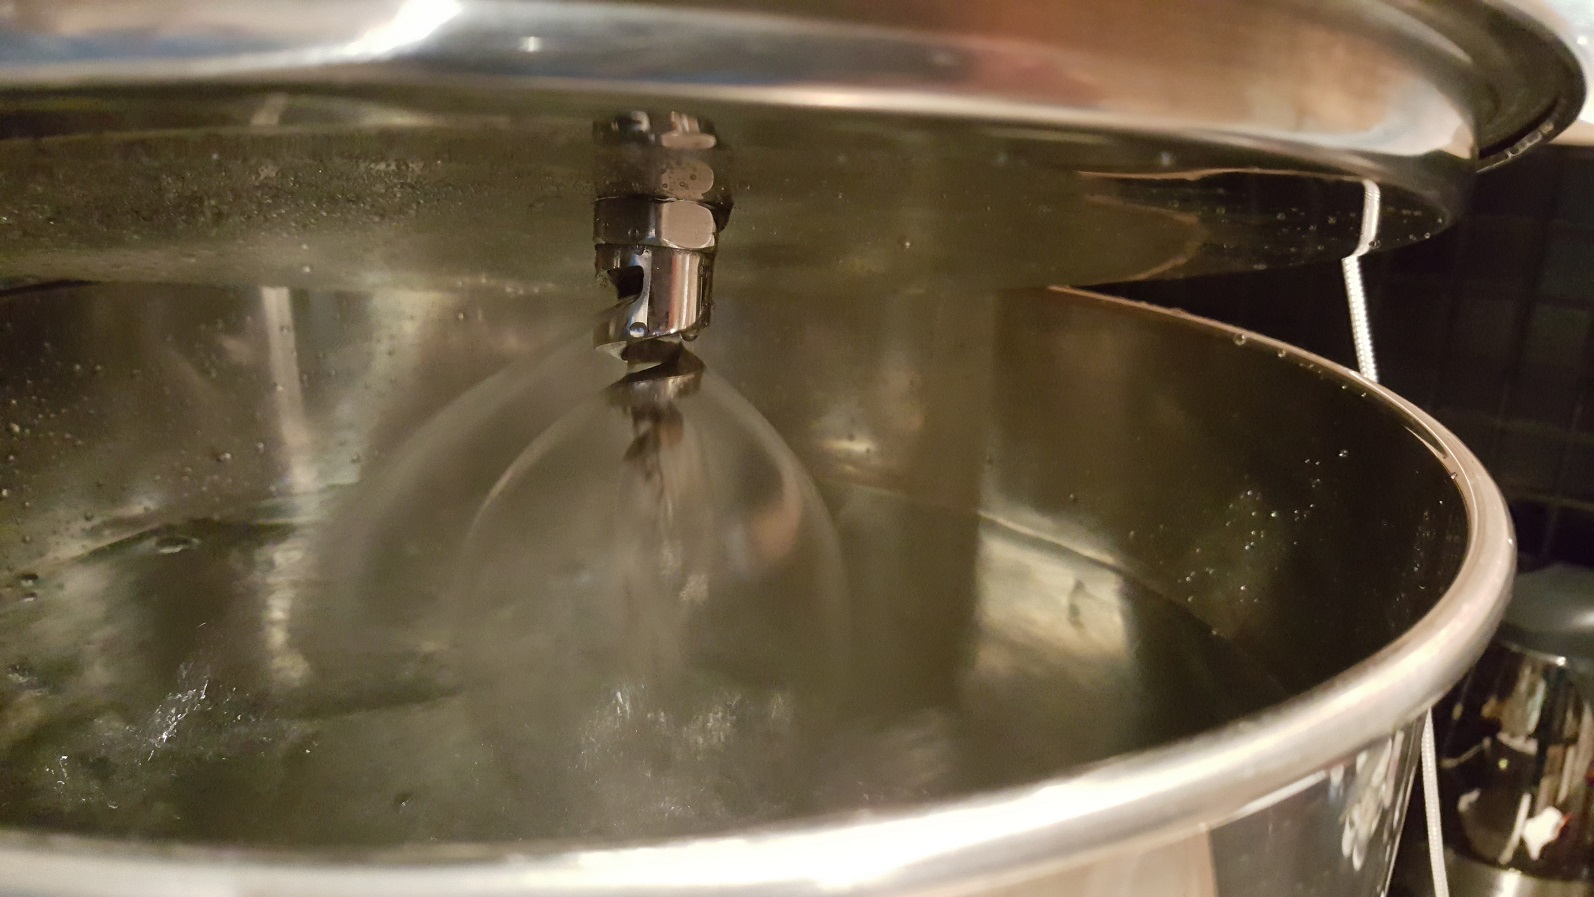
'm also really happy with the spiral nozzle in the lid. It has a good flow rate, is highly unlikely to get clogged. I've yet to test if it's enough of a spread to reduce channeling.

nZj1dWC.jpg


I'll post some wide pictures when i get home to show the whole setup together.
 
I tried the same big W pot with a 1500w element but found the boil too vigorous, even with no insulation.
 
Thanks for the info.

It got to a boil with a 2000W element but it wasn't anything crazy. I put the dimmer in line to the element because from what people said (yourself included) it sounded like 2000W for such a small batch was going to be an insane boil. I'm going to try it with some yoga mat insulation again tonight and if its not a crazy boil i think i'll drop the dimmer.

Just realized the link i posted for the control box didn't work. Here it is again http://imgur.com/a/7oVhK
 
Here are some final pics of the setup. I'm happy with everything except the boil power which is more like a vigorous simmer. I'm going to bypass the dimmer to see if it makes any difference. But other than that all I need to do is get a new fermentation chamber and i'm good to go.


fAQdkIo.jpg


FwzRJe8.jpg


fZYZiMb.jpg
 
Impy said:
Here are some final pics of the setup. I'm happy with everything except the boil power which is more like a vigorous simmer.
Looks good Impy. Well done mate.

If your vigorous simmer is turing over the surface of the liquid then that is more than sufficient for your boil. You don't need it to boil like an erupting volcano. Have a listen to the brewstrong podcast from the brewing network on boiling.

JD
 
Yeah it turns over the liquid, thanks for the reassurance!

I'm also interested to hear if anyone has had experience with dimmers? Mine (http://www.ebay.com/itm/AC-220V-3800W-SCR-Voltage-Regulator-Dimming-Dimmers-Speed-Controller-Thermostat-/221122862107) gets quite hot even when it's letting the full power through. My basic understanding of how they work would lead me to assume heat generation would be minimal if I had it at full power as no power would need to be bled off as heat at the dimmer to drop the voltage.
 
Impy said:
I'm also interested to hear if anyone has had experience with dimmers? Mine gets quite hot even when it's letting the full power through. My basic understanding of how they work would lead me to assume heat generation would be minimal if I had it at full power as no power would need to be bled off as heat at the dimmer to drop the voltage.
Those kinds of dimmers work by switching on/off in each half-cycle of the AC waveform -- the dial is a potentiometer in series with a static value resistor that controls how quickly the switching capacitor charges. At the maximum setting (i.e., when the potentiometer is at the minimum resistance), the capacitor charges very quickly, switching the DIAC/TRIAC part of the circuit almost instantly in each half-cycle, resulting in a negligible difference in the load voltage waveform to the source.

Since this results in close to 100% duty cycle for the DIAC/TRIAC, the amount of current flowing through each with respect to time is much higher than when the potentiometer is dialled to a lower voltage, which would result in a build-up of heat in the TRIAC's heatsink (side-note: since these are pretty cheap Chinese units, there's a chance/risk of the heatsink being energised at the same potential as the load, so as a precaution -- DON'T TOUCH IT WHILE THE UNIT IS PLUGGED IN/TURNED ON).

If you want to minimise the amount of heat generated inside your control box, one solution might be to install a SPDT switch (rated to suit AC voltage), which would allow you to select either full voltage (i.e., bypassing the SCR), or dimmed voltage, like so:
NKflUQK.png
 
Thanks Gibbo, that's a perfect explanation. So it's getting hot simply because it's handling a high current when it's dialed to full power.

I've actually got a spare switch (http://picclick.com.au/2Pcs-10A-2-Position-NO-NC-Maintained-4-281491585769.html#&gid=1&pid=2) which I could put before the dimmer to bypass if needed. The other option I thought of was to install a small 12V fan port, but that would severely compromise what water proofing the box affords.

And yeah I've always been super paranoid about safety with the box since it's handling 240V. I always make sure it's turned off and unplugged before I even open it.
 
nice build - very neat! Ddidn't realise this thread existed and looking at your design and thinking I seem to have channelled some of the same ideas just with a bigger pot! I would have attributed them to you if I knew!

funny that I was going to source the same spray nozzle - that took me ages to find it on the web!
 
Hi guys, i'm making the Mk2 version of this setup. Does anyone have a 21mm sheet metal punch I can borrow to put a couple of holes in the new pot? Happy to throw a few beers your way when I return it.
 
Back
Top