Rinsing Yeast (in Pictures)

Australia & New Zealand Homebrewing Forum

Help Support Australia & New Zealand Homebrewing Forum:

This site may earn a commission from merchant affiliate links, including eBay, Amazon, and others.
Looks pretty good to me mate. One thing to do is put some contact on your jars and mark ml on it in 25ml increments so you know what you have.

Cheers
 
Wolfy said:
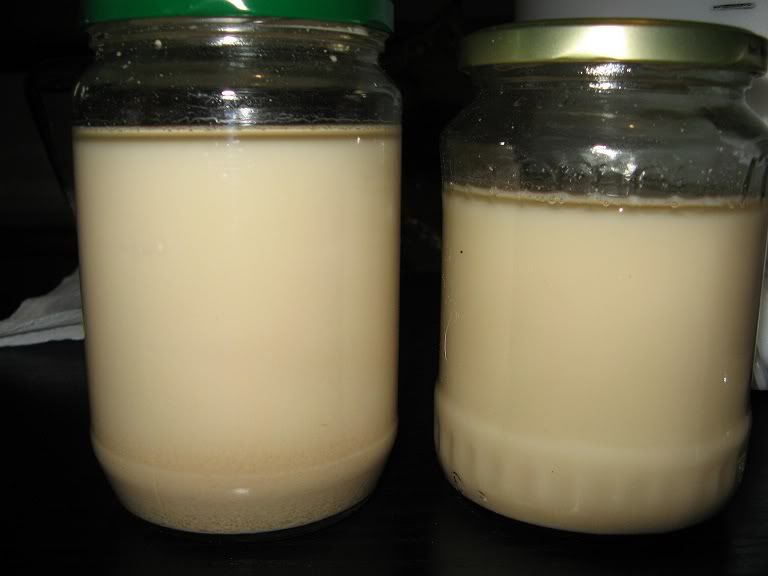
Now we need to be patient and watch what happens, after about 10 to 30mins you should start to see three distinct layers in the jar, clear water/beer ontop, a creamy layer of suspended yeast in the middle and with the trub and break material falling to the bottom of the jar.
The time it takes, and exactly what it looks like depends on the yeast, the wort, the grain, finnings and many other factors, so if you are not familiar with the process or the yeast it can be a good idea to let the jars sit for a number of hours (even a day) and watch as the trub and yeast settle out over time. However, the longer you let it sit the clearer the layers will become, but once the yeast starts to settle out of suspension it is harder to separate (so if you let it settle out to observe, simply shake it up so you can start the process again).
yeast_rinsing6.jpg


We want to keep the middle layer since that contains our yeast in suspension. If you do not leave it long enough you will still have trub mixed in, but if you leave it too long the more floculant yeast will have settled out. The process is a bit of trial-and-error, but by careful observation it's not too hard.

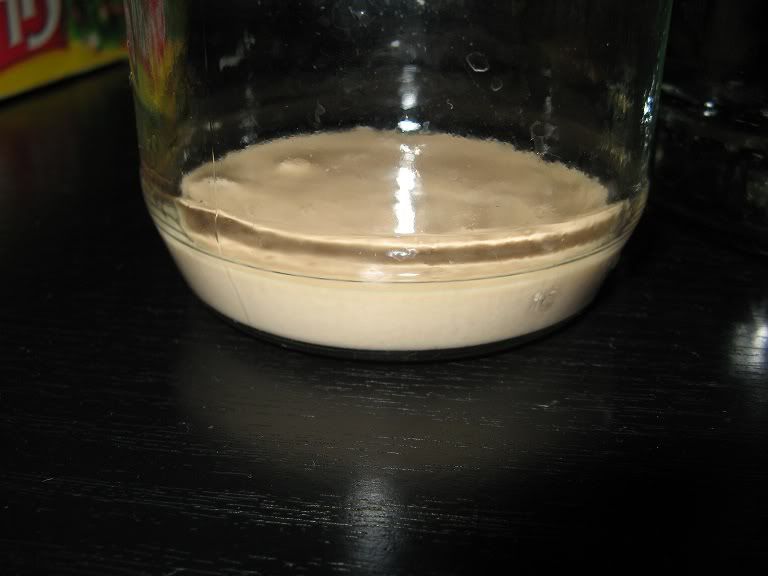
I've found that by the time the layers start to form about 1/2 to 2/3 of the jar's contents is the milky-homogenous-yeasty-suspension that we want to keep, the trub and debris on the bottom is usually a darker, grainy layer, with the jars having a thin-clear layer on the top.
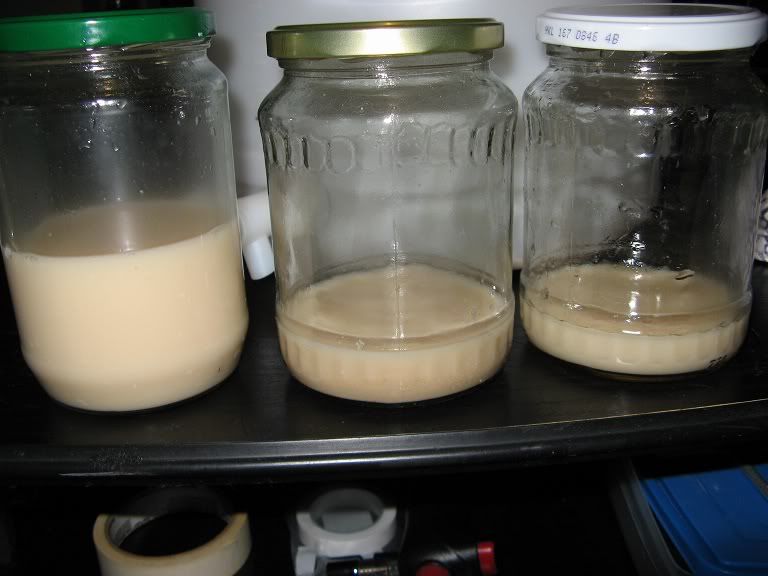
By carefully decanting the liquids we should be able to discard the clear top-layer, keep the middle layer which is our yeast in suspension, and discard the bottom layer of trub.
The middle jar is the original one, with the trub remaining on the bottom, the jar on the right contains our top clear layer and the jar on the left is our yeast-in-suspension that we will keep:
yeast_rinsing7.jpg


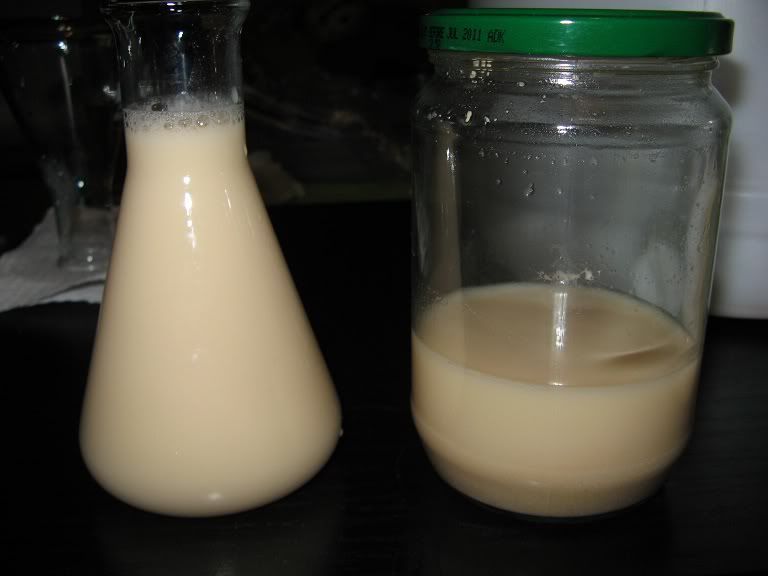
The suspended-yeast-layer from the second jar was decanted into a flask ready for re-pitching, the top clear layer discarded and the trub (with some suspended yeast), that will also be discarded, remaining in the original jar:
yeast_rinsing8.jpg


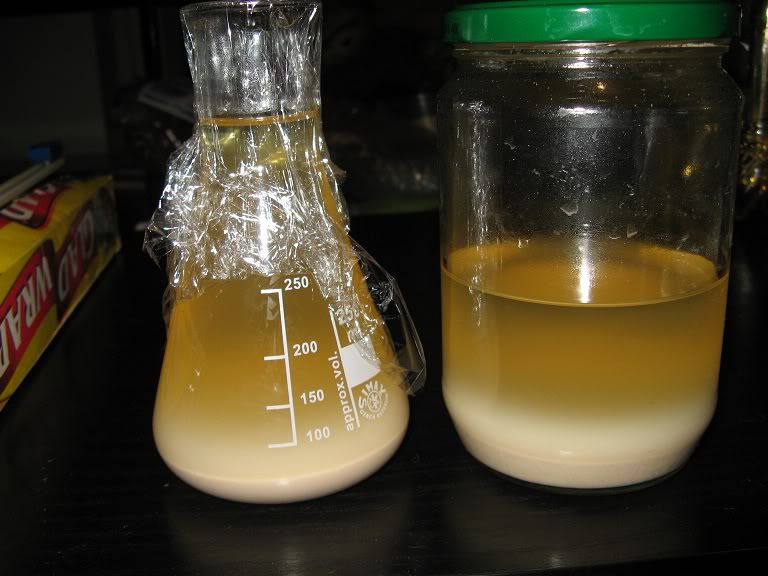
If we have done it right and/or were lucky, by letting the saved yeast-in-suspension layer settle out, we should have only single layer of nice clean creamy yeast:
yeast_rinsing9.jpg

But if you find you still have a distinct layer of trub settling more quickly, simply repeat the process again.

The yeast in the flask was left to settle (refrigeration would have sped-up the process, however since I was going to directly re-pitch the yeast I did not want to risk thermal-shocking it, so instead just waited a day for it to settle out at fermentation temps).
Once the yeast has been rinsed and settled to form a thick compact layer of yeast-slurry (if it is viable and healthy) 50 to 100ml should be adequate for pitching into the next batch of beer.

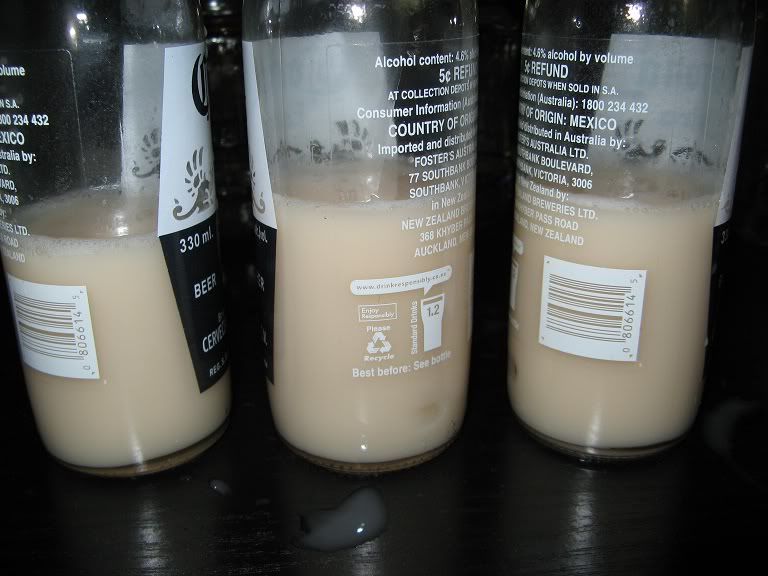
The yeast in the jar, which will be stored for later use was washed several times more, until the liquid remained clear, each time decanting the liquid from the top and giving the yeast time to settle out:
yeast_rinsing10.jpg


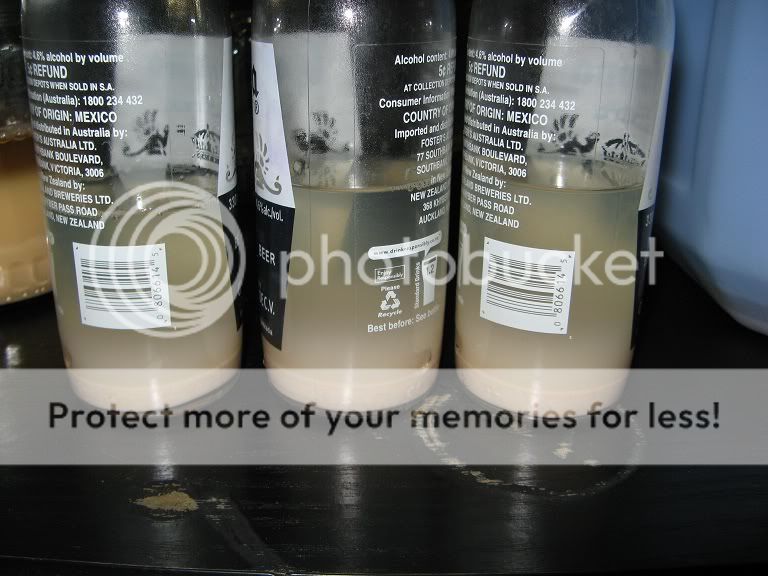
When the liquid above the yeast is clear, it was split into 3 storage containers (ie: sterilized beer bottles):
yeast_rinsing11.jpg


Once they have been capped and labeled the washed yeast should remain viable if stored in the fridge for 6 to 9 months.
yeast_rinsing12.jpg

The thick layer of yeast on the bottom of the bottles should be adequate to pitch directly into a starter (I step it from 300ml to 1.5L before pitching), however yeast stored this way does not usually remain viable more than about 1 year.
Im all good til the last step,

How did you decant the final yeast slurry into the 3 bottles?
 
Wolfys not on here much anymore,

You pour very slowly and gently so as not to disturb the shite at the bottom.

You can get little funnels if you want to store in pet or stubbles.
 
Thanks,

I understand that he made the starter in one go, but the last bit is confusing me. With the residual least left in the jar, was this rinsed in sterilised water until all the brown was gone and then split into 3.. just not getting how he got the three into the bottles
Yob said:
Wolfys not on here much anymore,

You pour very slowly and gently so as not to disturb the shite at the bottom.

You can get little funnels if you want to store in pet or stubbles.
 
storeboughtcheeseburgers said:
Thanks,

I understand that he made the starter in one go, but the last bit is confusing me. With the residual least left in the jar, was this rinsed in sterilised water until all the brown was gone and then split into 3.. just not getting how he got the three into the bottles
Pour some boiled. cooled water in, swirl and put 1/3 into each bottle.
 
lukiferj said:
Pour some boiled. cooled water in, swirl and put 1/3 into each bottle.
Cheers mate,

I'm rinsing my first AG which was pretty trubbb troubley? so I'll prob decant the yeast layer into one, let it settle and redecant - i boil all my drinking water anyway so should be easy.

Very cool technique!
 
No worries! Although it sounds a bit complicated, once you have done it a few times you get the hang of it pretty quickly. You can also start to pick when the layers separate better. Good luck :beerbang:
 
Yeh pretty happy with how mine turned out - I decanted both jars into one juice bottle and I boiled/sanitised all 3 to start with.

Can I just store this in the fridge now for a future use? I'll probably use it for 2 20 Litre batches down the track, can I split it later into bottles? Or does this have to be done now

IMG_20140604_190914.jpg


IMG_20140605_092352.jpg
 
Well done. Looks like you got plenty of clean yeasties in there.

Would probably be easier to split now but will be fine down the track.
 
Ok - so if I just decant the top layer up until the white, then add some water to 2 beer bottles, can I swirl it and pour it in the bottles (half each)
 
Yep exactly. If you have enough yeast it will be easier to split now and less chance of infection if you try and use half later. I would just pour the water into the jar, swirl and then pour half of the solution into the bottles.
 
What a bugger, I searched for this thread and all the pictures are missing because of the "Third party sharing" bullshit.
 
I haven't even watched it yet, but maybe this video will help...

it's on my to-do-list of shit to watch and try

if you watch it, let me know if its any good!
 
I haven't even watched it yet, but maybe this video will help...

it's on my to-do-list of shit to watch and try

if you watch it, let me know if its any good!

I watched it some time ago, it's a good summary of the process
 
Back
Top