QldKev's New Biab With Internal Rims

Australia & New Zealand Homebrewing Forum

Help Support Australia & New Zealand Homebrewing Forum:

This site may earn a commission from merchant affiliate links, including eBay, Amazon, and others.
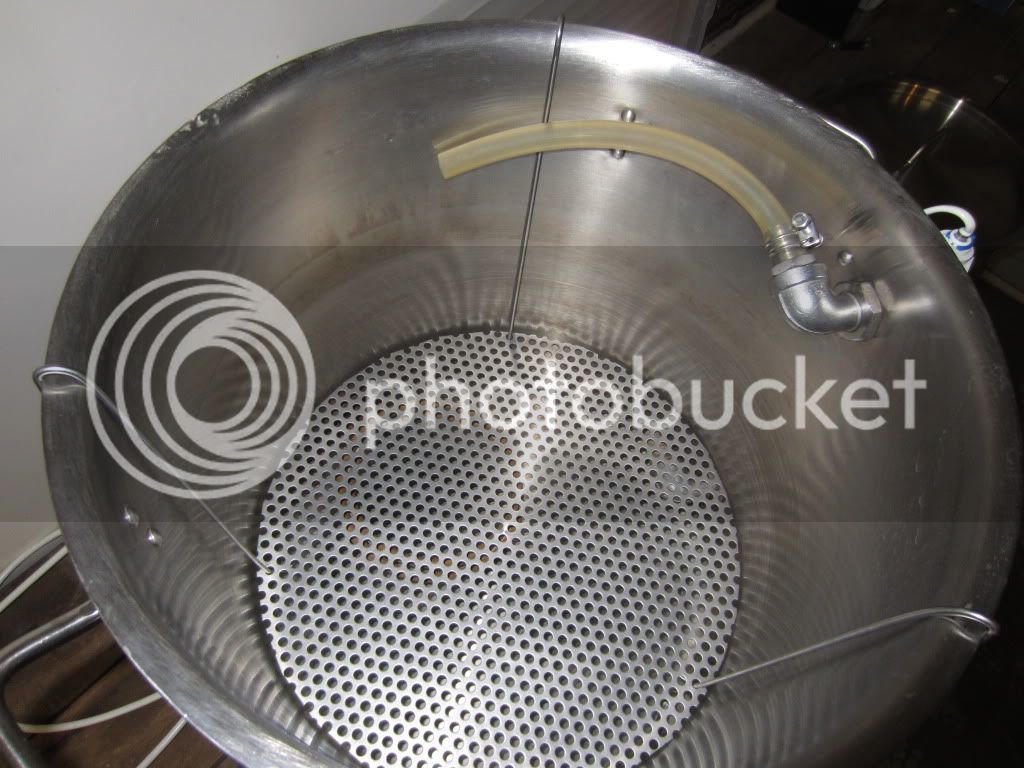
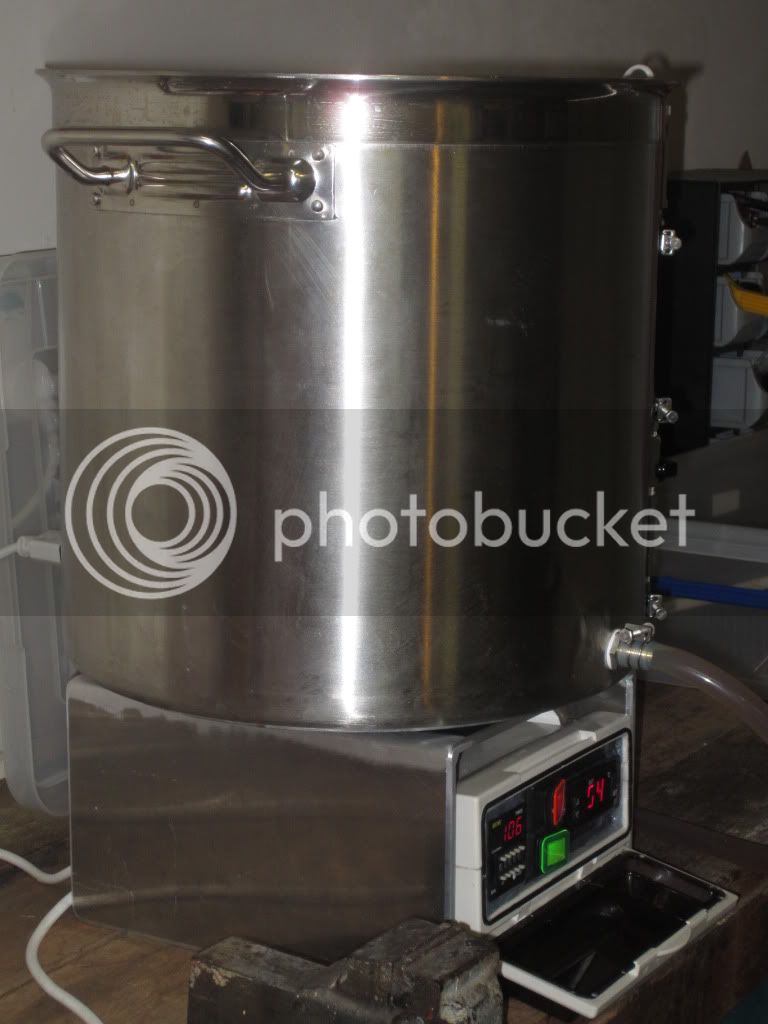
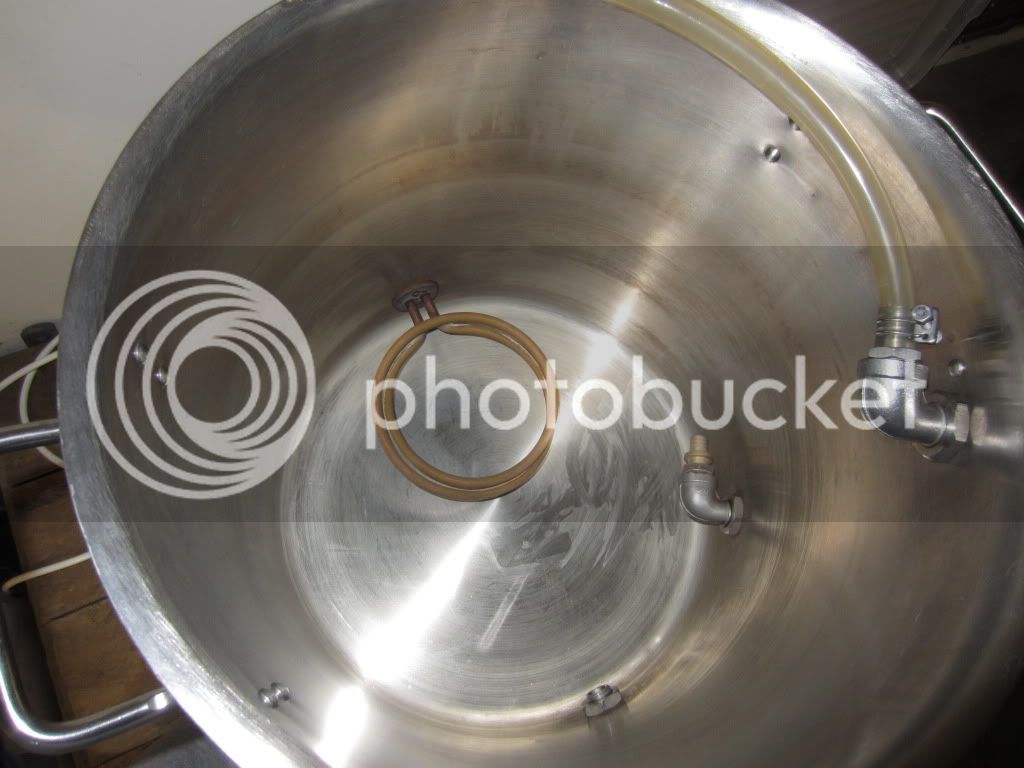
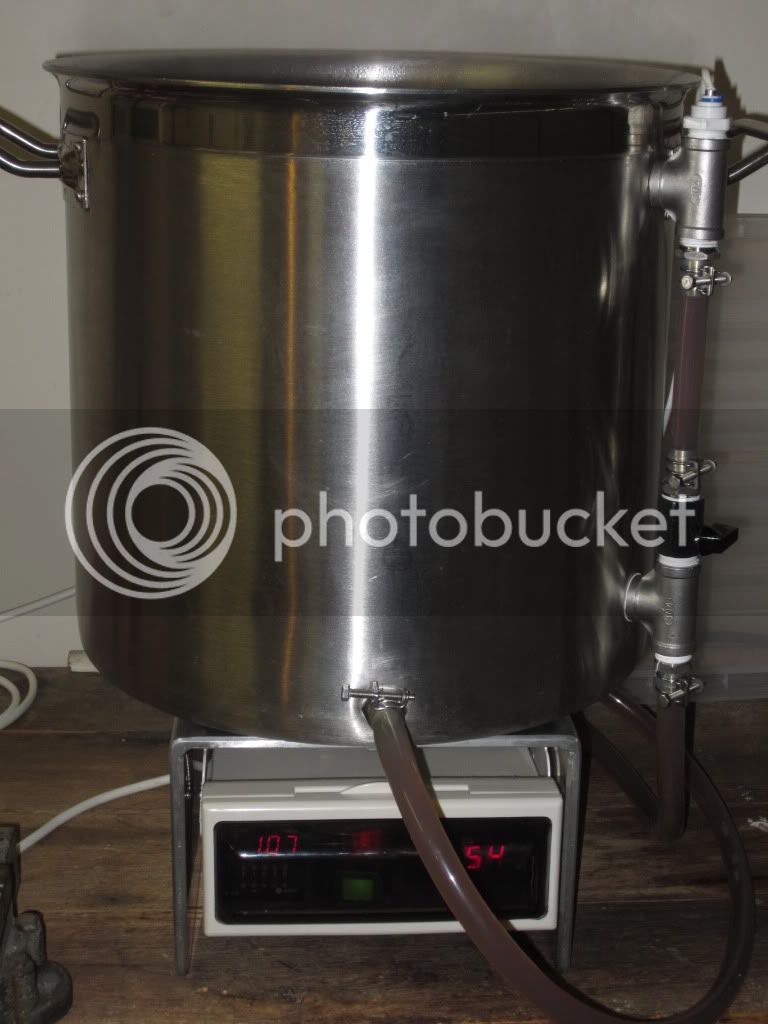
Went out to Bundaberg Constructions yesterday. Greg (mate that's also an all grain brewer) welded up the handle and some supports for the bucket to sit on to drain. Should make sparging pretty easy. The bottom of the bucket sits just above the 32L line.

draining_zpse5c41f13.jpg
 
Brew day 2 with the new pot setup was at a brewday at Greg's place. He brewed on his 3V while I fired up the 1V. I was making a beer for another ex-brewer using some of his really old grains. The grains were milled in Greg's mill and ran through twice as I prefer a finer crush, also there was a large percentage of flaked maize in the mix. I found I could not leave the top return fully open as the wort level crept up in the pot. Although we assume this was caused from the old flaked maize which we found out afterwards has gone custard like in the bottom of the pot, I decided to throw some more openings in the pot. I was hesitant to put more slit in it with the grinder as it was already starting to get weak, so this morning I drilled some holes. If anyone else decides to cut slits in these thin BigW pots, I would keep them shorter and probably more staggered.

I could have done a neater job :huh:
false_botom_holes_zpsded0882e.jpg


Then today I brewed, brewday 3. Grain crushed on my mill settings and the new holes, I managed to hold the flow on the top valve fully open and had no issues with the wort level getting high.

Finished off a nice clean looking wort.
3rd_brew_zps8a191b2d.jpg


Can't wait to try it :chug:
 
Looks great Kev,
If there is any improvements to the controller that you could think of, let us know. I'm thinking about changing my original controller over to a brauduino just to see how it goes. I still like my orignal controller but I would like to see how a brew goes with the brauduino, I have never brewed with it.

cheers steve
 
Looks all good Kev how do you get the false bottom up after the mash? Heres some pics of the system I built a year or so ago notice the hooks system on the false bottom to help remove it once the mash has finished to start the rolling boil.
IMG_1210.jpg
IMG_1191.jpg
IMG_1212.jpg

IMG_1188-Copy.jpg
 
thebigwilk said:
Looks all good Kev how do you get the false bottom up after the mash? Heres some pics of the system I built a year or so ago notice the hooks system on the false bottom to help remove it once the mash has finished to start the rolling boil.

<snip pics>>

I like your build, it's where I got the idea how to mount the 2 return lines. :beerbang:


The false bottom is part of the BigW 19L inner pot. So I don't use a swiss voile bag or the pizza tray false bottom anymore. To drain I just lift the pot and sit it on the ledges, so it drains directly back into the main wort. It also allows an easy sparge having solid sides so the water cannot leak out sideways.
 
matho said:
Looks great Kev,
If there is any improvements to the controller that you could think of, let us know. I'm thinking about changing my original controller over to a brauduino just to see how it goes. I still like my orignal controller but I would like to see how a brew goes with the brauduino, I have never brewed with it.

cheers steve
Steve, I find it a great bit of kit and makes brewing easy. I love how easy the interface is compared to my Auber programmable pid.

My wish list is as follows.

Controller
Ability to install a louder alarm. I cannot hear mine from my office when brewing. Also with a loud alarm, a volume knob/pot would be great so I could turn it down if I'm in the area.
A wifi / network enabled version, that you can log onto from the network and monitor the progress.
Maybe a 20 x 4 display.

Software
Have a constant declared for BoilStartTemp (95c is a bit cool for me, I use 98c)
Have a constant declared for MaxPumpTemp (ie when to stop the pump, I run a Kaixin and don't take it past 80c)
Have a pause_pump function triggered by Button_next. As per pause_stage but pump only.
Do the CRC check on the temperature read
 
eresh666 said:
KEv,

Any restriction on the brew size when using the 19L bigw as a 'malt pipe'? I'm interested in modifying my keggle to work similar to these (batch size 20-26L).
I managed to squeze a 28L batch with 5.64kg of grain today. It was definitely a full pot.


Straight after mash in

5_64kg_grain_zps1cccb655.jpg
 
QldKev said:
I managed to squeze a 28L batch with 5.64kg of grain today. It was definitely a full pot.


Straight after mash in

I had my brewday yesterday, very pleased with the results, however, I have modified the wort return to include a control tap, the new pump was performing great, too good, so I had direct the wort to the outer pot to avoid spill over.
Early days but my efficiency also improved to 75% from a planned 60%.
Thanks for your guidance.

5_64kg_grain_zps1cccb655.jpg
 
nala said:
I had my brewday yesterday, very pleased with the results, however, I have modified the wort return to include a control tap, the new pump was performing great, too good, so I had direct the wort to the outer pot to avoid spill over.
Early days but my efficiency also improved to 75% from a planned 60%.
Thanks for your guidance.

Glad you've improved your efficiency. 60 to 75% is a great change. The excess flow is great to redirect back at the heating element as it keeps the changes of scorching wort down, have a look at thebigwilk and my posts earlier in this thread, we have a second return at the bottom facing directly at the element. Then the pump flows full all the time, it's just how much you let to the inner pot that changes.
 
2013-08-21 10.05.53.jpg2013-10-08 10.08.40.jpg2013-10-08 10.08.40.jpg
QldKev said:
Glad you've improved your efficiency. 60 to 75% is a great change. The excess flow is great to redirect back at the heating element as it keeps the changes of scorching wort down, have a look at thebigwilk and my posts earlier in this thread, we have a second return at the bottom facing directly at the element. Then the pump flows full all the time, it's just how much you let to the inner pot that changes.
Kev, I have a HEX so that problem does not exist although I understand the good point that you are making.
I am attaching a couple of pictures so that you can see the progress that I have made since you started this topic, sadly no bling,
the first picture gives you an idea of my setup, I have since changed the pump to one like your's.
The second picture shows the pot within the pot and also a temperatllure probe within the mash, I have a few adjustments to make but feel sure that success will come. I fabricated a return pipe which will give me the ability to divert the flow either into the mash pot or into the main pot for recirculating back to the HEX, I am keeping the pump at full flow.
Another trial awaits next week.
 
QldKev said:
...
I could have done a neater job :huh:
false_botom_holes_zpsded0882e.jpg


Then today I brewed, brewday 3. Grain crushed on my mill settings and the new holes, I managed to hold the flow on the top valve fully open and had no issues with the wort level getting high.


Can't wait to try it :chug:
Mate,
Can you please let us know the width / diameter of the holes and slits you have made? Was this done with a dremel and cleaned up with a flap disc?

Cheers
 
malt_shovel said:
Mate,
Can you please let us know the width / diameter of the holes and slits you have made? Was this done with a dremel and cleaned up with a flap disc?

Cheers

The slits were cut with a Makita 1.0mm stainless cutoff wheel on a normal grinder. I've found the dremel ones are too fine. Then cleaned up with a normal flap disc. I find after I've flap disc'd it I need to take the cut off wheel by hand and clean up the burs in the slits. Just remember to ensure the cutoff wheel and flap disc are new and have not touched non stainless steel.

The round holes are 2.2mm. But anywhere from 2.0mm to 2.5mm will be ok depending on your crush. I find drilling from the inside of the pot makes cleaning up a lot easier as the burns are on the outside.
 
Have you have any issues with rust in this system?

I cut a series of slots in the bottom of my Big W 19L pot last week then smoothed it out with a grinder and it was looking great. Then yesterday, I discovered it was covered in rust.

QldKev said:
Just remember to ensure the cutoff wheel and flap disc are new and have not touched non stainless steel.
Would this have anything to do with it? I used an old flap disc. Could I fix it by going over it with a new flap disc?
 
Yep that would be your issue.

You could pickle it or get a stainless flap disc or wire brush wheel and run over it again.
 
2013-10-15 10.27.38.jpg2013-10-15 10.27.26.jpg2013-10-15 14.26.40.jpg
QldKev said:
Glad you've improved your efficiency. 60 to 75% is a great change. The excess flow is great to redirect back at the heating element as it keeps the changes of scorching wort down, have a look at thebigwilk and my posts earlier in this thread, we have a second return at the bottom facing directly at the element. Then the pump flows full all the time, it's just how much you let to the inner pot that changes.
Second brew today, went really well.
I have increased the HEX thermocouple temperature to take into account the temperature differential between the HEX and the mash tun, the picture that I am attaching demonstrates this. I did a single infusion mash @ 66 degrees, the HEX thermocouple is set to 73 degrees and as can be seen by the two temperature probes within the mash I have a difference of 7 degrees, this kept constant during the 60 minute mash cycle, I am recirculating at 20 litres per minute and the other picture shows the wort return pipe that I made so that I can control the flow without overflowing the mash tun.
Really pleased to have made some good progress.
 
cbet said:
Have you have any issues with rust in this system?

I cut a series of slots in the bottom of my Big W 19L pot last week then smoothed it out with a grinder and it was looking great. Then yesterday, I discovered it was covered in rust.


Would this have anything to do with it? I used an old flap disc. Could I fix it by going over it with a new flap disc?

This is the cause of your issue. I used my stainless work only discs (they are even kept separately from the normal job ones), and it has no sign of rust. You have successfully impregnated the stainless with some foreign metal which is rusting. Not sure how you will go with a fresh disc, as there will still be the foreign metal in the job. I would get some decent pickling paste if you can, failing that use something like straight starsan as the pickling paste.
 
Phosphoric acid will also work if you paint it on the rusty stainless it will eat away the ferrous metal leaving the chromium on top preventing further oxidation. Leave it for a while then wash off with water.
 
How necessary is the bottom pump return with this design?

Have you tried protein rests without it?
 
pat_00 said:
How necessary is the bottom pump return with this design?

Have you tried protein rests without it?
With any element which is in contact with wort / RIMS I would recommend moving the wort past the element for a protein rest. There are a couple of systems in use that don't have the bottom return. IMHO you may get away without it for a while, but eventually it will bite you.
 

Latest posts

Back
Top