How To Drill A Fridge?

Australia & New Zealand Homebrewing Forum

Help Support Australia & New Zealand Homebrewing Forum:

This site may earn a commission from merchant affiliate links, including eBay, Amazon, and others.
I had some cheap drill bits from hume and iser and used them, so if i killed them i didn't care but didn't even bother them.. the fridge came off worse :)
 
Are you sure it's only 1.2 cm? That seems quite small to me.
 
as Sammy said 1.2cm seems small most tap shanks are about 2.2cm get a holesaw for metal or a drill bit and round file remember the metal on a fridge door is very thin so drill slowly with a light pressure or the drill will grab and tear the metal,useing a file is the cheapest and neatest[unless you can borrow a hole saw]
Russ
 
Disconnect the fridge from power 1st and check the door for cables. You could have 240v running diagonally across the door exactly where you're going to drill (butter compartment cables). The celli shank is very thin, where if you're installing the snaplock commercial shank it's ~22mm.
 
Hi,
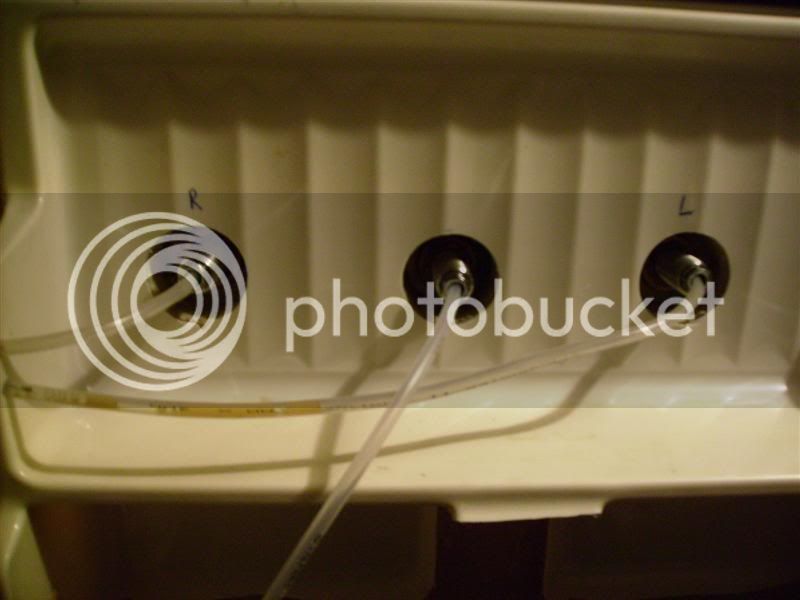
I'm about to install taps in the fridge door. She shank diameter is quite large, 1.2 cm or so. I have a timber drill bits but raven19 mentioned they are easy to damage.
http://www.aussiehomebrewer.com/forum/inde...showtopic=28560

What is the best way to drill? Go and buy special steel drill bits?

In hindsight I would have used a metal bit! But mine were a cheap set (mainly for timber - even though the packet said ok for metal) - wrecked the bit, so now if I need another hole, I need another drill bit! <_<

as Sammy said 1.2cm seems small most tap shanks are about 2.2cm get a holesaw for metal or a drill bit and round file remember the metal on a fridge door is very thin so drill slowly with a light pressure or the drill will grab and tear the metal,useing a file is the cheapest and neatest[unless you can borrow a hole saw]
Russ

+1, go very slowly - patience is a virtue. It will heat up too, with the metal on metal friction.

Best of luck.
 
First thing to do is use a Stanly knife on the inside skin!

The inside is plastic and (with power off) you will be able to make a hole, dig out the insulation and confirm if there is anything important to hit when drilling the metal skin.

If possible, drill the metal skin from the inside, with a BI-METAL hole saw. They are cheap at Chinese importers like Bunnings or TRADE TOOLS. The advantage of drilling the metal from the inside is you will be able to de-bur easily, the hole as the burs will be on the outside.
 
I found that a little spray of CRC or something like that whilst using the circle saw helps the cutting action, kind of like the lubricant they use whilst cutting stuff on a metal lathe.
 
I just drilled many small holes with a small drill and hammered the bit out - very rough but I was desperate to get it done and the taps are in straight, are solid and with the cover ring look professional installed too :p
 
I found that a little spray of CRC or something like that whilst using the circle saw helps the cutting action, kind of like the lubricant they use whilst cutting stuff on a metal lathe.

Indeed, I forgot to mention a lubricant, or you could say a coolant to assist drilling a hole. Make it a constant flow whilst drilling. Probably not suitable, because of residue and smell is kero in a spray bottle, a bit cheaper than CRC spray, but it shouldn't take long to drill 0.6 to 1.2 mm (depending on fridge age) sheet metal.

Another suitable tool, if you can get a lend, is a dremmel after using you biggest twist bit.
 
Finally a question I can answer... (flame suit by my side)

Welcome to the forum by the way. :D

Use metal bits timber bits will break off and or blunten very quickly causing you to try to burn your way thru.

12mm does seem a small diameter (but ZABOND is reliable on these matters) so regardless still see method #1 as you will probably need to drill some smaller holes if your going to have the gas cyclinder external to the fridge. IF (this is important) your shank is greater than 13mm you will need to see method #2 as the cost of getting larger twist drill bits will be excessive IMO and in the hands of an novice can cause more damage than good.

I am assuming that you are going thru the front door of an upright fridge with this. Use this in conjunction with Raven19's most excellent post as well. Also, I in no way take responsibility for the accuracy of this post and you should always do your own research and consult professionals prior to any project. (Yes it's a disclaimer)

You will need:
  1. 2 drill bits preferably HSS (High Speed Steel) however plain metal bit will do for the job as the metal cladding on a fridge is thin in the 0.8mm to 1.6mm. Also make sure the biggest drill bit is long enough to go thru the full width of the door.
    A. 3mm dia and you will use this as the pilot hole.
    B. 13mm dia
  2. Larger shank size will require a larger hole a bi-metal hole saw 1mm greater than the hole required. Eg 22mm diameter shank use a 23 or 24mm hole saw is best. You won't need the second HSS drill bit
  3. Electric or Battery drill must be variable speed.
  4. Level or tape measure.
  5. Screw driver or screw bit.
  6. CRC/WD40 or a spray bottle with kero.
  7. Pliers and alike.
  8. Hammer and 3" nail (75mm) and or centre punch
  9. Marker
  10. Electrical or duct tape
  11. Safety gear and ear/eye portection
Method #1


  1. Disconnect the fridge from the power. Don't just switch it off at the wall physically pull the plug from the wall.
  2. Remove all the drawers and selves from the fridge. But take note of where they are positioned.
  3. Remove the inner door liner. These can be tricky suckers and unfortunately some are screwed, gooed and or plugged. Or all of the above. So just take your time and have a little patience. If you do destroy the inner liner it's no major loss as you can replace it later on with a sheet of 6mm MDF or Ply. It is better if you can keep the fridge door inner though as the butter shelves etc come in handy for hops and yeast storage.
  4. Once the inner liner is free of the door you may find wires that run interior lights, butter trays etc. You can either disconnect these and or unclip them. Should you decide to disconnect then they will need to be blanked off and insulated properly. If your not sure in anyway that you can effectively insulate the wires from shorting then a LICENCED electrician (not your mate that wires his own car audio ok) should always be consulted. Fridges are a wet moist environment and poorly insulated wires will lead to electricution and possiblly death.
  5. Assemble your taps with the original handles. Measure the overall height from the centre of the threaded shank to the very top of the handle. An easy method to do this is to lay the tap on a A4 sheet of paper, line up the bottom og the page with roughly the middle of the shank and trace the top of the tap handle, measure up to your mark. The reason for this is so you can firstly make sure the top of the tap handle clears the freezer door above. What we are trying to avoid is the freezer door opening and turning/flicking the tap/taps on. Seen that and you don't want it IMO. Kids open the freezer and your hard earned beer is flooding the garage. Also this measurement will give you how much tollerance you have to play with when positioning the tap. If you have an upside down fridge (the freezer is on the bottom) then not such a drama. Also if your planning to use the fancy pub style taps, flashing LED lights LOL, then you will have to take this into consideration but be mindful you don't want your taps so far down the door that you have to constantly bend over to pour a beer. Use your best judgement, you will probably have to compromise between convience and the freezer door. If in any doubt mock it up first, even have the better half hold the tap in it's final position and pretend to pour a beer, as funny as it may seem, holes in fridge door are permanent.
  6. Now mark out your fridge door. Close the fridge. Take the overall measurement of the tap add +20mm to that measurment and measure down from the top of the door. Mark it both ends of the door. Now get your electrical tape and connect the marks to the top of the tape. Make sure you have a good long piece of tape that will be long enough to wrap around to the inside of the door. Make sure when you wrap the tape around the sides of the door that they are level and true. If in doubt measure down and around to satisfy yourself.
  7. Now measure the width of the door and halve it. That obviously gives you centre. From there you can work out the position of the tap/taps. If you only plan to have one tap then that's your mark. If you plan to have more then now is the time to accomodate those even though you may not be installing the taps straight away. Trust me selling a fridge with a hole in the door and no keg set up is difficult if you stuff this up. On my fridge I installed 2 taps but planned for a third so my two taps are closer to the leading edge of the door leaving a space at the back edge of the door for the future tap. Anyway just make sure that the taps are evenly spaced so it looks more professional to your mates. Trust me one of 'em and the cheese and kisses will pick you up on it.
  8. Mark the tape with the tap spacings nice and clearly so you can see it. Mark every tap position whether you are installing them now or not. Stand back and make sure that your happy with the position and spacing of them. If need be do as I said above mock it up, grab a tap and pretend to pour a beer, you might think this is silly but not as half as silly as you will feel not getting it right. Check the spacing again. This is your last chance to get it right so as my Grandpa used to say "measure twice cut once"!
  9. Now transfer those marks/measurements to the inside of the door. Now stand back again take a deep breath and see if there are any obvious clashes with doors shevles, wires etc. If your putting the inner door liner back on here's your chance to hold in position side on against your marks and check for clashes. If you have clashes do steps 7 and 8 again and or compromise to your satisfaction.
  10. Back to the inside of the door. Now where your rough tap positions are you are going to have dig out some insulation. Depending on the age of your fridge it could be anything from mineral wool to fibreglass wool to poly foam. Regardless be careful and wear breathing/respirator/dust mask protection. Trust me there could be unexpected nasties in that insulation that you wouldn't want you or your family breathing in. Be careful and slowy dig out a hole roughly around the area where the tap will come thru the door. Use what ever you have at hand but I found a sharp small width chisel and a stanley knife was all I needed. Also make it over sized. You may find more wires and stuff lurking under the insulation. If you do find something then you can either push it out of the way (if possible) or do as previouusly discussed. If you don't know what it is then err on the side of caution and get a professional to have a look. It could be a fridgeration line, bugger that up and you throw the fridge away. I doubt there would be one in the door but stranger things have happened. Clean up the mess and dispose of carefully and properly into 2 plastic bags and seal with tape. Sounds like over doing it but think of the garbo as well huh? It's not just you who will come into contact with it once it's in the bin.
  11. Close the door. Stand back look and double check you are happy where everything placed. Double check the inner door liner to where you have dug the insulation out. This may highlight clashes you didn't see first time around. LAST CHANCE SON AND OR DAUGHTER!
  12. Tack the inner door lining on now.
  13. On the centre mark of your tap position get an ordinary nail/centre and tap with hammer to dent the door slightly. Tap! not swing! We are only trying to get a starter so the drill bit won't wander all over the door and ruin the paint job. Do this only on the taps your are going to install now, the future one can wait till that time.
  14. Now Drill a pilot hole with the 3mm bit, start wil slow RPM's and build up speed. Have the cheese and kisses steadily spray the bit as you drill. Metal cuts quicker and cleaner at lower RPMS but not too slow (it's a balance). As the bit goes thru the metal it might jam and catch on the swarf. No drama, it's normal, just reverse the drill bit out and with a little more speed lightly try again. Make sure you are holding the drill nice level and square to the face of the door. You want to drill thru the front and the inner liner. If it helps have two goes at it. Drill the metal cladding first, rest, compose yourself and then drill the inner liner.
  15. Open the fridge door a make sure the hole/holes are where you expected them to be. If not make adjustments as required. At least you only have a 3mm hole to patch on the inside and outside. A bit of food grade white silicon will hide many sins. You may need to refer to step 10 again in regards to insulation removal.
  16. Now drill the main hole with the appropriate sized twist drill bit. Just as above. Drill the metal cladding only this time. Try to stop short of drilling all the way through. Now open the door and come back at the hole. This will give you a clean hole and prevents cracks and breakage to the plastic. In older fridges this plactic can be quite brittle.
  17. METHOD #2 - For a larger hole that requires a hole saw now is the time to get out. Do as above and take it easy using minimal RPM's and use the spray/CRC/WD40. Metal hole saws are tough but are not indestructable ok. Make sure you are cutting and not burning your way thru. Oh and keep your fingers away it's going to get hot, real hot! If you start to see/smell burning back off and reassess what you are doing. You have probably burnt/blunted the saw and no amount of pushing or swearing is going to help. You will need a new saw! Sorry but you've stuff it so suck it up and start again (unless you have the capability to sharpen it yourself). A file can be used as well to enlarge the hole if need be. Again as above stop short of going all the way thru the door and come back at it from the inside for the inner liner.
  18. Test fit the taps for hole clearance and adjust with a file as necessary. You need to have at least a little gap so the tap shank can be freely passed in and out of the hole without jagging.
Good luck and God's speed!
All things being equal you should be well on the way to completing your kegerator and have a somewhat profession finish to your job. Don't forget if you have a kegerator you have bragging rights to your mates who don't! No matter how much they rib you about your home brew just the mention of the kegerator will shut them down completely! :rolleyes:

Cheers

Chappo
 
Cheers

I aim to please! Actually this came up as I was planning to write something on my own keg experience for others.
 
I hope he hasn`t changed his mind and decided to bottle, after all :(

stagga.
 
IMGP0085Medium.jpg


Here's a shot of what's inside my keg fridge- used a hole saw to do this.
 
P&C

Are the R and L labels just in case you forget which hand has your beer? :lol:

Stagga's maybe I did scare him off? :(
 
better to use a hole saw - they are cheap these days and come in lots of different sizes.

dont have any picks but I hit the jackpot with my fridge, not only metal on the outside but metal on the inside under the door liner. The freezer compartment had been previously removed so tap height not an issue.
 
Finally a question I can answer... (flame suit by my side)

Welcome to the forum by the way. :D

.....

Cheers

Chappo

Chappo,

Thanks a lot mate for a detailed explanation! You certainly saved me a lot of trouble! I was thinking: it's no big deal if freezer door will touch the handles... not realising if I open the door I will actually OPEN the taps!!!

I'm really impressed by your forum guys :)

Now, let me get to drilling... will post some pics once done.

And yes, you're quite right - my shanks are 22mm rather then 12mm

Again, thanks all of you guys!
 

Latest posts

Back
Top