reVoxAHB
Well-Known Member
- Joined
- 3/3/07
- Messages
- 1,112
- Reaction score
- 17
I've had a few people PM asking how to build my little pick-up hop screen.
Here it is, as requested.
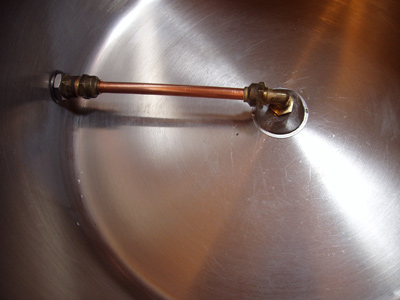
Ghetto Pickup Arm/SSBall Hop Screen:
If you have the tools and copper off-cut, it's a $10 D.I.Y.
Tools and parts required:
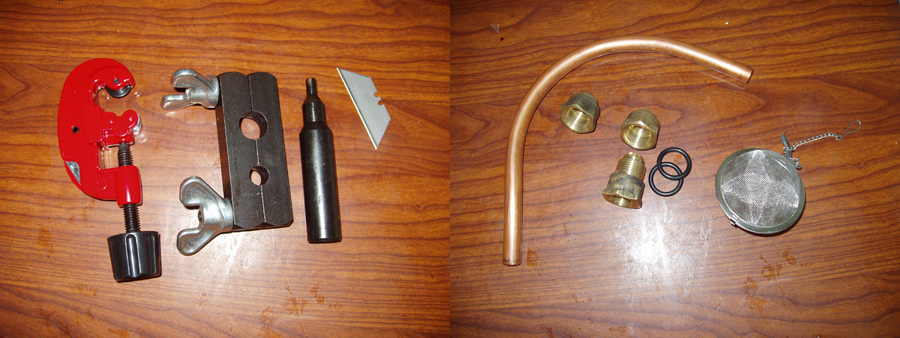
Tools (as shown from left to right)
Pipe cutter ($7-$10)*
*You could get away with using a hacksaw to cut your copper and filing ends flat; cutter is cleaner.
Flaring Tool ($15-20)
Blade (fine scissors, etc.) to cut circle in screen
Other Tools
Hammer to flare copper ends
Spanner or wrenches to attach ball and arm to valve (finger tight would likely be fine, too)
Parts (as shown from left to right)
Bit of 1/2" copper to desired length depending on your choice of installation *see Final Thoughts
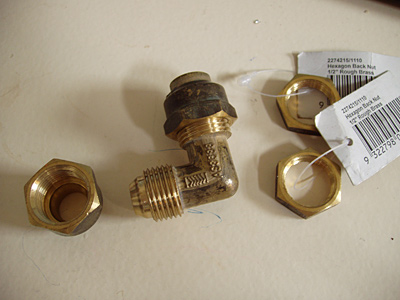
End fitting (thread size to fit your valve $2)
End fitting/coupling (1/2" $4)
2X rubber washers (these come in different widths and are about .25 each, so grab a couple of each- I reckon the one shown and used is 2mm by estimate)
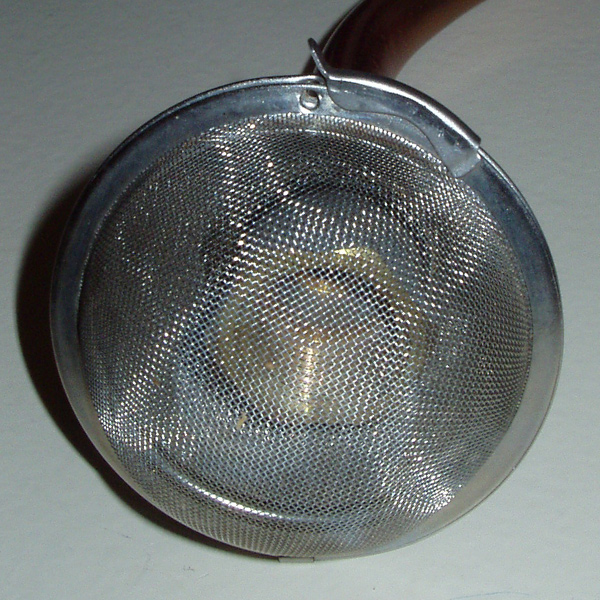
Stainless Steel Tea Ball ($5-6) available here, or Asian supply, Tea stores, etc.
Plumbers Tape (as desired .50)
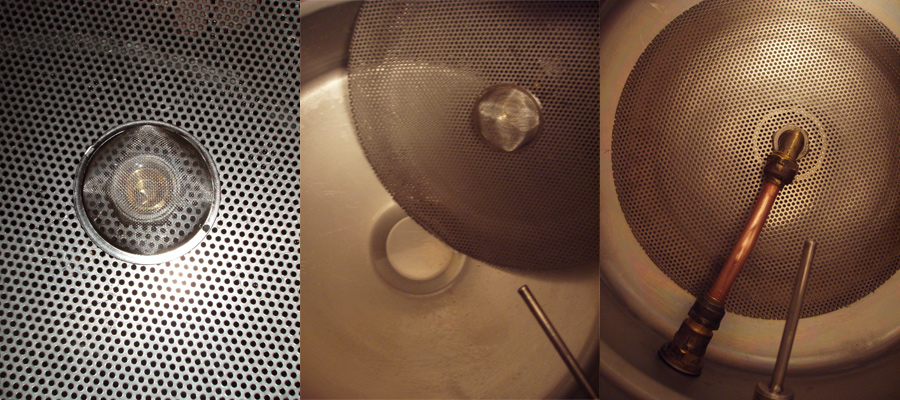
Start by marking a hole using the inside of the coupling end, as guide. I pierced the mesh (it's quite strong, which is good!) with a razor blade (mesh inverted and flush with wood), then cut the circle out nicely using SWMBO's nail scissors. You basically want the hole slightly under the 1/2" thread size; it allows you to thread the ball onto the coupling good and tight.
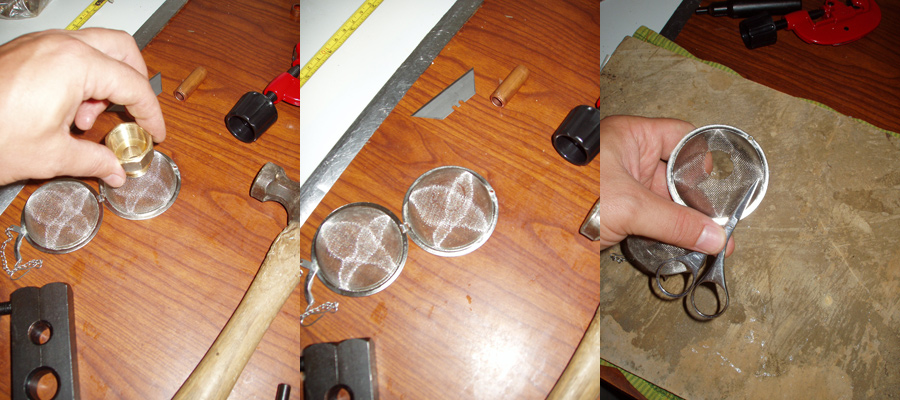
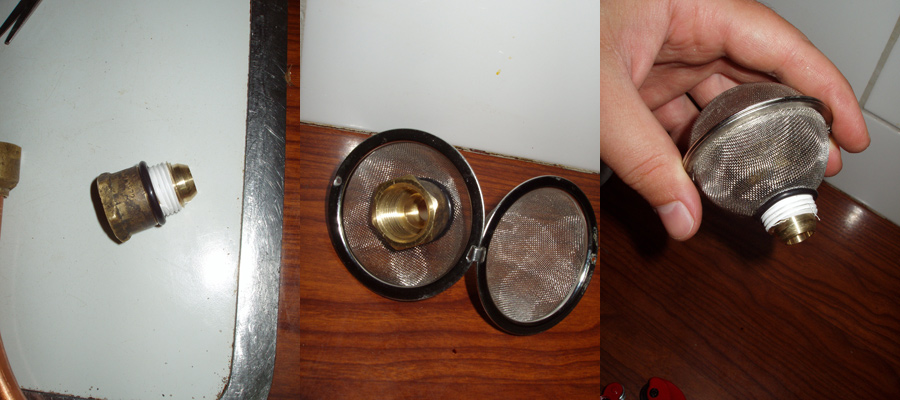
Next, wrap the internal coupling threads with plumber's tape, and roll a rubber washer down. This should be snug. Screw it to the inside of your hop ball so looks like second photo. Roll the next washer down on the outside of the ball - you should now have a washer on the inside and outside of SS mesh (which will allow a nice compressed grab of the mesh when cranked down).
Time to bend yer copper. If you don't have a pipe bender (as I didn't) get creative; use a corny keg, etc. I used the base of my pistil and mortar. Palms on each side and a bit of weight and you're there. Next, get the two end fittings on the copper with threads pointed out, away from each other. Each end into the flaring tool. If you've never used one before, leave 2-3mm of overhang as shown in pic at right. Bang on.
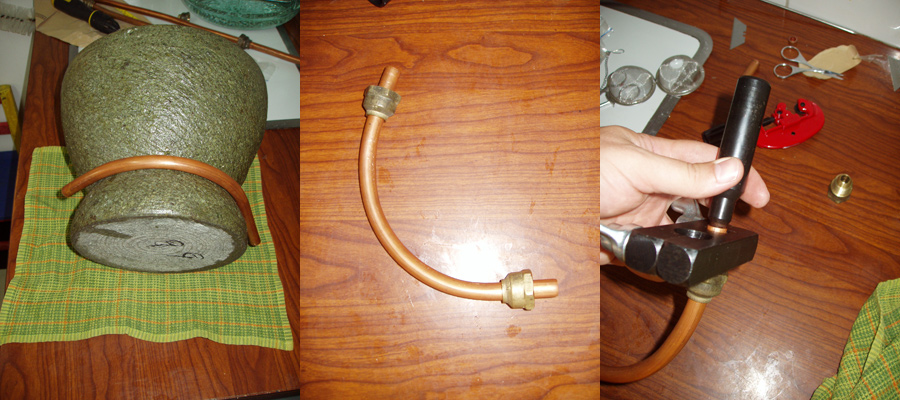
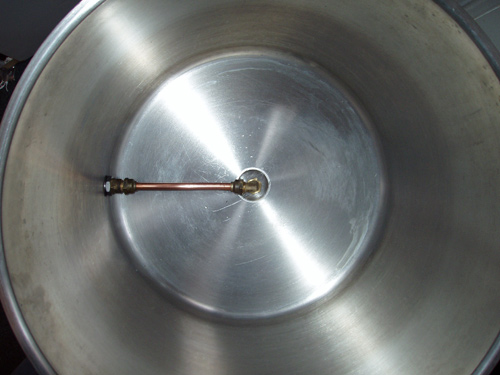
The ball can now be fitted to one side of your arm. The SS mesh should be snug (no play) between coupling fittings. You may have to play with various rubber washers to achieve desired grab, but as I say, it should be snug with no travel. Alternate side of arm next fitted to valve.
Done.
Additional notes:
Chain from ball was removed as is no longer required.
The retaining pin on the locking clip is piss weak. It has been noted in other threads that this is likely the only non-SS part in the ball, and therefore susceptible to corrosion, etc.
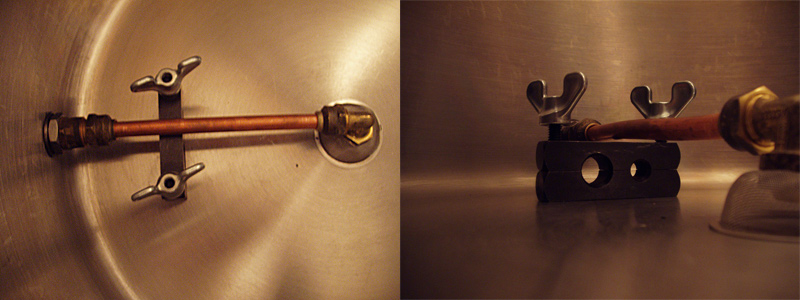
I clamped the locking pin tight (on both ends) using needle nose pliers, then wedged it onto the ball assembly (shown below). Alternately, you could run a small screw into the hole, omitting the clip (probably better)
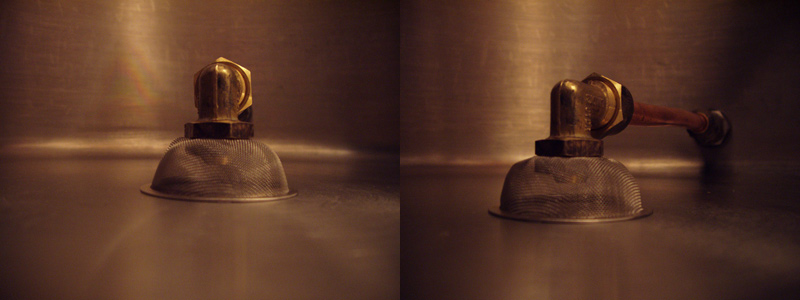
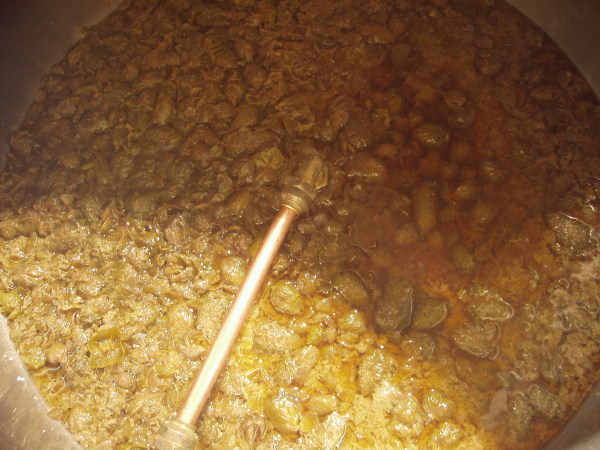
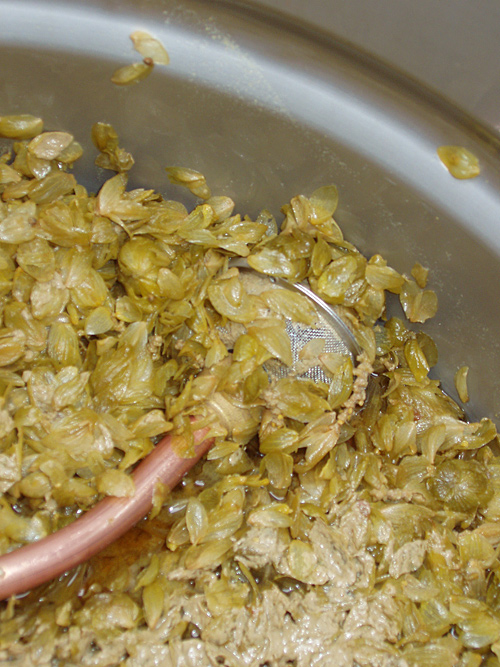
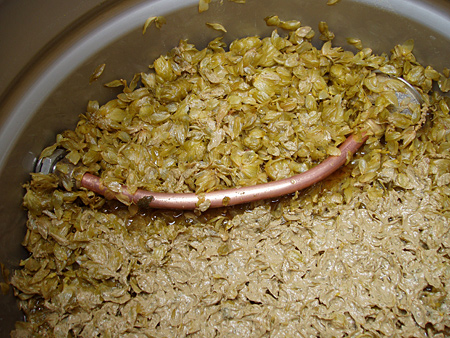
In action:
Final Thoughts:
Plenty of superior commercial offerings are available and alternate setups like warren's false bottom filter, which also has it's benefits.
I reckon a repositioning of arm is in order to fully drain the kettle. An S like approach in arm, so that the arm wraps the side of kettle to ball would be better (allowing tipping/gravity to work effectively).
Another variation would be to reverse the couplings attached to ball, allowing you to mount the ball directly to your valve, omitting the pick-up arm. In that way, you could whirlpool, and pull directly from the side with filter.
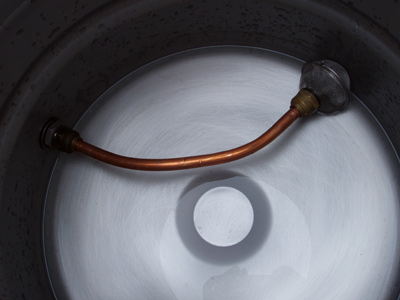
Simon W had a great suggestion to utilise 1/2 the ball running the arm and ball to the center of keg as shown:

so that it works much like Warren's false bottom setup where flower hops create a bed harbouring break. If using a CUB keg as your kettle, I reckon the fit would be perfect to the little circle dimple in the bottom")
Not sure where this project will land. Built it on a whim for a one-off brew as I'm between gear atm.
Other Ghetto Projects:
Ghetto Carbon Water Filtration
Open to suggestions and feedback, as always.
Have fun,
reVox
Here it is, as requested.
Ghetto Pickup Arm/SSBall Hop Screen:
If you have the tools and copper off-cut, it's a $10 D.I.Y.
Tools and parts required:
Tools (as shown from left to right)
Pipe cutter ($7-$10)*
*You could get away with using a hacksaw to cut your copper and filing ends flat; cutter is cleaner.
Flaring Tool ($15-20)
Blade (fine scissors, etc.) to cut circle in screen
Other Tools
Hammer to flare copper ends
Spanner or wrenches to attach ball and arm to valve (finger tight would likely be fine, too)
Parts (as shown from left to right)
Bit of 1/2" copper to desired length depending on your choice of installation *see Final Thoughts
End fitting (thread size to fit your valve $2)
End fitting/coupling (1/2" $4)
2X rubber washers (these come in different widths and are about .25 each, so grab a couple of each- I reckon the one shown and used is 2mm by estimate)
Stainless Steel Tea Ball ($5-6) available here, or Asian supply, Tea stores, etc.
Plumbers Tape (as desired .50)
Start by marking a hole using the inside of the coupling end, as guide. I pierced the mesh (it's quite strong, which is good!) with a razor blade (mesh inverted and flush with wood), then cut the circle out nicely using SWMBO's nail scissors. You basically want the hole slightly under the 1/2" thread size; it allows you to thread the ball onto the coupling good and tight.
Next, wrap the internal coupling threads with plumber's tape, and roll a rubber washer down. This should be snug. Screw it to the inside of your hop ball so looks like second photo. Roll the next washer down on the outside of the ball - you should now have a washer on the inside and outside of SS mesh (which will allow a nice compressed grab of the mesh when cranked down).
Time to bend yer copper. If you don't have a pipe bender (as I didn't) get creative; use a corny keg, etc. I used the base of my pistil and mortar. Palms on each side and a bit of weight and you're there. Next, get the two end fittings on the copper with threads pointed out, away from each other. Each end into the flaring tool. If you've never used one before, leave 2-3mm of overhang as shown in pic at right. Bang on.
The ball can now be fitted to one side of your arm. The SS mesh should be snug (no play) between coupling fittings. You may have to play with various rubber washers to achieve desired grab, but as I say, it should be snug with no travel. Alternate side of arm next fitted to valve.
Done.
Additional notes:
Chain from ball was removed as is no longer required.
The retaining pin on the locking clip is piss weak. It has been noted in other threads that this is likely the only non-SS part in the ball, and therefore susceptible to corrosion, etc.
I clamped the locking pin tight (on both ends) using needle nose pliers, then wedged it onto the ball assembly (shown below). Alternately, you could run a small screw into the hole, omitting the clip (probably better)
In action:
Final Thoughts:
Plenty of superior commercial offerings are available and alternate setups like warren's false bottom filter, which also has it's benefits.
I reckon a repositioning of arm is in order to fully drain the kettle. An S like approach in arm, so that the arm wraps the side of kettle to ball would be better (allowing tipping/gravity to work effectively).
Another variation would be to reverse the couplings attached to ball, allowing you to mount the ball directly to your valve, omitting the pick-up arm. In that way, you could whirlpool, and pull directly from the side with filter.
Simon W had a great suggestion to utilise 1/2 the ball running the arm and ball to the center of keg as shown:
so that it works much like Warren's false bottom setup where flower hops create a bed harbouring break. If using a CUB keg as your kettle, I reckon the fit would be perfect to the little circle dimple in the bottom
Not sure where this project will land. Built it on a whim for a one-off brew as I'm between gear atm.
Other Ghetto Projects:
Ghetto Carbon Water Filtration
Open to suggestions and feedback, as always.
Have fun,
reVox