You are using an out of date browser. It may not display this or other websites correctly.
You should upgrade or use an alternative browser.
You should upgrade or use an alternative browser.
Tight Arse Stir Plate
- Thread starter sosman
- Start date

Help Support Australia & New Zealand Homebrewing Forum:
This site may earn a commission from merchant affiliate
links, including eBay, Amazon, and others.
By burn out though, I would think they mean stop working, not burst into flames....Bummer, I might have to have a re-think....
I'll use it for this one brew though (in a safe place), cheers mika :beer:
mika
Lupulin Threshold Shift Victim
- Joined
- 6/11/05
- Messages
- 2,990
- Reaction score
- 6
By burn out though, I would think they mean stop working, not burst into flames....
Yup...
ben_harvey
Active Member
- Joined
- 16/4/11
- Messages
- 34
- Reaction score
- 1
Bam.

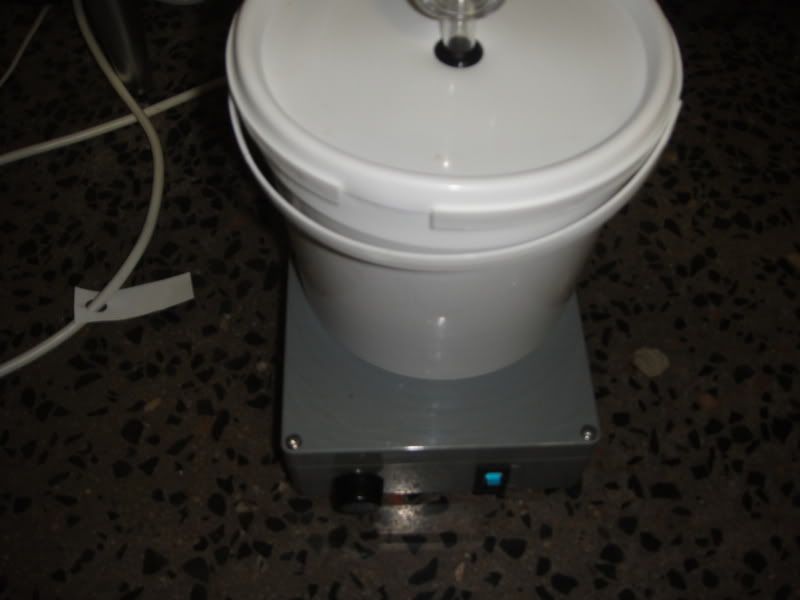
That's a Wyeast 3068 on the plate for my first ever Weizen. Can't wait!

That's a structural toilet roll holding the fan up. Don't use a Sorbent roll or you'll have issues with torsional rigidity.
But seriously I didn't want screws poking out the top and it was the best thing I could find. I have a feeling that it will be a temporary solution that works so well that I never get around to...

That's a Wyeast 3068 on the plate for my first ever Weizen. Can't wait!

That's a structural toilet roll holding the fan up. Don't use a Sorbent roll or you'll have issues with torsional rigidity.
But seriously I didn't want screws poking out the top and it was the best thing I could find. I have a feeling that it will be a temporary solution that works so well that I never get around to...
Gar
Well-Known Member
- Joined
- 29/10/10
- Messages
- 475
- Reaction score
- 7
Bam.
Nice, I thought that was a toilet roll
The pots seem to burn out over time
Well my pot survived one starter pfffft lol
Ah well... like the 6 million dollar man... "we can rebuild him, we have the technology!"
Mine have been working fine for 2-3 years now, so you should not need to rebuild it too often.Well my pot survived one starter pfffft lol
Ah well... like the 6 million dollar man... "we can rebuild him, we have the technology!"
Gar
Well-Known Member
- Joined
- 29/10/10
- Messages
- 475
- Reaction score
- 7

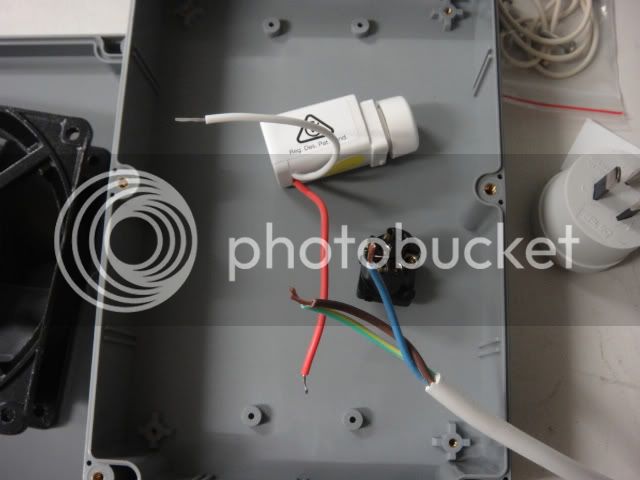
Well I finally got off my bum and rebuilt the stir plate, thanks very much to everyone suggesting the LED Dimmers, seems to work a treat :beer:

I was quite surprised that all the components fit snugly into my existing box.... the dimmer box itself was quite bulky but the guts are nice and small.

lickapop
Well-Known Member
- Joined
- 7/6/08
- Messages
- 103
- Reaction score
- 48
I didnt really feel like reading thru 38 pages but I was wondering.. can I just connect the little nob thingy to the mountable jack without having to build that LMthingy circuit?
oh and where do I buy earth magnets from and what size?
lolz sorry just taking the piss.
great thread. I have read it 3 times already. love your work, especially LC's noob friendly circuit instructions
I am going to knock a DC version up over the next couple of days but I was also wanting to build an AC version.
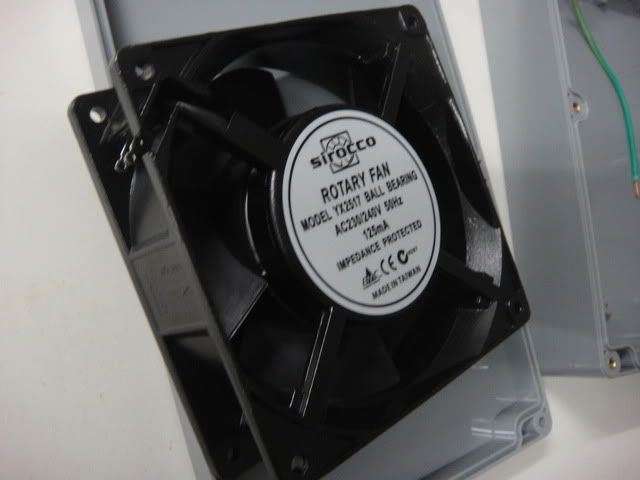
I happen to have a HPM fan controller laying about, and also a 240V 120mm computer fan. I would like to know how I should wire this up. I cannot find clear instructions especially from brewer petes build or Doc.
I am extremely confident in wiring 240v if given enough instruction. The STC-1000 thread was great for that
So if anyone gets a bit of time can you please just throw up a little sketch please or some written instruction
Thanks all


Either you are confident or you need help ... not both.I am extremely confident in wiring 240v if given enough instruction. The STC-1000 thread was great for that
So if anyone gets a bit of time can you please just throw up a little sketch please or some written instruction
Its 240V, it can kill you or someone else, if you're asking for help - stick with the 12V computer fan not a 240V one.
lickapop
Well-Known Member
- Joined
- 7/6/08
- Messages
- 103
- Reaction score
- 48
No worries.
I didn't think about it until now but the same controllers are in my house. When I get the chance I will pop them off the wall and see how the are wired up
Or I will just stare at it long enough that it will come to me. I bet it is real simple lol
I didn't think about it until now but the same controllers are in my house. When I get the chance I will pop them off the wall and see how the are wired up
Or I will just stare at it long enough that it will come to me. I bet it is real simple lol
Steve@PMF82
Simplicity is perfection
- Joined
- 13/11/10
- Messages
- 883
- Reaction score
- 3
No worries.
I didn't think about it until now but the same controllers are in my house. When I get the chance I will pop them off the wall and see how the are wired up
Or I will just stare at it long enough that it will come to me. I bet it is real simple lol
I have the same kind of fan. I was thinking of buying one of these http://www.ebay.com.au/itm/Fan-Speed-Contr...9#ht_500wt_1202
only $35 - although some of the comments say it looks homemade, they would have to be a sparky to sell such a thing you would think?
Would be good to know how to wire one up with a diagram like stc 1000, but all in all it would prob be safer to get a local sparky to wire one
up for me, whether or not that would work out cheaper than ebay option?
lickapop
Well-Known Member
- Joined
- 7/6/08
- Messages
- 103
- Reaction score
- 48
Yeah some of those stc1000 diagrams are awesome. I built a couple of them.
Thanks I saw one of those controllers on eBay. I have a professional manufactured one at home already but you know how it is... It's just another box hanging off your stir plate that gets in the way of your beer mug
I want mine to look sexy.
Thanks I saw one of those controllers on eBay. I have a professional manufactured one at home already but you know how it is... It's just another box hanging off your stir plate that gets in the way of your beer mug
I want mine to look sexy.
lickapop
Well-Known Member
- Joined
- 7/6/08
- Messages
- 103
- Reaction score
- 48
Either you are confident or you need help ... not both.
Its 240V, it can kill you or someone else, if you're asking for help - stick with the 12V computer fan not a 240V one.
Truman42
Well-Known Member
- Joined
- 31/7/11
- Messages
- 3,973
- Reaction score
- 608
Just built myself a stir plate but not sure what size stir bar to use. Ive used a hard drive magnet which is 35mm long. So not sure if I should buy a 30mm stir bar or a 40mm one.
Those of you that have used hard drive magents, what size stir bar did you find worked best?
Thanks.
Those of you that have used hard drive magents, what size stir bar did you find worked best?
Thanks.
sp0rk
Mayor of Pooptown
So after reading the whole thread I've decided I'd like to make a stir plate
while cleaning out a wardrobe today i pulled out an old pc to put out for the council clean up
but first I stripped it of all fans, useful wires, power supply and the old 40gb HDD that was in it
I've gutted the HDD to remove the magnets and also pulled out the drive motor
after about an hour of googling and watching youtube videos, I've figured out I can use the drive motor to power my stir plate
an R/C servo tester for rpm control and a brushless speed controller to convert from DC power to the 3 pole motor
the servo tester was $2.70 and the speed controller was $7.20, both on ebay
the speed controller is rated 20A 6-12v so I can either use a 6v torch battery, phone charger or the computer power supply (which i'm planning on customising into a 12v power supply for other projects)
I'll post more on the progress of this once the servo tester and speed controller get here
ledgenko
Well-Known Member
- Joined
- 1/11/09
- Messages
- 506
- Reaction score
- 4
For an active "starter" just run the stir plate until you see some signs of fermentation... ie bubbles running up the side of the flask, start of a krausen etc. Then turn it off. You don't want to be adding oxygen to the wort once fermentation is underway. This will oxide the wort giving off flavours when you add the entire contents of the active "starter" to the waiting wort. You want to pitch active "starters" to the wort at the peak of fermentation, this gives the yeast a running start at the main wort.
For yeast culturing/stepping up, keep the stir plate going the whole time until fermentation is complete. Then crash chill the wort to settle the yeast. Decant the oxidised beer from the yeast cake and either pitch just the slurry to the wort or add more wort to the flask for a step up, in order to produce more yeast.
Totally OT ... Cheers Argon.. My 5 brews I have done each at 50lt which have had a yeasty / off taste ... Maybe explained by your sims explaination...
Cheers
sp0rk
Mayor of Pooptown
Well, my hard drive motor stir plate experiment is over quicker than i thought
because of the shaft in the centre of the motor, i can't mount the hdd magnet over the middle
so i ended up just grabbing a project box and switch from jaycar
and using a variable voltage power pack from bunnings
8cm fan and a hdd magnet sourced from old pc
i've got some rare earth magnets coming in the mail, as the hdd magnet seems a little too strong
peterl1981
Well-Known Member
- Joined
- 2/5/10
- Messages
- 132
- Reaction score
- 15
hey lads,
I have just made a stir plate, but the pot dose not work properly, it only goes flat out or off, so it only uses one end of pot...
what would be the problem??
I have just made a stir plate, but the pot dose not work properly, it only goes flat out or off, so it only uses one end of pot...
what would be the problem??
Similar threads
- Replies
- 8
- Views
- 1K
- Replies
- 14
- Views
- 1K
- Replies
- 2
- Views
- 1K


