Rinsing Yeast (in Pictures)

Australia & New Zealand Homebrewing Forum

Help Support Australia & New Zealand Homebrewing Forum:

This site may earn a commission from merchant affiliate links, including eBay, Amazon, and others.

Wolfy

Well-Known Member
Joined
18/12/08
Messages
3,872
Reaction score
64
Location
Melbourne
Rinsing yeast is a technique used to 'wash' the yeast/trub slurry found on the bottom of the fermentor after the beer has been removed. The 'cleaned' yeast can be pitched directly into a new batch of beer, or saved for later re-use. I've used the term 'rinsing' (as used in the recently published 'Yeast' book) to differentiate between 'washing' the yeast in water to remove trub and debris from 'acid-washing', a process used to to eliminate biological contaminants.

This process was described very well by chiller in this AHB forum thread some years ago, but as an additional starting point, there are some photos in the Yeast Rinsing Experiment which show the difference between yeast and trub.

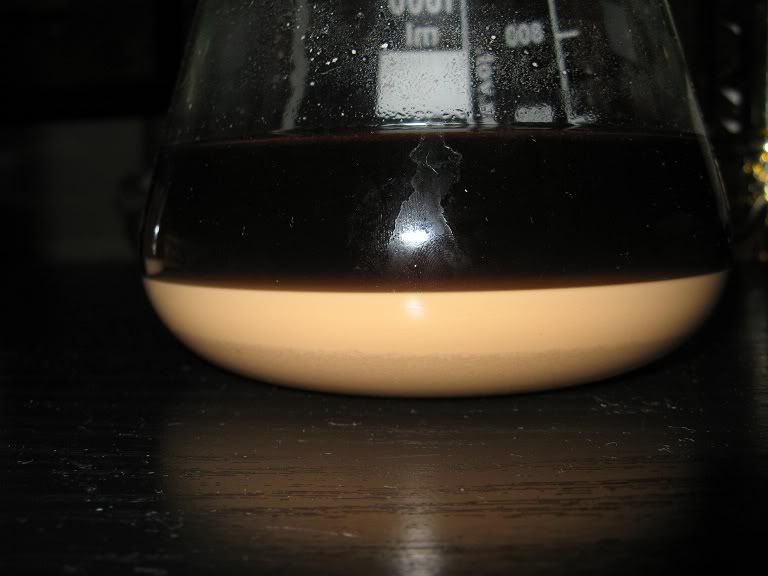
While the process of yeast rinsing is dependent on the yeast-strain, wort composition and what (if any) fininings were used, the basic process relies on the fact that the yeasty-trub will form three distinct layers when left to settle:
yeast_rinsing1.jpg

Here you can see the fermentor-dregs of a dark UK-style ale. The top clear layer of left-over beer, the creamy-yeasty middle layer, and then the trub (protiens, break material and other debris) on the bottom. The process of rinsing the yeast aims to retain only the middle layer of yeast and discard the other two layers, especially the trub and debris.

I wash my yeast in (~400ml) glass pickle jars, they can be easily heat-sterilized (in a pressure cooker or boiled in a large pot) and boiling water can be tipped directly into them to enhance the sanitation procedures. Ideally sterile distilled water should be used for yeast washing, however I use plain boiled and cooled tap-water (here in Melbourne the water is very soft and contains few minerals, but if you live in an area with hard water it may be a good idea to use treated or even bottled water). When working with yeast try to keep the equipment and procedures as clean and sterile as possible, and if possible keep the temperature constant, don't shock the yeast by tipping in water too cold or hot. I try to pre-boil the water and seal the jars a day or two in advance so that the yeast and the water will be the same temperature.

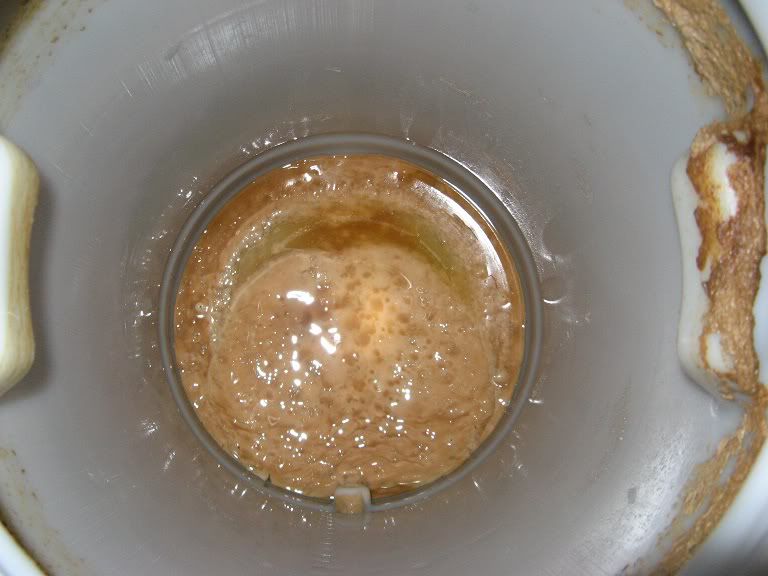
Here is the trub in the bottom of the fermetor after a recently brewed Australian Ale (using Coopers re-cultured yeast):
yeast_rinsing2.jpg


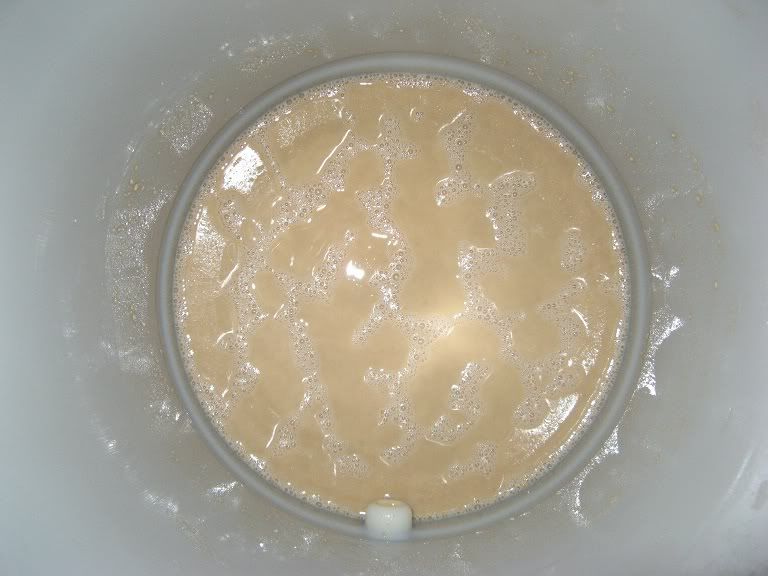
Add a jar full of cooled-boiled water (approx 400ml) and shake/swirl and mix it around and it should look like this:
yeast_rinsing3.jpg


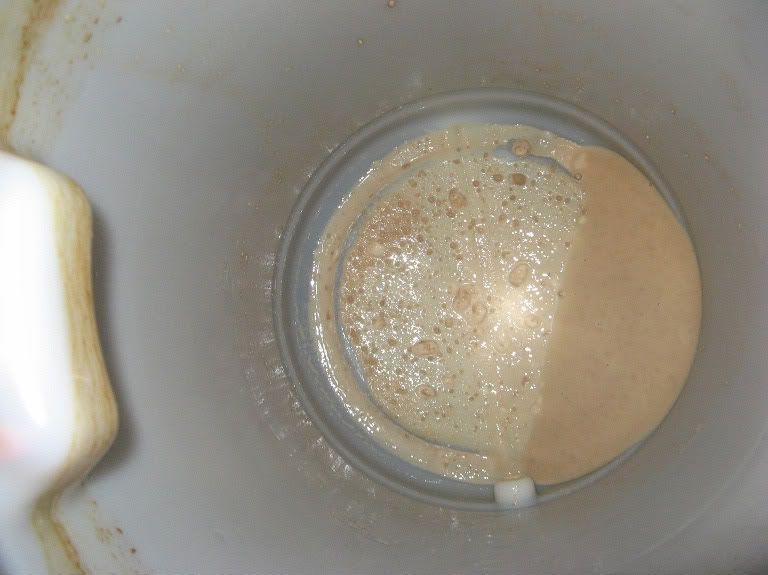
Let the yeasty-liquid-trub settle for 10 to 15mins, and then the first step of the rinsing process is to decant the majority of the liquid into the rinsing-jars, but leaving behind any large bits of gunk, break material, hop or other debris:
yeast_rinsing4.jpg


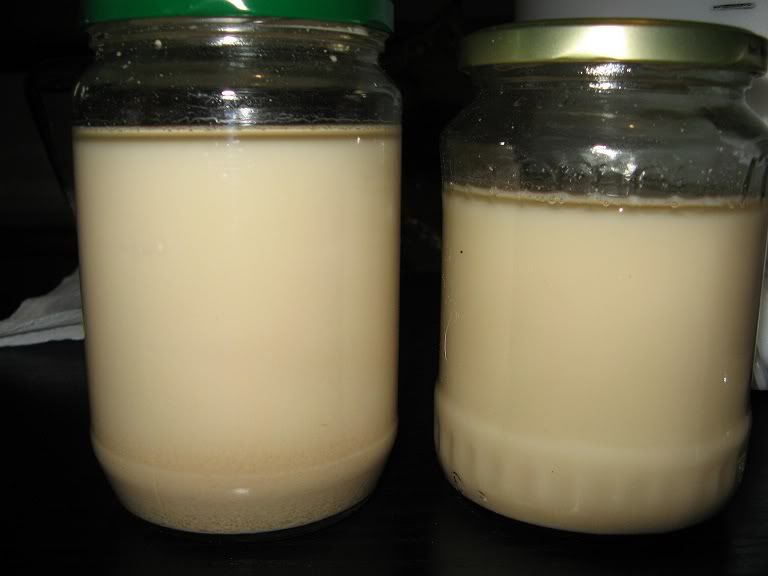
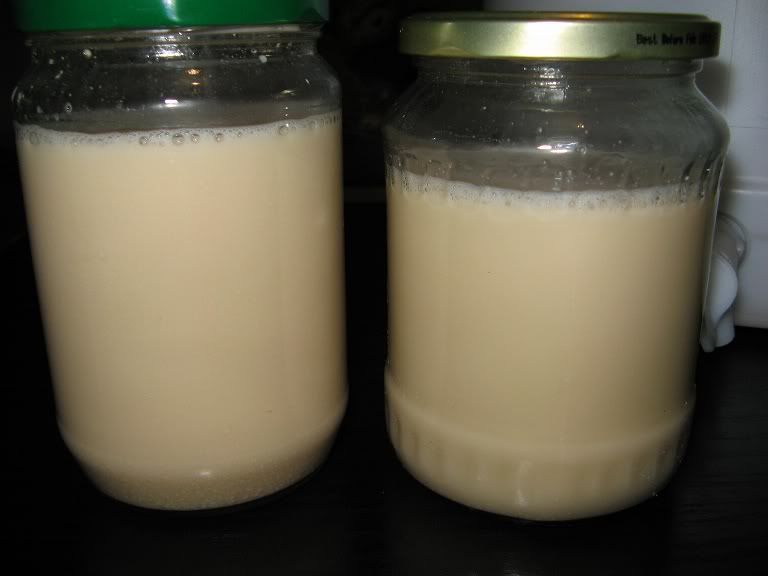
Depending how much beer was left behind, how much yeast and how much trub you have, you should easily be able to fill 1 or 2 jars. Generally yeast rinsed from one jar is enough to pitch into a new batch of beer, but I also wanted to save some for later re-use, so I ended up with 2 jars full of yeasty-trub and the left overs in the fermentor shown above:
yeast_rinsing5.jpg
 
Now we need to be patient and watch what happens, after about 10 to 30mins you should start to see three distinct layers in the jar, clear water/beer ontop, a creamy layer of suspended yeast in the middle and with the trub and break material falling to the bottom of the jar.
The time it takes, and exactly what it looks like depends on the yeast, the wort, the grain, finnings and many other factors, so if you are not familiar with the process or the yeast it can be a good idea to let the jars sit for a number of hours (even a day) and watch as the trub and yeast settle out over time. However, the longer you let it sit the clearer the layers will become, but once the yeast starts to settle out of suspension it is harder to separate (so if you let it settle out to observe, simply shake it up so you can start the process again).
yeast_rinsing6.jpg


We want to keep the middle layer since that contains our yeast in suspension. If you do not leave it long enough you will still have trub mixed in, but if you leave it too long the more floculant yeast will have settled out. The process is a bit of trial-and-error, but by careful observation it's not too hard.

I've found that by the time the layers start to form about 1/2 to 2/3 of the jar's contents is the milky-homogenous-yeasty-suspension that we want to keep, the trub and debris on the bottom is usually a darker, grainy layer, with the jars having a thin-clear layer on the top.
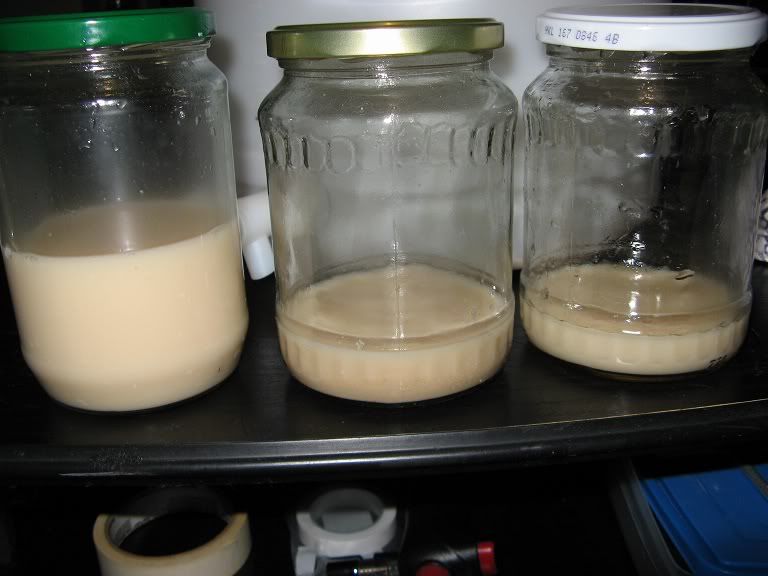
By carefully decanting the liquids we should be able to discard the clear top-layer, keep the middle layer which is our yeast in suspension, and discard the bottom layer of trub.
The middle jar is the original one, with the trub remaining on the bottom, the jar on the right contains our top clear layer and the jar on the left is our yeast-in-suspension that we will keep:
yeast_rinsing7.jpg


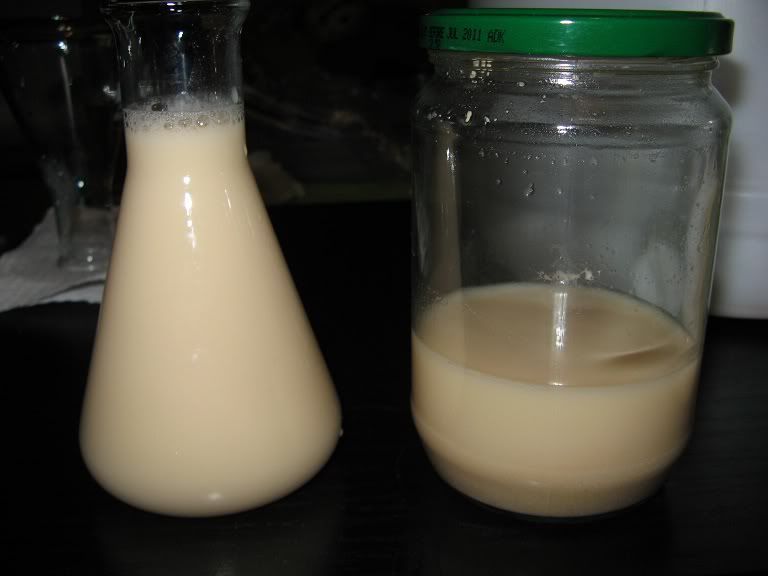
The suspended-yeast-layer from the second jar was decanted into a flask ready for re-pitching, the top clear layer discarded and the trub (with some suspended yeast), that will also be discarded, remaining in the original jar:
yeast_rinsing8.jpg


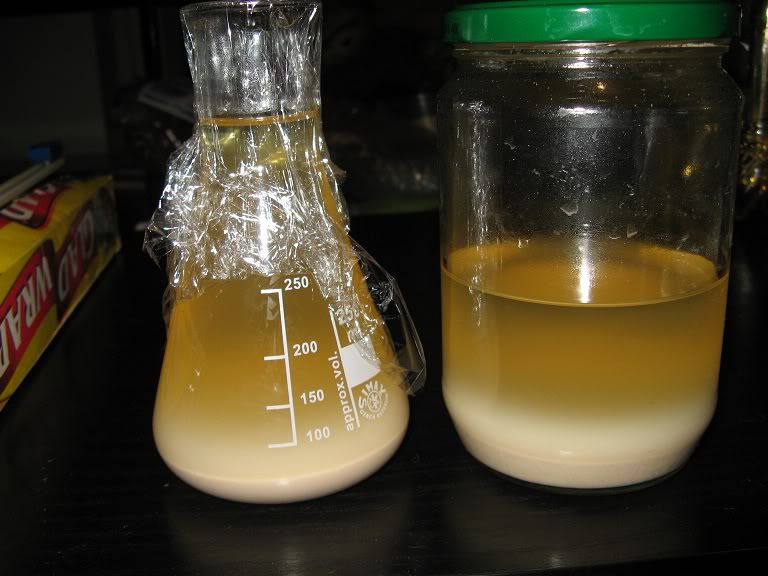
If we have done it right and/or were lucky, by letting the saved yeast-in-suspension layer settle out, we should have only single layer of nice clean creamy yeast:
yeast_rinsing9.jpg

But if you find you still have a distinct layer of trub settling more quickly, simply repeat the process again.

The yeast in the flask was left to settle (refrigeration would have sped-up the process, however since I was going to directly re-pitch the yeast I did not want to risk thermal-shocking it, so instead just waited a day for it to settle out at fermentation temps).
Once the yeast has been rinsed and settled to form a thick compact layer of yeast-slurry (if it is viable and healthy) 50 to 100ml should be adequate for pitching into the next batch of beer.

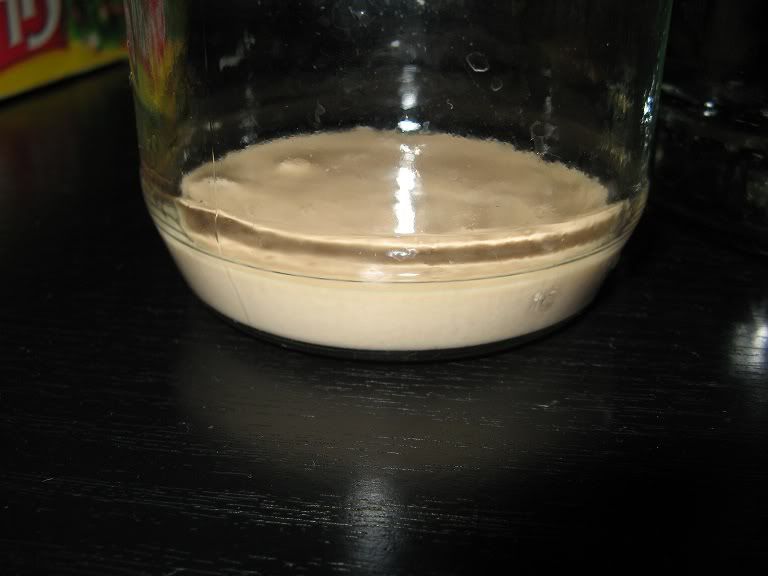
The yeast in the jar, which will be stored for later use was washed several times more, until the liquid remained clear, each time decanting the liquid from the top and giving the yeast time to settle out:
yeast_rinsing10.jpg


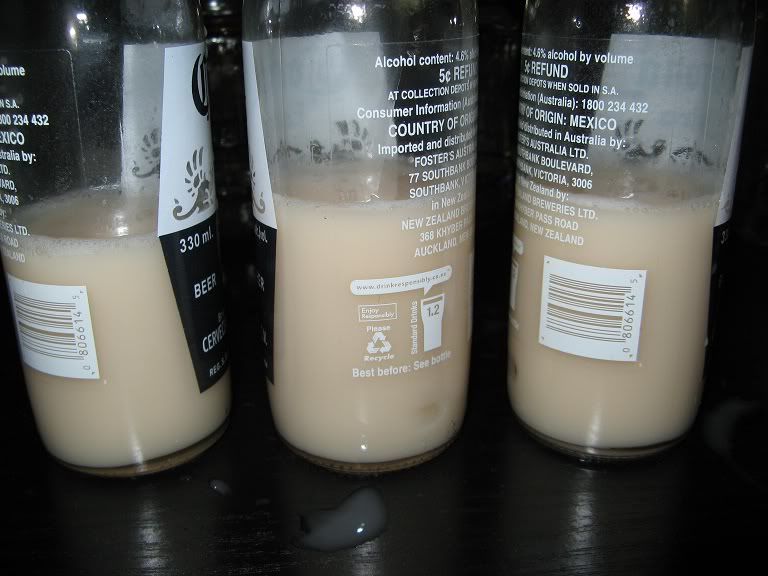
When the liquid above the yeast is clear, it was split into 3 storage containers (ie: sterilized beer bottles):
yeast_rinsing11.jpg


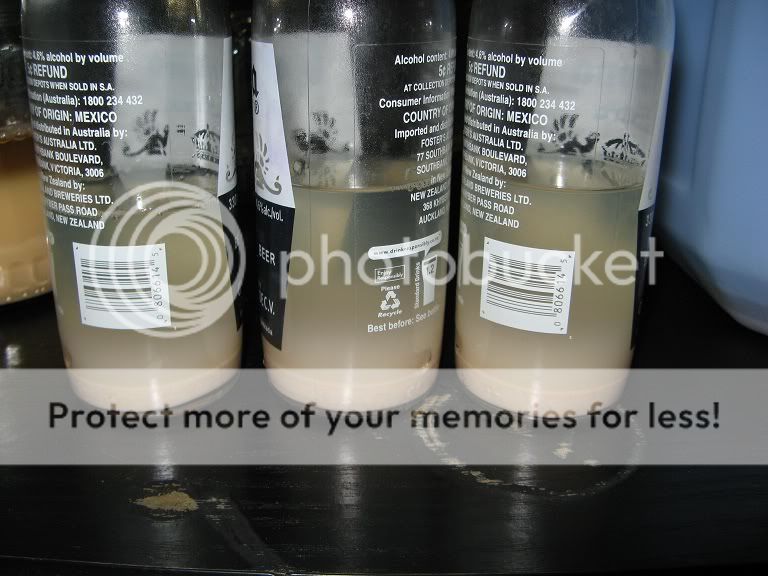
Once they have been capped and labeled the washed yeast should remain viable if stored in the fridge for 6 to 9 months.
yeast_rinsing12.jpg

The thick layer of yeast on the bottom of the bottles should be adequate to pitch directly into a starter (I step it from 300ml to 1.5L before pitching), however yeast stored this way does not usually remain viable more than about 1 year.
 
What a way to make use of the 3am time slot while most others are sound asleep you are hard at work.

Great informative post again Wolfy, nice clear pics, this is all very similar to what i have been doing, but you have given me a few things to think about to refine my process further.

:icon_cheers:
 
Great job Wolfy :beerbang:

One question, if you were using Mr malty re pitching calculator after the rinse, what would be the cells per ml that you would use to work out the amount to pitch.

Thanks for another great thread!

BDB
 
I reckon a separatory funnel would be great for this. You can get ones that would fit into the top of a conical flask to limit air exposure.
You could wait for the trub to settle, then drain it off, wait for the yeast to settle and then capture it.

thanks for the writeup wolfy, i'm always interessted in ways to make my yeast go further :)
 
Superb post Wolfy. Very well put together.

Steve
 
Good work mate.

This kind of contribution epitomizes what joints like should be all about.
 
Should there be any concerns about headspace in the storage vessel? I store my yeast under "beer" and have always made sure to fill the bottle to about an inch & a half from the top or higher. Any point worrying about it?
 
I reckon a separatory funnel would be great for this. You can get ones that would fit into the top of a conical flask to limit air exposure.
You could wait for the trub to settle, then drain it off, wait for the yeast to settle and then capture it.

thanks for the writeup wolfy, i'm always interessted in ways to make my yeast go further :)

A bulk buy of separatory funnels?
 
beerdrinkingbob, since the yeast has been washed there should be very little 'non yeast' material, so I slide that slider all the way down (close to 0%).
If I let the yeast settle out and form a nice solid layer on the bottom of the jar, the 'yeast concentration' can be slid all the way to the right for 'thick yeast'. However, since there is often an abundance of yeast-slurry, it does not hurt to be conservitive, so I assume a cell density of about 2.5billion cells per ml.

ekul a separation funnel would be ideal, however it's not a piece of gear that I think too many home-brewers will have at home. :)

Pennywise, we're storing yeast not beer, the theory in storing it under 'pure' water (which is why distilled water is best) is that we push it into an almost dormant-state. Once the yeast settles settles it is not in contact with the air in the bottle (if it is under water or beer) but so even if there is a small exchange of air due to the large head-space, I don't imagine it would be a problem. What were you thinking would be a problem?
 
sexy looking yeasties. B) great work on the process mate, couldn't have done it better myself.
 
Just having a binge on reading about yeast atm so this is perfect.

Cheers Wolfy!
 
we're storing yeast not beer, the theory in storing it under 'pure' water (which is why distilled water is best) is that we push it into an almost dormant-state. Once the yeast settles settles it is not in contact with the air in the bottle (if it is under water or beer) but so even if there is a small exchange of air due to the large head-space, I don't imagine it would be a problem. What were you thinking would be a problem?

I was thinking about any contaminants in the air being left in the bottle, I just figured if I minimised that, it could only be agood thing.


On another issue, I've got a bottle of distilled water that's been opened. What's the general thoughts on using it straight from the bottle, or should I boil/ccol it now it's been opened?
 
Would you make any change to this process for WLP002? I find that it flocculates so well that I end up with lumps of (what I assume is) yeast, and they settle out first. Would you just throw them out with the trub and keep what's left in suspension? I guess you could also give the jar a good swirl to try to "dissolve" some of the lumps.

Cheers,

Jon
 
Well done mate,

Great post and awesome example of a working method.
 
On another issue, I've got a bottle of distilled water that's been opened. What's the general thoughts on using it straight from the bottle, or should I boil/ccol it now it's been opened?

Distilled or de-mineralised water? These are different.

The one you get for irons at the supermarket are demineralised in most instances which is essentially RO water, not distilled. Your just as well off using Melbourne tap water which has been boiled and cooled.
 
Would you make any change to this process for WLP002? I find that it flocculates so well that I end up with lumps of (what I assume is) yeast, and they settle out first. Would you just throw them out with the trub and keep what's left in suspension? I guess you could also give the jar a good swirl to try to "dissolve" some of the lumps.

Cheers,

Jon

(same goes for Wy1968)
short of popping it into a flask and onto a stir plate i'd just swirl the fermenter until it breaks up and comes back into suspension and start the process from there into the jars. Ive done this before with 1968 for separating yeast and trub and have had no problems identifying trub/yeast/water layers.
 
Pretty sure it says both de-mineralised & distilled on the bottle, but I'll have a look when I get home.
 

Latest posts

Back
Top