Fully Automated Brewing System Design

Australia & New Zealand Homebrewing Forum

Help Support Australia & New Zealand Homebrewing Forum:

This site may earn a commission from merchant affiliate links, including eBay, Amazon, and others.
Mash tun sounds too tall and skinny, I can't remember where I read it, but a depth/diameter ratio of 1:1 (or as close to) is preferred for most brewery vessels. There's good economic sense behind it for a kettle. And it's the 'rule' we work to for processing tanks at work, which include agitated tanks as you might find if using a mash rake (especially if it's reversible for emptying the mash tun)
 
At my old job the more monitory and the number of 24 inch monitors you had determined how important you were...
:icon_offtopic: haha quite the opposite here... when you no longer have to draw, your worth more
 
:icon_offtopic: haha quite the opposite here... when you no longer have to draw, your worth more

+1, no cad used in design and construction of either of my brewbots. Only recently did the schematics for the design competition.

Not that I can't, it's just that it doesn't offer much value for one-off prototypes. 1 minute with pencil and paper will be just as good as 1 hour in front of CAD.

Besides, I'd rather be in the workshop than in front of the nerd box. :)

If you think you are going to be able to print parts, you are doing it wrong. The output of most 3D printers isn't that smooth or true or strong. At the end of the day it's still a few blobs of melted plastic.

Each to his own. Glad to see you back at it Bandito.
 
Mash tun sounds too tall and skinny, I can't remember where I read it, but a depth/diameter ratio of 1:1 (or as close to) is preferred for most brewery vessels. There's good economic sense behind it for a kettle. And it's the 'rule' we work to for processing tanks at work, which include agitated tanks as you might find if using a mash rake (especially if it's reversible for emptying the mash tun)

Yea, I realised that when I ordered the butterfly valves, but may just be an optical illusion because it is 30cm diameter, and at 30cm high it would be 20 litres. The rest of the hight is for liquid to evaporate, boilover protection and stuff like the washer nossle - It just looks wrong!

I just want to see this 3D printer of yours in action...

Sure has been a lot of talk about it huh! If you cant wait the 12 months it will probably take to install the last 3 parts :unsure: you can always google 'reprap mendel' and see plenty of vids on youtube. Seroiusly though, its only a few hours to install and a few weeks to calibrate and tweak the print quality - The circuits do power on at the moment. Settling in to the new place and cleaning the old place is the priority at the moment though.
 
It seems the false bottom rotation issue is solved. The issue was that when the false bottom is rotated about a pivot point directly above the butterfly valve's pivot point, as the butterfly disk rotates the false bottom gets closer and closer - to the point where they touch each other after just a quarter of a turn of the disk.
This seems to have been solved by moving the false bottom's pivot point (axis) horizontally so it is closer to the downward moving half of the disk. This way the disk can be rotated to an almost 90 degree (vertical) angle and thus maximise the area for the grain to fall out of the MLT. I'm still to tweak it and find out if it can go vertical, but there is an Animated video below>


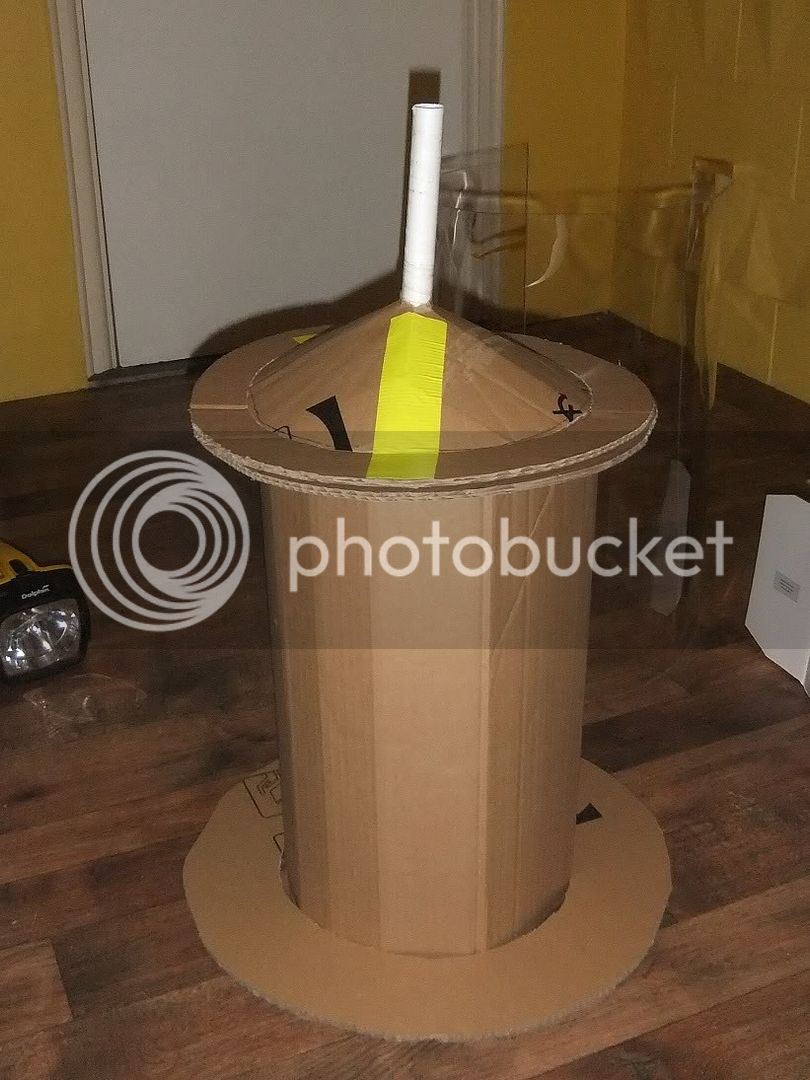
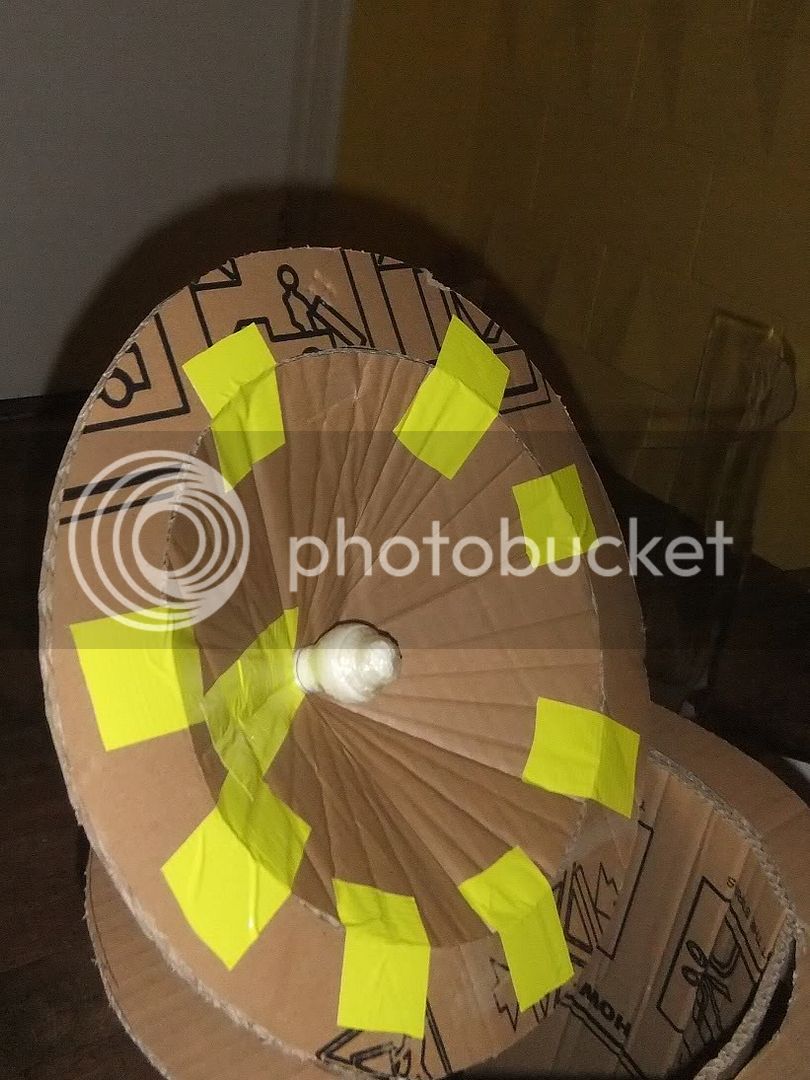
I also made a mock up of the rotating tank washer (sprayball), and installed it in the cardboard mockup of the MLT/kettle. due to it being very close to the lid, it seems as though I wont need a 360 degree version and a 180 degree spray pattern will suffice.
mlt-cardboard-mock-1.jpg

mlt-lid-underside-cardboard-mock-1.jpg


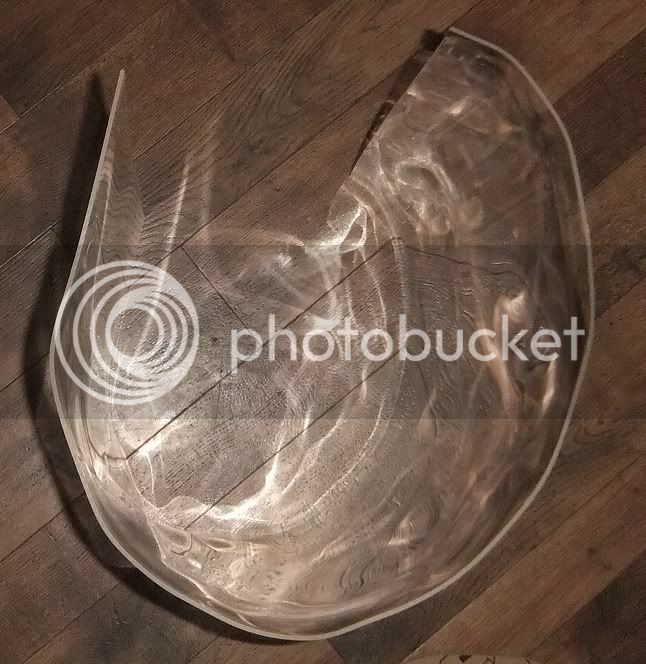
But to make sure the spray pattern is effective I have decided to make a mockup version of the MLT using perspex so I can see how it cleans out the spent grain and how the mixer mixes the grain. At the moment I am thinking of having a motorised mixer offset towards one side of the MLT. Theory is that it would be like having only one beater in a cake mixer, and might improve the mixing as opposed to one centrally. This would allow the mixer to be on the low side of the butterfly valve so as not to hit it as the disk rotates, and free up the central space in the lid for the rotating tank washer. The diameter of the mixer will only be half the diameter of the vessel.

The first try rolling acrylic sheet using an electric heat gun did not turn out well at all:>
perspex-mlt-1.jpg


Will retry next weekend by constructing a 90cm x 60cm x 12cm high oven out of wood and once the whole sheet of acrylic has reached its plastic temperature where it can be shaped, rolling on a form - either a 300mm log or something similar.

This way I hope to be able to see any areas that arent washed by the tank washer before its made in stainless by http://www.tripleninestainless.com.au/orbital.html which I doubt will be cheap.

Next stage is to make mockups of the air inlet and steam outlet tubes for the kettle - it will have a lid, and will have air pumped in so the steam is forced out. This outlet will go through a coil in the HLT to help to heat the sparge water for the next batch that will be mashing while the kettle boils the previous batch :)
 
Sure has been a lot of talk about it huh! If you cant wait the 12 months it will probably take to install the last 3 parts :unsure: you can always google 'reprap mendel' and see plenty of vids on youtube. Seroiusly though, its only a few hours to install and a few weeks to calibrate and tweak the print quality - The circuits do power on at the moment. Settling in to the new place and cleaning the old place is the priority at the moment though.

Hi Bandito,

Been following this thread very sporadically but most of this talk about automation is above my head. I have missed something, how does one of these 3D printers help me make beer?

Kieren
 
Hi Bandito,

Snip:
how does one of these 3D printers help me make beer?

Kieren

I doubt a 3d printer would help you make beer. But in my case -

The 3d printer is purely to make the rotary valve that will dispense accurate volumes of grain to the mill.

The following video is of the 3d model that will be printed and assembled.

It looks like there will be at least 3 of them - one for each type of malt. Specialty malts may have to be mixed together to make do with only three. All three feed into the one marga mill motorised by a drill on a 3d printed frame. Thats about its only uses.


If it all works, or when it all works, you or any other brewer wont need a 3d printer because I will have one that I can print stuff for you for the cost of the plastic plus postage :)
 
Hi Bandito,

Been following this thread very sporadically but most of this talk about automation is above my head. I have missed something, how does one of these 3D printers help me make beer?

Kieren


you can always google 'reprap mendel' and see plenty of vids on youtube.

It is meant to model parts for the brewery which will then make beer.

EDIT: Bandito beat me to it
 
So are you restricting yourself to 3 malts with your Rotary valves ?
I can't quite think of a truly better way of doing it, but for example. You could indivdually weight monitor each malt container and use a loss in weight type of system, with the rotary valve simply acting as isolation from moisture in the tun.
Or with loadcells under the mash tun, you could use a gain in weight and tune the gate open time from the hoppers to achieve your recipe. Material flow would be a bit dependent on hopper fill level, but with a bit of tuning, should be able tio achieve good results.
As I understood it, 3D printed parts were good for looking at, but weren't much good for actual use, particularly with a fairly abrasive product like grain.
Could also use electromagnetic vibrators under each hopper, rather than the slide gate, then the 'on' time of the feeder could be calibrated to the weight of grain moved. Should be a little less dependent on hopper fill level.
I guess you're going to need loadcells or some sort of ultrasonic sensor in each hopper anyway for inventory control and to 'alarm' if a hopper runs out of product.
If you're simply planning on the same recipe time after time I guess the rotary valves should work out OK, though you'll still need some sort of weight monitoring in the mash tun to calibrate the rotary valves to.
 
So are you restricting yourself to 3 malts with your Rotary valves ?

No, the maximum number of rotary valves per marga mill seems to be either 1 base malt plus 2 speciality or 4 speciality. Based on height available above the mill. I have sketched the hopper and valve design on paper but havent posted it.

As for the rest of your suggestions/comments, I am going to need some time to contemplate them! This isnt just 1 + 1 = 2, its 1 + ? = X type of stuff.

So far i've gone for the simple assumption that volume will suffice, and I'm pretty sure it will, but I'll try and check.

Whats the formula for how much moisture malted barley absorbs v's temperature and humidity again? Oh yea! 42!

This could get just a little too complex, no?
 
I doubt a 3d printer would help you make beer. But in my case -

The 3d printer is purely to make the rotary valve that will dispense accurate volumes of grain to the mill.

Ah, I see.
 
Hmmm... I hope you know what you are getting into Bandito.

Most home made 3D printers don't print at very high res:

3d-printed-nerf-gun-e1301763075881.jpg


Not only that, but without a heated bed, larger output typically warps as it cools.
 
That valve is huge!

I went on a tour of the Little Creatures Brewery in Fremantle recently. The brewer there said their mash tun had a flat false floor in it. The mash stirrer was used in reverse to push the spent grains outward to a side mounted valve. I think they were then pneumatically transported to waste silos

If your mash stirrer was designed correctly you could take a similar approach...

Cheers
 
Is that mash tun made of food grade cardboard? Good to see you back.
 
Silo Ted, I'm using a marga because I already had it and because it seems the only one that easily runs off a drill. Seems all the others need pullys with powerful motors. It is the bottleneck in getting the malt in the tun though.

I've been waiting for that gregs :). I dont see anything wrong with it though, theres lots of stuff going into each vessel and making mockups lets me see it all in realistic 3d just as if I was touching it.
 
Silo Ted, I'm using a marga because I already had it and because it seems the only one that easily runs off a drill. Seems all the others need pullys with powerful motors. It is the bottleneck in getting the malt in the tun though.

a man of your talent should be able to hook up a wiper motor to a MM2 or similar.
 
What's the build cost on this ? A $150 crankandstein would be a drop in the ocean - and easily driven. No need to cut corners, do it properly.

Though you should make one out of cardboard first, see how she runs.
 
Back
Top