Brewology Brew Rig.

Australia & New Zealand Homebrewing Forum

Help Support Australia & New Zealand Homebrewing Forum:

This site may earn a commission from merchant affiliate links, including eBay, Amazon, and others.
Hi guys,

A bit of an update!!

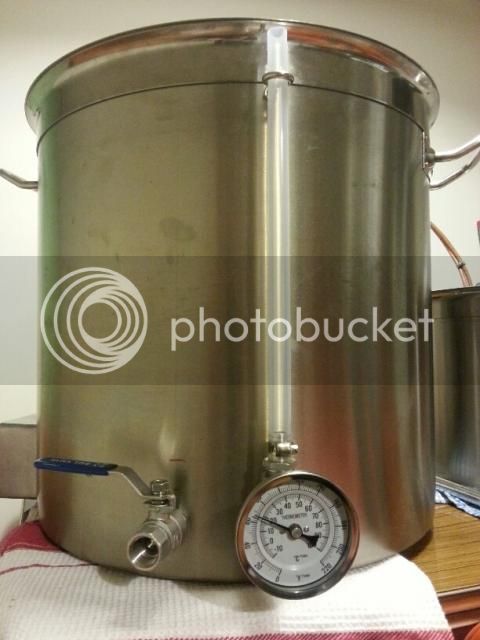
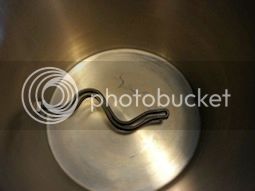
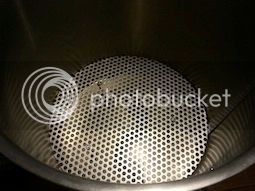
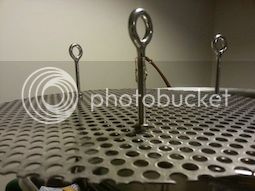
I installed the Camco 5500w element this morning. That was a fun job. :huh: I used a hole saw to start with but I think went to slow with the drill and the stainless hardened and blunt the hole saw. I ended up using the dremel (ozito) to finish the job. The hole turned out good tho. I had to thread the element into the hole so it's a nice tight fit. With the die-cast hobby box and silicone washer I managed a couple of turns on the retaining nut. Holds water nicely.
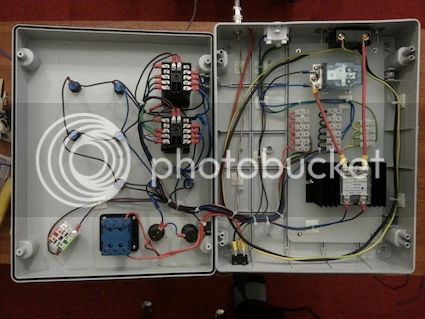
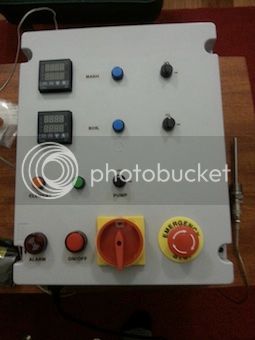
Elementin-2.jpg


Wiring Box

elementbox.jpg


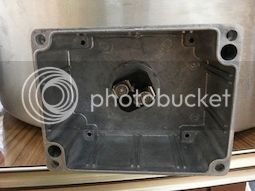
I have to wait a week or so before my sparky can install a 25A outlet to run the element. It is going to be a long wait.
 
Good to see that you have the element installed. WRT the steel hardening, it hardens when it's too hot. You are recommended to cut slowly and use cutting fluid. You did the right thing of you used the fluid, otherwise you still may have gone too quickly.

Good job!
 
Thanks fellas,

It is all starting to come together.

I had a false bottom cut at the local sheet metal shop today. It think it will drain nicely and, if/when I do
go braumeister with this rig, I can have it trimmed down to fit the top of my 400mm wide malt pipe.

Falsie :super:

FlaseBottom.jpg


Falsie Feet

FalseBottomLegs.jpg
 
Hey Edak,

Its only 1.5 mm. Just measured it. I forgot to ask at the shop. It will most likely need reinforcement to be used on a malt pipe.


I got the metal shop to cut it.
 
brewologist said:
Hey Edak,

Its only 1.5 mm. Just measured it. I forgot to ask at the shop. It will most likely need reinforcement to be used on a malt pipe.


I got the metal shop to cut it.
They look like quite big holes too?
 
Hey Parks,

I wanted some perf with really good drainage. I read on here that some brewers have run their rigs dry below the falsie due to not enough flow. The voile bag and pump speed can contribute to this to. If my silicone hose turns up in the mail today i will give it a dry run (with water) to see if there are any issues with drainage. Without a grain bed it will be had to tell though.

The perf is (with my crappy vernier) 1.5mm thick and the holes are 9 or 10mm wide. About a 40% open area.

I was cruising eBay last night and ordered one of these.
http://www.ebay.com.au/itm/1-2-SS316-Stainless-steel-spiral-cone-spray-nozzle-very-heavy-weight/121063254783?_trksid=p2045573.m2042&_trkparms=aid%3D111000%26algo%3DREC.CURRENT%26ao%3D1%26asc%3D27%26meid%3D8927827160211496646%26pid%3D100033%26prg%3D1011%26rk%3D1%26sd%3D121063254783%26
In the spirit of keeping everything stainless, I think it should do a good job of dispersing the return wort. The plan at the moment is to plumb it through the lid and down below the surface of the liquid to minimise splashing and agitate the mash.
 
Sorry mate, I missed you were BIAB'ing.

Looks good :)
 
BIAB is the plan to start with on this rig.

I've already been doing it with gas but the stuffing around involved with step mashing and the noise have inspired me to go electric. I want to be able to chill out and relax on brew day. With the gas its like a jet is taking off in my backyard and I can't really listen to music or have a conversation.

With the PID and electric I should be able to wander off and do a few jobs around the house (mow the lawn while mashing), pour a beer and chat with the GF or mates and relax a bit once I know and trust my rig.

After I've pumped out I few brews I'll reassess the situation. I have the bits for a malt pipe but plumbing it will be challenging due to the element on the bottom of the kettle. I have thought of a way around this but need more time to think it through.

I drank the last of my kegs last week so the priority at the moment is to get the current rig up to the stage where I can brew on it. I'm just waiting for some deliveries from Aliexpress and eBay and the electrician to come around so I can power it up. Hopefully I'll be brewing on it Saturday week.

Cheers,
 
Oh, you've hit the catch 22 situation of can't make homebrew with a homebrew - what will you do?!??

:p
 
Well, being on a work break I sorta hit up the homebrew's pretty hard last week.
The girlfriend has me on a health kick at the moment.

So, unforeseen to me, I will be partaking in dry July after all. :)

I'll sneak in the odd beer here and there.

Off to the Bright this weekend and can't miss visiting the Bright Brewery.
I'll definitely be purchasing some samples to bring home to.
 
Hey Paul,

I used a 22mm hole saw for the larger lights (same as I used to drill for taps on kegerator and kettle) and a 15.5 for the small lights and switches (they were 16mm but the 15.5 did the job). I dremeled and used a jigsaw for the PID controller's and other square holes.

If I had a set of hole saw's I would have used them for all the cut outs as they are easier to use and give a better finish. The drill bits tended to rip the plastic so I had to be really careful. I also started off with small drill bits and stepped up to the finished hole size to make the hole placement more accurate.

Cheers,
 
Hey Brewers,

Another update as I got a bit more done today. Waiting on all the parts to come is killing me. There really is a slow boat from China. I'm still waiting on some 25mm silicone hose for the plumbing, 12v pilot light, computer fan, transformer and an e-switch to kill the element in case of a disaster.

A big thanks to Jon's Brew for the thermometer and other bits and pieces. Also a shout out to Gava for the stainless cam lock fittings. I'll be using them when I put the plumbing together which will hopefully be next week.

Thanks to everyone who has helped me out with this build.

Cheers,

A 22mm and 6mm hole and voila.....Sight Gauge and Thermo

ThermoandSightGauge.jpg
 
Another update on the progress.

I got a bit more done on it tonight. The control box is pretty much ready for a test run, bar the cooling.

I installed an eStop, relay and swapped out one of the 240v pilot lights for a 12v to show when the element is working. The sparky will be installing power for it sometime this week.

The guts:
Insides.jpg


Almost ready to brew. I suppose I will have to do a water test before I throw some grain at it.
eStopin.jpg


Cheers,
 
Looking good mate.

Apparently those alarms are quite loud. Im going to keep mine inside the box once I get it, and cover it with some blue tack to quieten it down a bit.
 
brewologist said:
Almost ready to brew. I suppose I will have to do a water test before I throw some grain at it.
Where's your sense of adventure?
 

Latest posts

Back
Top