Matto-FNQ
Active Member
- Joined
- 8/1/18
- Messages
- 27
- Reaction score
- 29
Hi team,
It's time to document the start of my keezer build project for internet posterity.
Thanks to everyone who gave advice in my previous thread (https://aussiehomebrewer.com/threads/advice-on-beginners-ikegger-system.97510/) . I've listened to most of it and stubbornly ignored some - we'll see how badly that comes back to bite me.
To recap:
...and this brings us to the latest plan. I'm going to shamlessly copy Batz' bar build here:
https://aussiehomebrewer.com/threads/fitting-a-font-to-a-chesty.64398/
I've bought a freezer (brand new GVA 199L from The Good Guys), and ordered a bunch more stuff from CheekyPeak, Clever Brewing and other places. My credit card is suffering, and the wife is getting concerned. Any hope that this is a cheap project to make cheap beer has long since faded.
Plan is:
Still need:
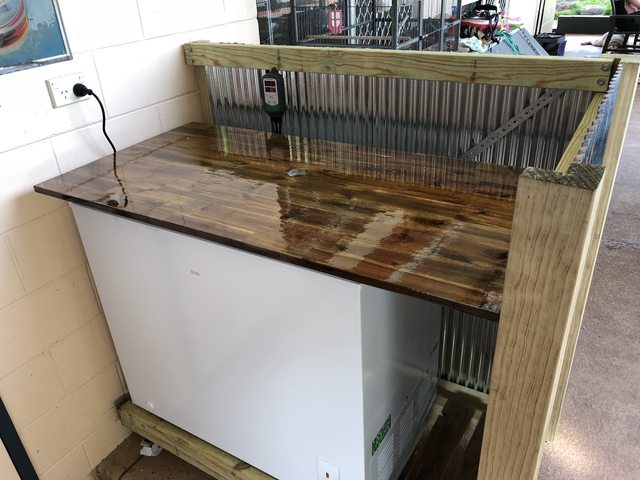
Still waiting on the last shipments to arrive, but will hopefully get cracking on the bar "shell" build this weekend.
Photos:
As always, any advice is most welcome - this is my first time building a keezer, and first time with anything to do with kegs.
Cheers,
Matt
It's time to document the start of my keezer build project for internet posterity.
Thanks to everyone who gave advice in my previous thread (https://aussiehomebrewer.com/threads/advice-on-beginners-ikegger-system.97510/) . I've listened to most of it and stubbornly ignored some - we'll see how badly that comes back to bite me.
To recap:
- Initial plan was to buy some iKegger mini kegs and use them in the drinks fridge that we already had. But that was expensive (I thought at the time - HA!), and not great bang-for-buck. Also, with friends living close who all run proper keg systems, I could see the attraction of staying with a similar system so we can all help each other, swap gear, etc. Mini keg plan got the boot.
- Next idea was to buy a bar fridge and make a mini kegerator. But that plan got squashed when my refurbed 19L kegs arrived and wouldn't fit in the fridge that I'd bought via Facebook. There was discussion about whether a font would be a smart idea, with the majority of people believe it would be quite dumb given the climate here. I really wanted to be able to have 2 beers on tap, and keep at least one spare keg cold and ready to swap in. So the bar fridge got sold.
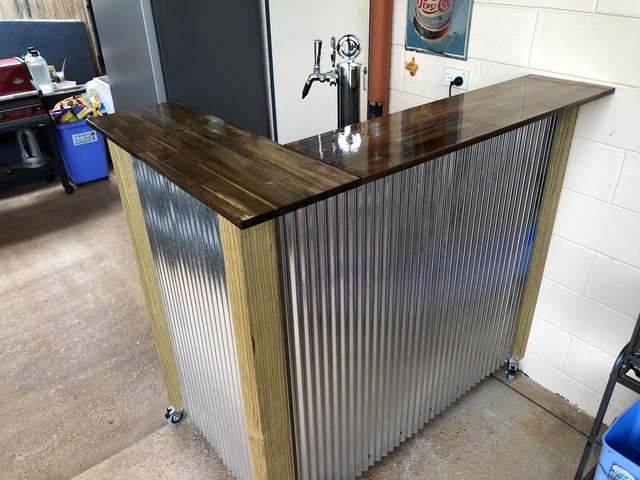
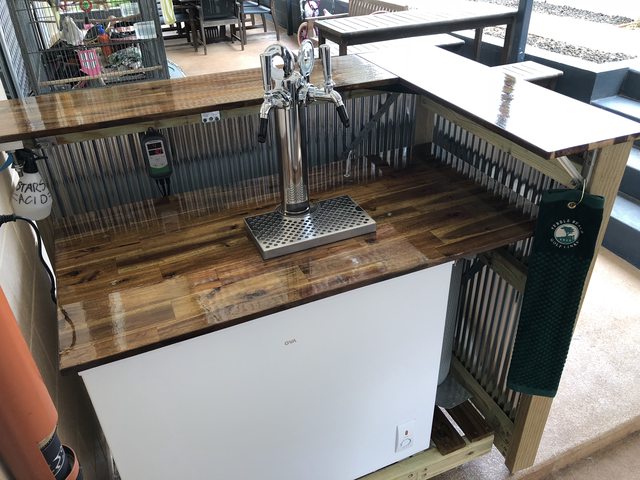
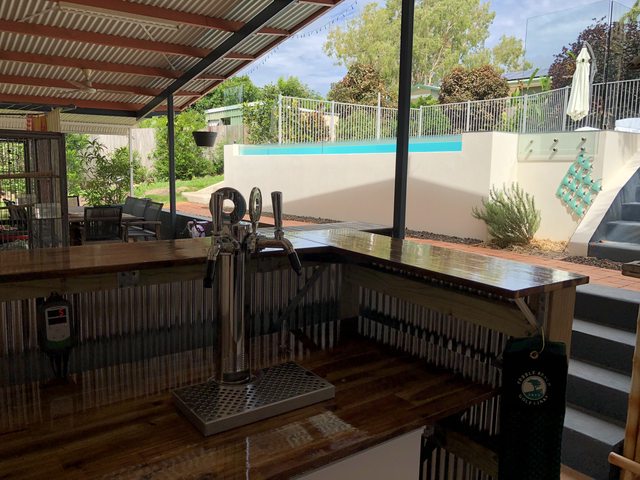
...and this brings us to the latest plan. I'm going to shamlessly copy Batz' bar build here:
https://aussiehomebrewer.com/threads/fitting-a-font-to-a-chesty.64398/
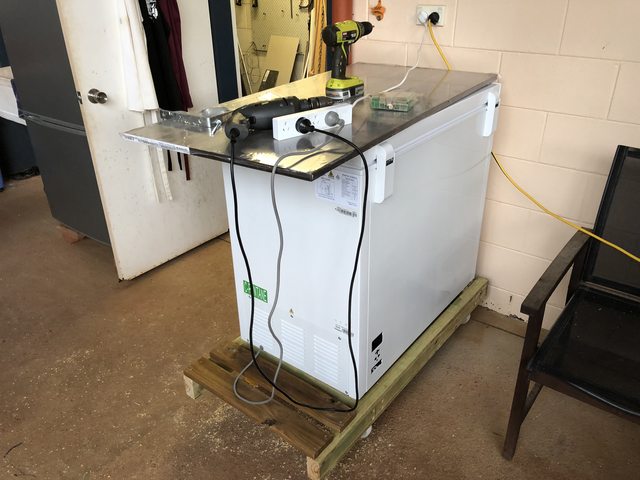
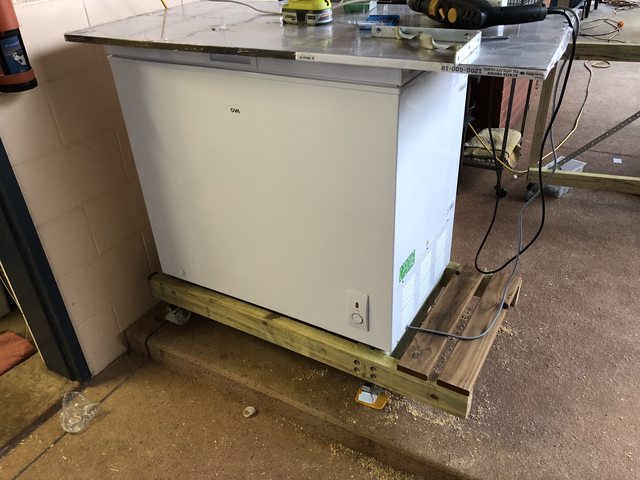
I've bought a freezer (brand new GVA 199L from The Good Guys), and ordered a bunch more stuff from CheekyPeak, Clever Brewing and other places. My credit card is suffering, and the wife is getting concerned. Any hope that this is a cheap project to make cheap beer has long since faded.
Plan is:
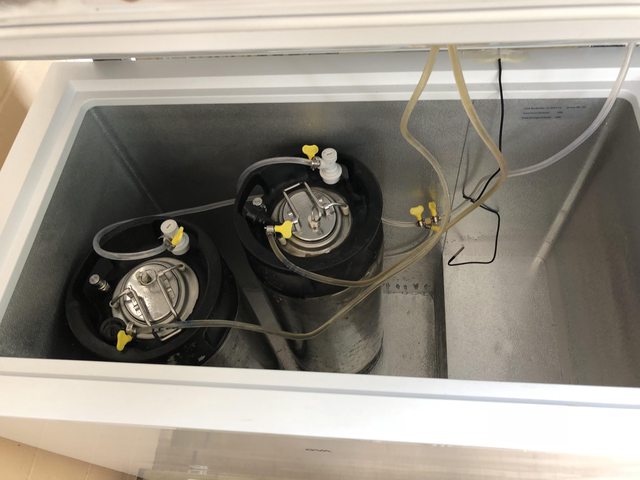
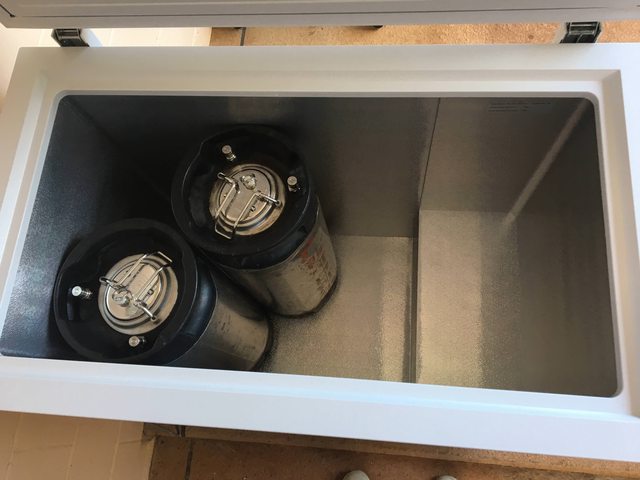
- Freezer can fit 3 x 19L kegs and 1 x 9L, with the gas bottle hopefully fitting inside. No light or anything in the lid.
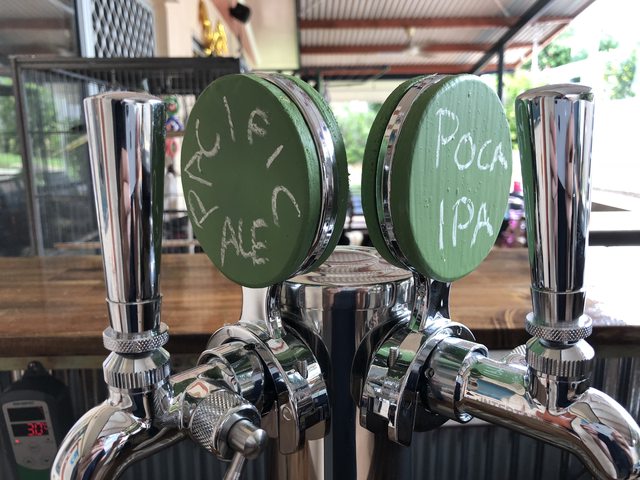
- Wife doesn't like the collar style with the taps protruding - prefers the font. So against all good advice, we're going with a font and two taps. Small price to pay to get some form of spousal buy-in. We'll see how much of a heat penalty we pay.
- Font is just your standard single stainless vertical tube with the 2 taps offset. Would have loved a Cobra, but budget already stupidly blown. Maybe down the track.
- Taps are 2 x Intertap SS FC
- Stainless shanks for the font.
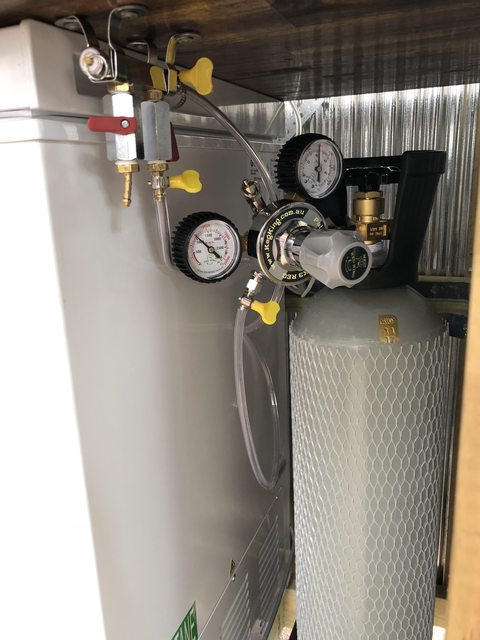
- 8m of gas / beer line should be enough
- 3 x pairs of both gas and beer disconnects
- Converted CO2 fire extinguisher - hopefully picking it up this weekend. Have a brew that's been cold-crashing and is ready to keg once I can get the gas.
- Keg-king regulator
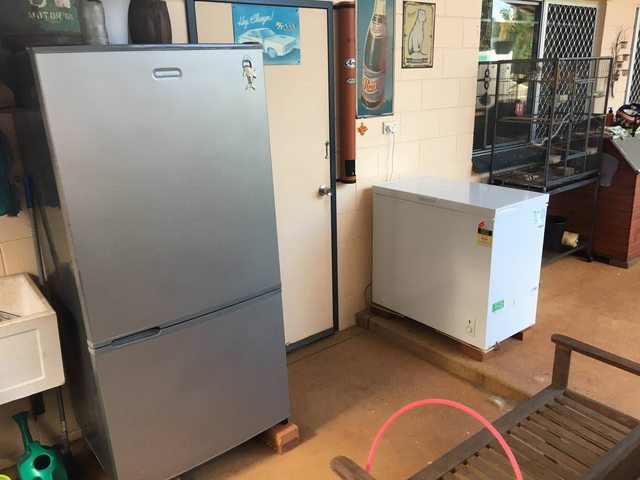
- 2 x second-hand 19L cornies currently, will probably buy another 2 shortly.
- Another Inkbird coming to control the temp. Even with the freezer turned to it's warmest setting, it's freezing water quite easily.
- Starsan to sanitise the kegs, lines, taps, etc.
Still need:
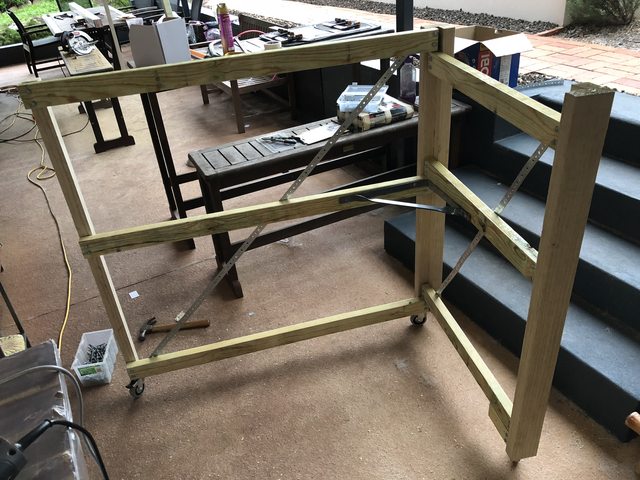
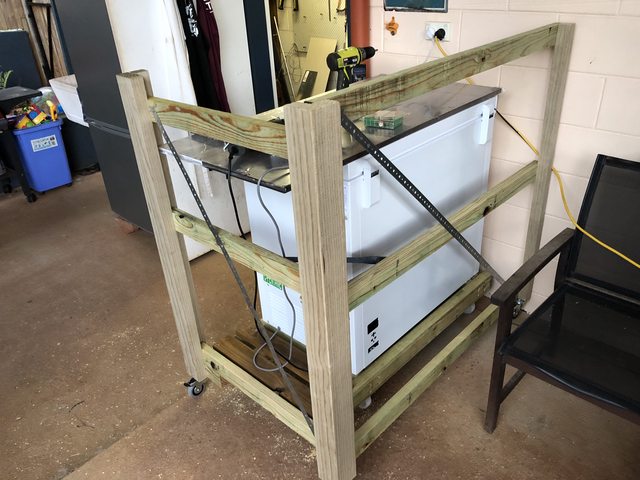
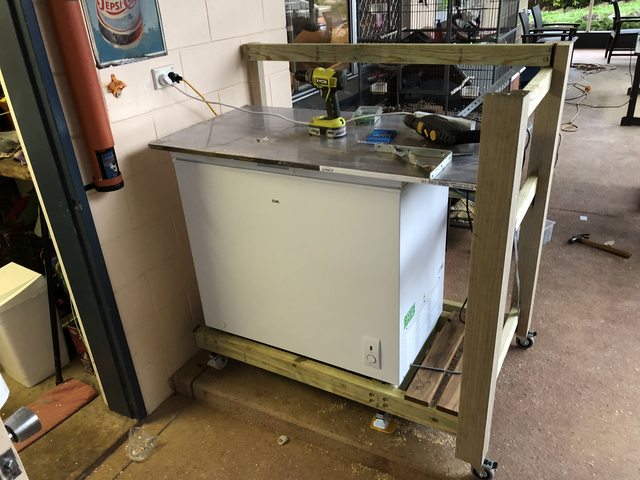
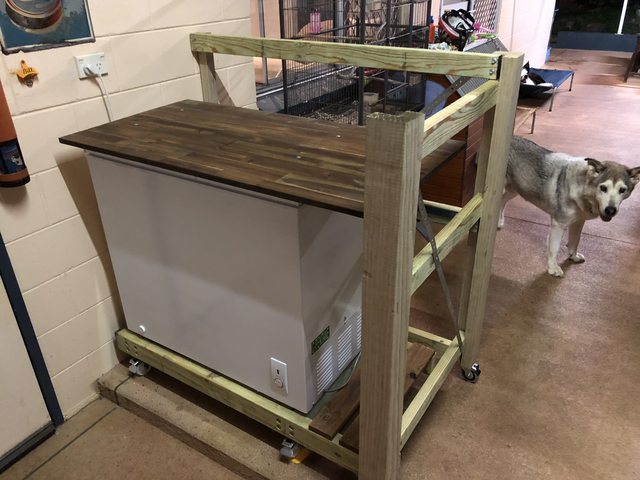
- To build the bar surround for the keezer to slide into. Will be L-shaped, with the hinged top like Batz' design.
- To install all the gear into the freezer, cut the big font hole, etc.
- Need to sort out something for a drip-tray.
Still waiting on the last shipments to arrive, but will hopefully get cracking on the bar "shell" build this weekend.
Photos:
As always, any advice is most welcome - this is my first time building a keezer, and first time with anything to do with kegs.
Cheers,
Matt

 ), and we'll be getting close.