This is a first post, hi all!
I am currently designing a 4 tap keezer for a freezer that I bought off eBay.
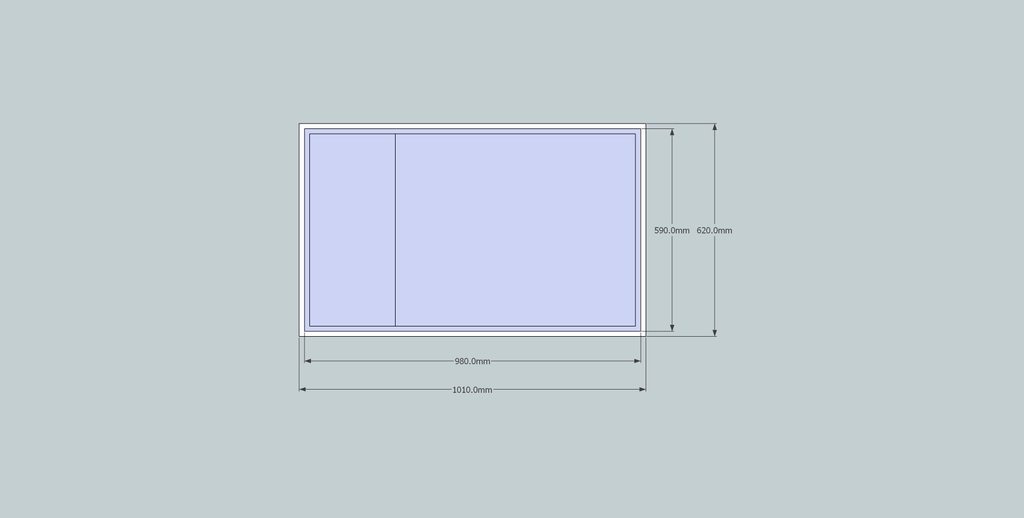
To start off with, I modeled the freezer dimensions. My freezer had sliding glass doors which are removed in the design.
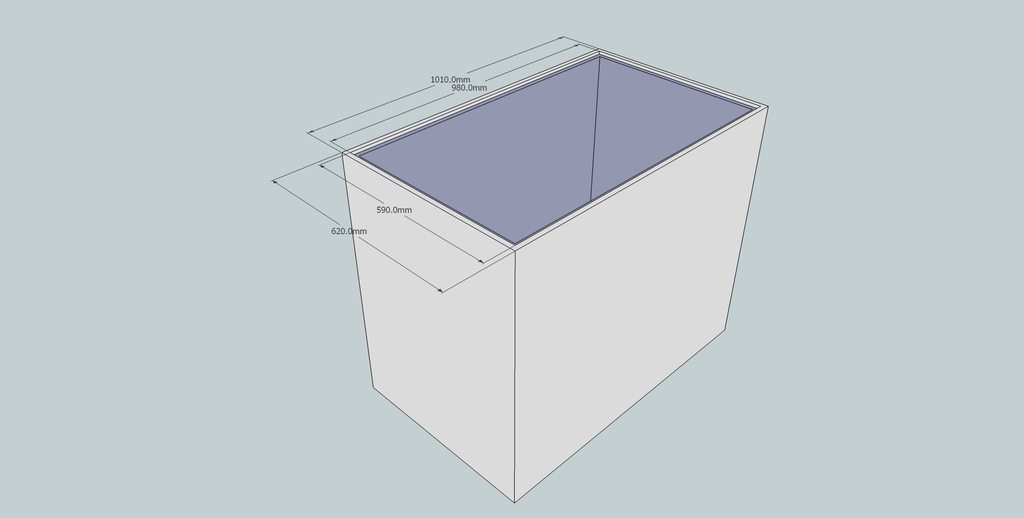
In terms of kegging, the freezer will hold 5 kegs plus CO2 (I am yet to find a satisfactory solution for the CO2 mounting though). I would recommend getting a couple of extra kegs so you can swap to a full keg instead of waiting with a batch to fill one. When looking at a freezer for kegging the likely highest point will be the top of the CO2 regulator at approximately 720mm. Your keezer needs to have at least this depth plus a little bit of headroom, so make sure to ask the seller on eBay.
You'll need air fittings and liquid fittings and in my opinion, the john guest fittings seem easier then the barbed fittings.
So, you will need:
x = number of taps
Knowing all this:
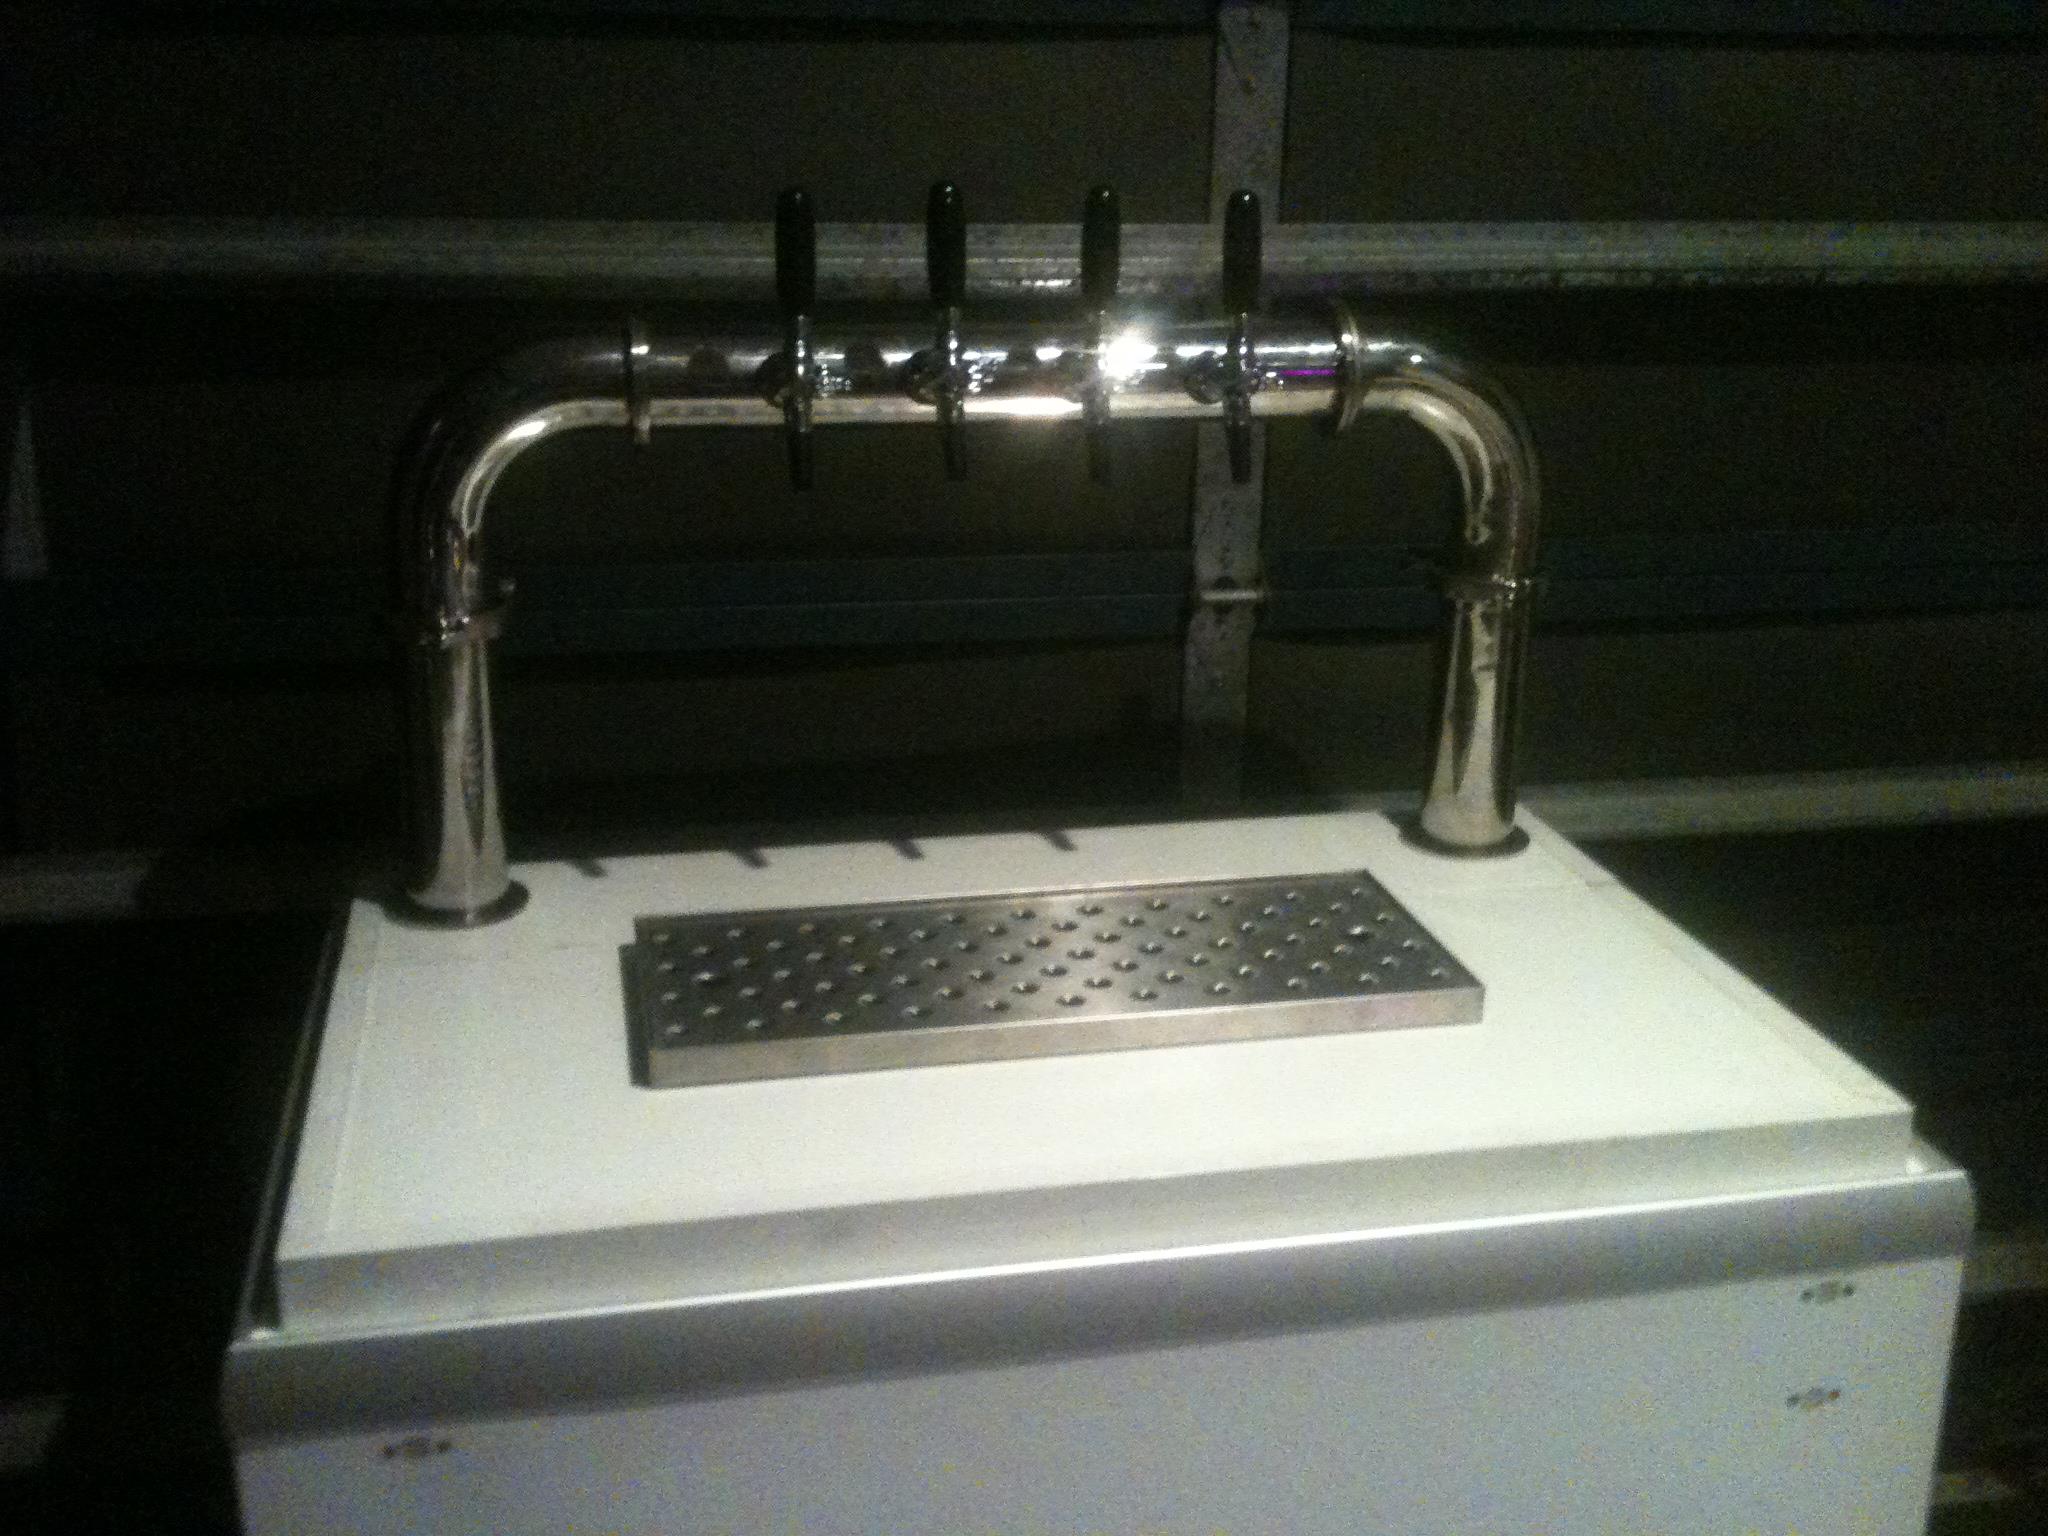
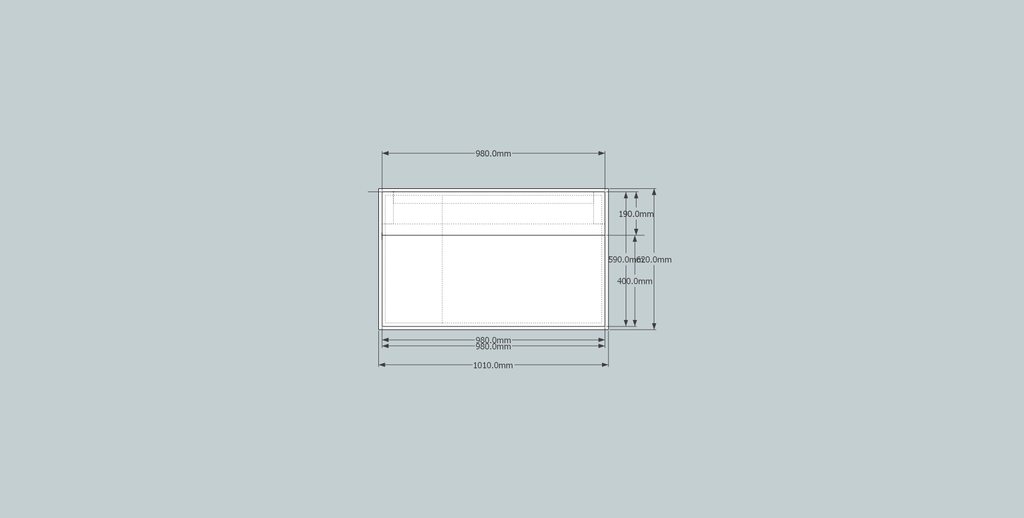
This allowed me to design a new top, which I made from 50mm cool room paneling with an aluminium edge. The groove in the panel allows the front half of the counter to be removed, in order to remove kegs / CO2.
From here, you could order any of the fonts from eBay and just holesaw through the panel with minimal design, however, I wanted something a bit more unique so I decided to roll my own.
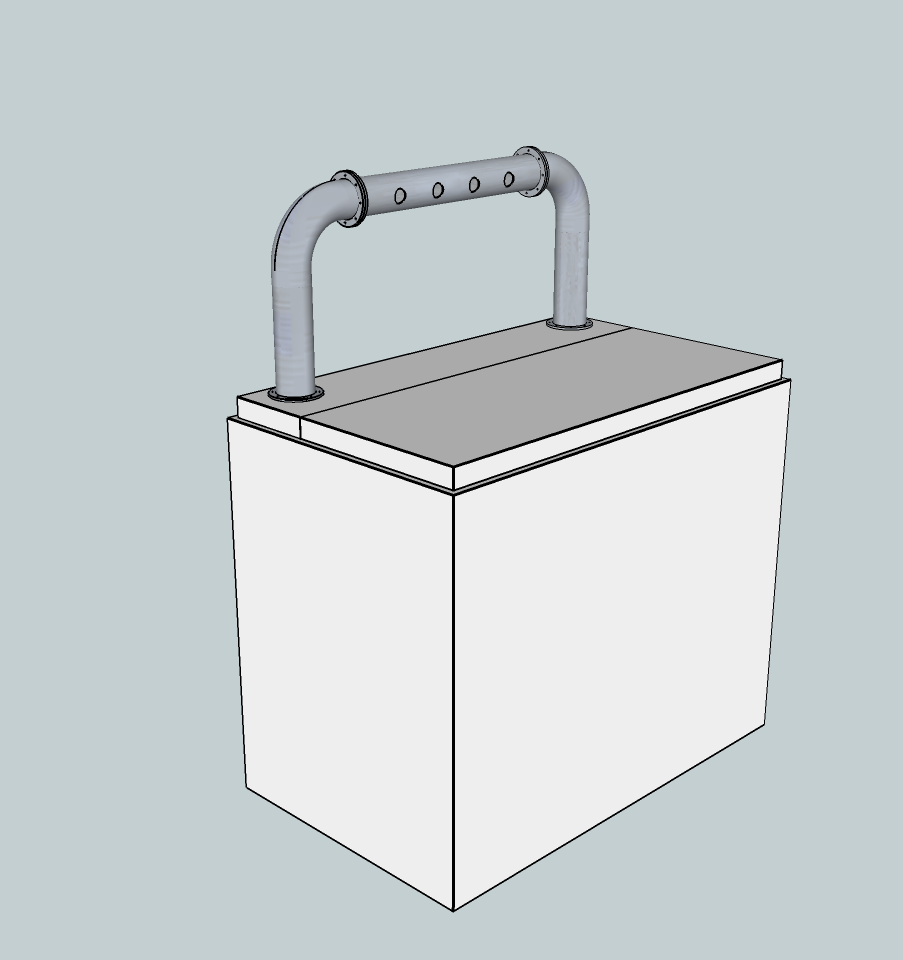
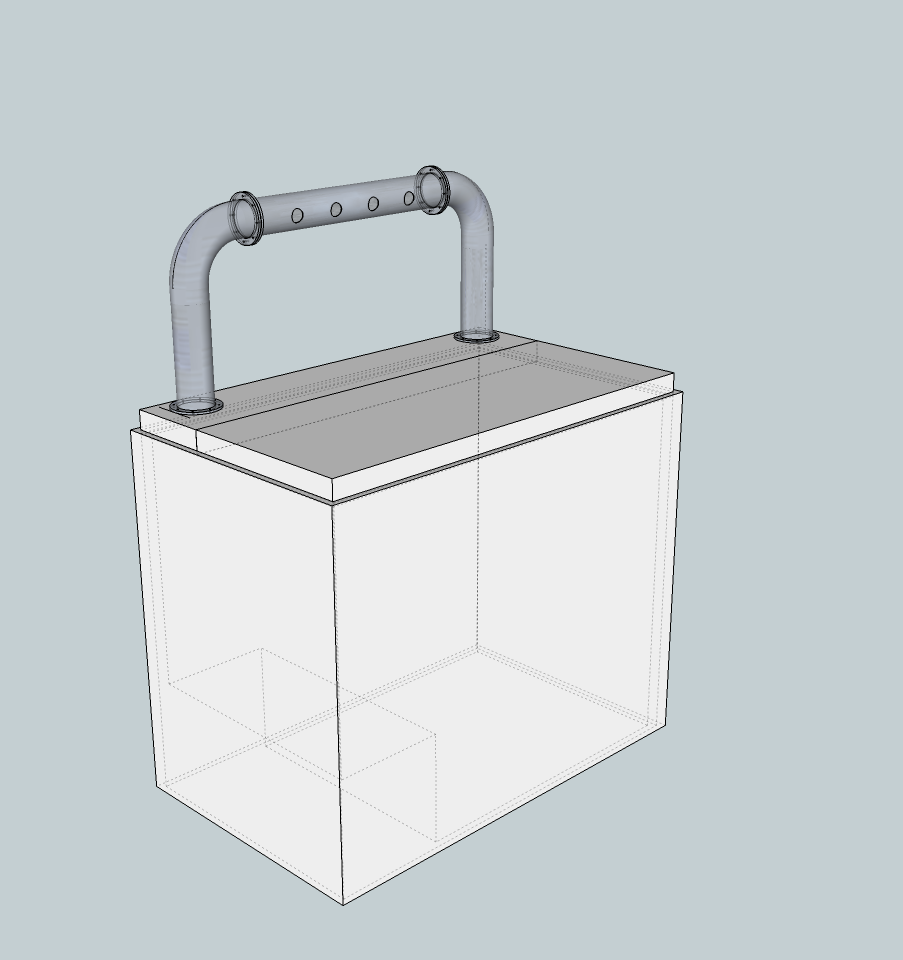
This design would have the beer lines going in on one side, and a fan attached on the other side to draw air through and keep the beer lines cool. When building a keezer, I am not an authority, but I believe if you can get some sort of arch/goalpost/pipeline design that allows you to draw air through it as opposed to a T-shape, the benefits of glycol are negated and the obvious cost and complexity drawbacks are avoided.
In case someone wants to get one of these fabricated, the elbows were 3 inch 316 S/S from Midway Metals I believe the width/height of these elbows came to about 200mm each.
The flanges and tube were obtained from Laser Central. In addition to those shown I also have 2 off 200mm long 3 in S/S tube sections to set the height of the taps. For me, I felt that about 1350mm total height from ground was comfortable. The tap tube has 4 holes laser cut to accommodate carbonator caps with the beer line to john guest fittings which seemed to coincidentally fit the back of my taps. I tested the seal on these and it seemed to be okay.
I've just ordered the steel today and it's looking like being about six hundred dollars, which seems very reasonable for an all stainless steel font, although I am sure welding will cost money if you can't DIY.
If you don't like the flanges or welding, you can use triclover fittings in which you need 2 ferrules, a seal and a clamp per join, although a solution would be needed to attach the font to the counter.
Hopefully my experience designing one of these might help some of you!
Finally, a big thank you to Ross and the craftbrewer team for helping me with this.
I am currently designing a 4 tap keezer for a freezer that I bought off eBay.
To start off with, I modeled the freezer dimensions. My freezer had sliding glass doors which are removed in the design.
In terms of kegging, the freezer will hold 5 kegs plus CO2 (I am yet to find a satisfactory solution for the CO2 mounting though). I would recommend getting a couple of extra kegs so you can swap to a full keg instead of waiting with a batch to fill one. When looking at a freezer for kegging the likely highest point will be the top of the CO2 regulator at approximately 720mm. Your keezer needs to have at least this depth plus a little bit of headroom, so make sure to ask the seller on eBay.
You'll need air fittings and liquid fittings and in my opinion, the john guest fittings seem easier then the barbed fittings.
So, you will need:
x = number of taps
- x taps
- x kegs
- x keg seal kit
- 1 Freezer
- 1 CO2 Tank
- 1 CO2 Regulator
- 1 Fridgemate + box + extension lead
- 1 food grade lube
- 2 stainless steel 5mm clamp
- 1 x way gas manifold
- x Quick Disconnect (Gas in)
- 2x Quick Disconnect (Beer)
- x Carbonator cap (or something to suit the back of your taps!)
- 3x MFL - John guest adaptor
- 1 Beer filter/gravity connector
- A few metres of beer line
Knowing all this:
This allowed me to design a new top, which I made from 50mm cool room paneling with an aluminium edge. The groove in the panel allows the front half of the counter to be removed, in order to remove kegs / CO2.
From here, you could order any of the fonts from eBay and just holesaw through the panel with minimal design, however, I wanted something a bit more unique so I decided to roll my own.
This design would have the beer lines going in on one side, and a fan attached on the other side to draw air through and keep the beer lines cool. When building a keezer, I am not an authority, but I believe if you can get some sort of arch/goalpost/pipeline design that allows you to draw air through it as opposed to a T-shape, the benefits of glycol are negated and the obvious cost and complexity drawbacks are avoided.
In case someone wants to get one of these fabricated, the elbows were 3 inch 316 S/S from Midway Metals I believe the width/height of these elbows came to about 200mm each.
The flanges and tube were obtained from Laser Central. In addition to those shown I also have 2 off 200mm long 3 in S/S tube sections to set the height of the taps. For me, I felt that about 1350mm total height from ground was comfortable. The tap tube has 4 holes laser cut to accommodate carbonator caps with the beer line to john guest fittings which seemed to coincidentally fit the back of my taps. I tested the seal on these and it seemed to be okay.
I've just ordered the steel today and it's looking like being about six hundred dollars, which seems very reasonable for an all stainless steel font, although I am sure welding will cost money if you can't DIY.
If you don't like the flanges or welding, you can use triclover fittings in which you need 2 ferrules, a seal and a clamp per join, although a solution would be needed to attach the font to the counter.
Hopefully my experience designing one of these might help some of you!
Finally, a big thank you to Ross and the craftbrewer team for helping me with this.
")