I figured it was about time to post some details of my allgrain system. I've only brewed with it a couple of times, and there are still some niggly things I'd like to get sorted out, as well as a heap of extra features I'd like to add to it.
It is a bit... well... different. I spent a long time designing a system that would be compact and have all of the bells and whistles of a full 3 tier setup. It isn't dissimilar to a Braumeister, but I developed it without any inspiration from the Braumeister.
I'm presenting it here as a set of images from today's brew day. They're consolidated in an imgur album here. Feel free to ask any questions you'd like about it.
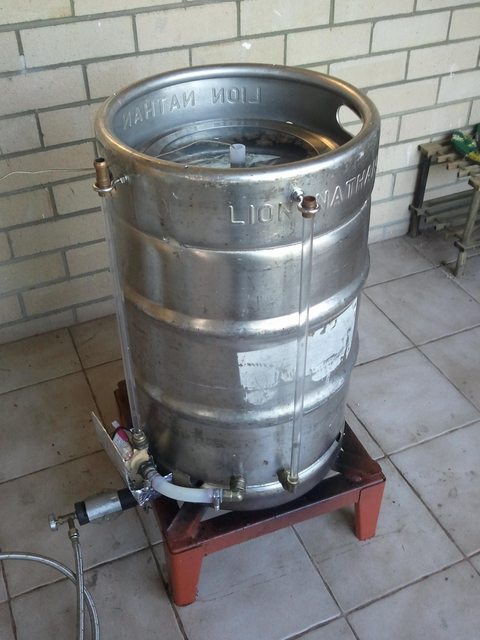
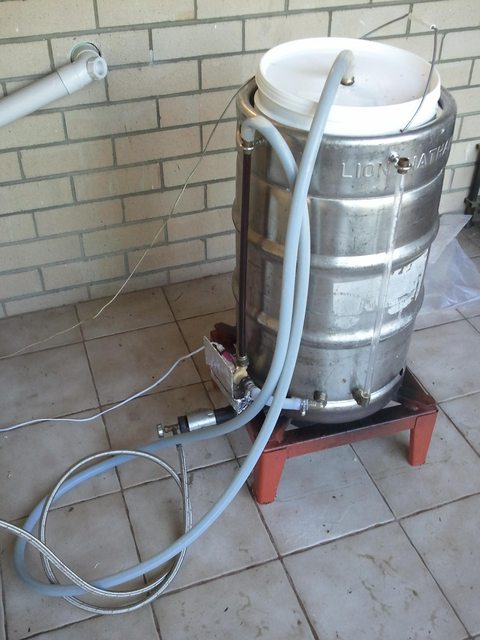
The single vessel. This image was taken while I was heating up the strike water. Aiming for 74C to hit a target temp of 67C when grains are added. The cable going through the lid is a temperature probe. As you can see, a pump is mounted to the vessel itself with a heat shield around it.
I dislike valves, so I've made all outlets above wort level, and I use the pump to move wort around.
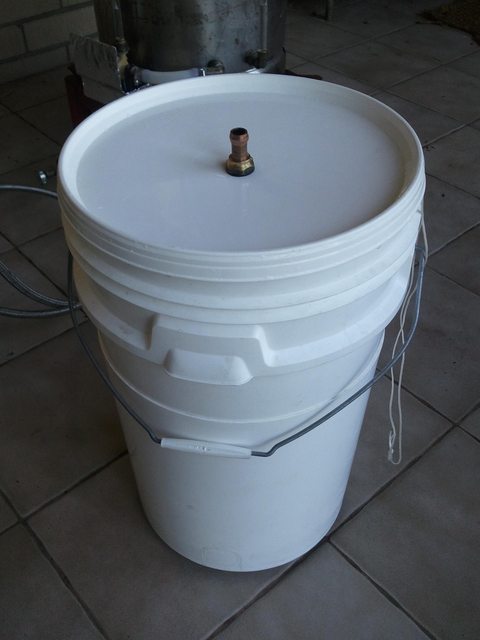
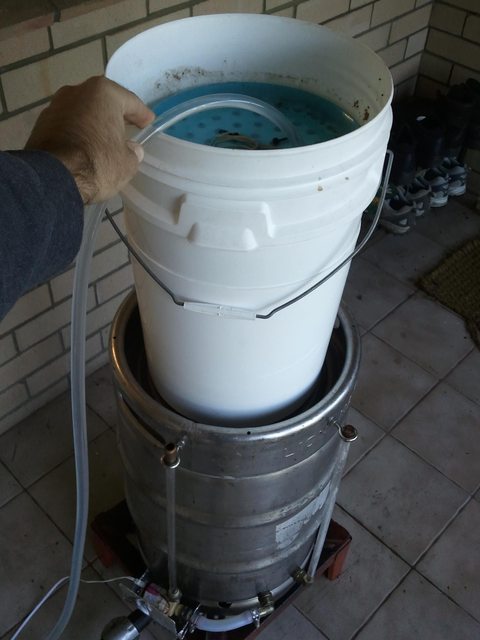
The mash tun. This is a regular 20L polypropylene bucket inside another partial bucket. The lid has a barb attached to the top to allow recirculated wort to be pumped into the tun.
A stainless mesh false bottom with 2.0mm holes. The 6 bolts hold the two buckets together, as well as holding the false bottom to the tun. The brass thing below the false bottom is a home made autosparge valve. The valve is usually closed, but pulling on the string opens it
The bottom of the mash tun. You can see that the 6 bolts double as feet for the bucket. The exterior of the autosparge valve can be seen here with a small copper barb as the outlet.
This is a polypropylene/polystyrene floating shower screen. It sits on top of the mash and gently drops water on it. It also floats when the mash tun wort level gets too high, pulling on the string and opening the autosparge valve.
The mash tun slides nicely inside the kettle, and hot water can be pumped into it for mash in.

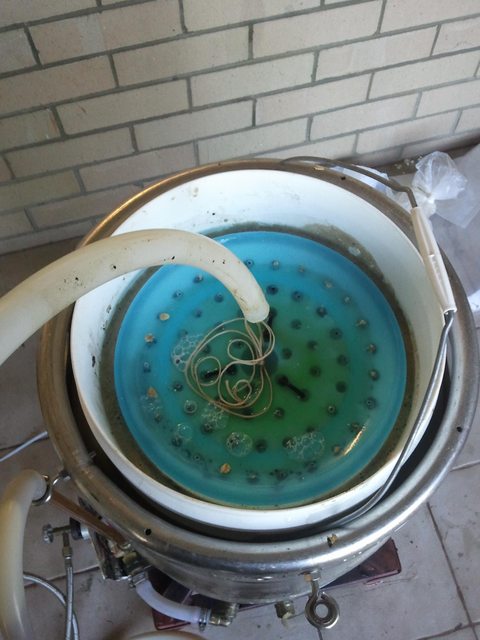
Grains are added to start the mash, and everything is thoroughly mixed. I'm making an oatmeal stout here, so you can see the pale malt, roasted barley and rolled oats.
The shower screen/float is put on top. The string connected to the autosparge valve is threaded through it and a stop knot is tied.
The beginning of recirculation. I've put the temperature probe in the mash to monitor it, and put the lid on the mash tun.
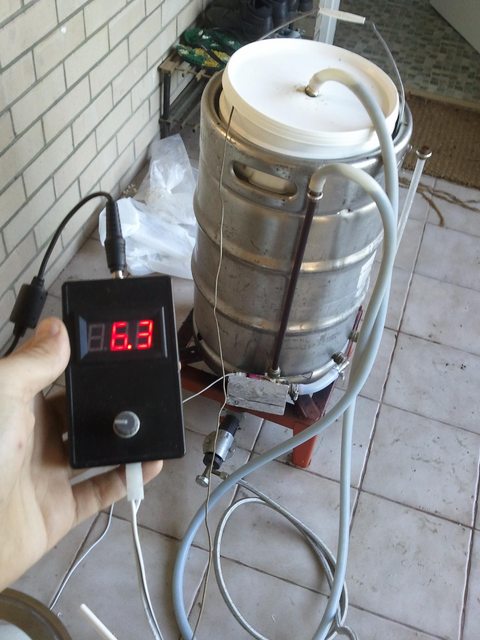
This is a speed controller I built for the pump. It is a 12V pump currently running at 6.3 V. That gives me about 2L/min recirculation rate.
It is a bit... well... different. I spent a long time designing a system that would be compact and have all of the bells and whistles of a full 3 tier setup. It isn't dissimilar to a Braumeister, but I developed it without any inspiration from the Braumeister.
I'm presenting it here as a set of images from today's brew day. They're consolidated in an imgur album here. Feel free to ask any questions you'd like about it.
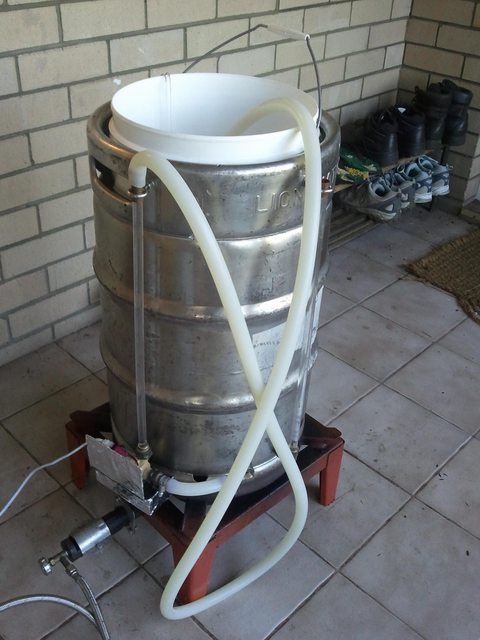
The single vessel. This image was taken while I was heating up the strike water. Aiming for 74C to hit a target temp of 67C when grains are added. The cable going through the lid is a temperature probe. As you can see, a pump is mounted to the vessel itself with a heat shield around it.
I dislike valves, so I've made all outlets above wort level, and I use the pump to move wort around.
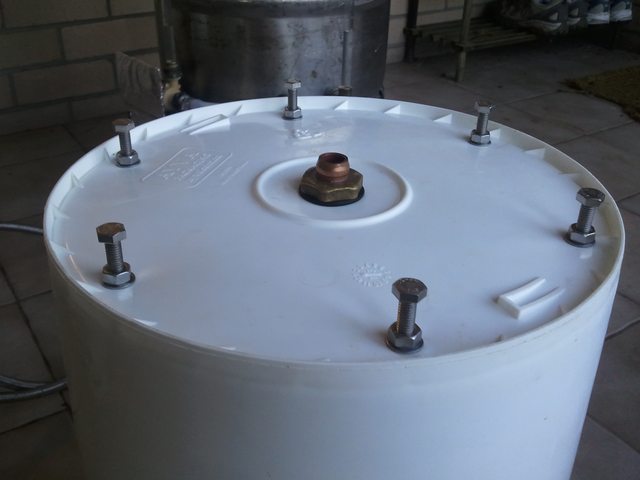
The mash tun. This is a regular 20L polypropylene bucket inside another partial bucket. The lid has a barb attached to the top to allow recirculated wort to be pumped into the tun.
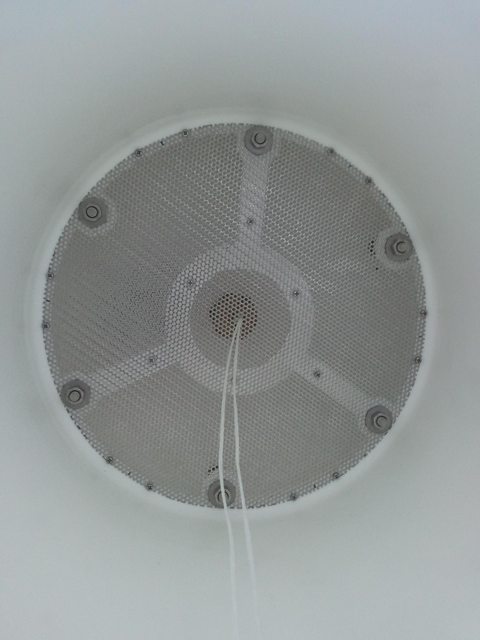
A stainless mesh false bottom with 2.0mm holes. The 6 bolts hold the two buckets together, as well as holding the false bottom to the tun. The brass thing below the false bottom is a home made autosparge valve. The valve is usually closed, but pulling on the string opens it
The bottom of the mash tun. You can see that the 6 bolts double as feet for the bucket. The exterior of the autosparge valve can be seen here with a small copper barb as the outlet.
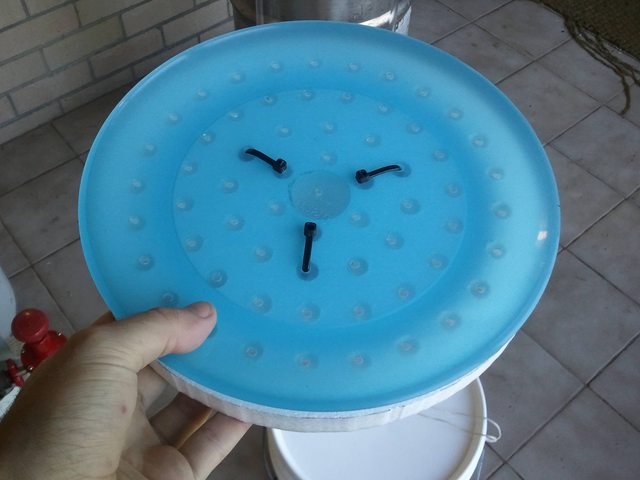
This is a polypropylene/polystyrene floating shower screen. It sits on top of the mash and gently drops water on it. It also floats when the mash tun wort level gets too high, pulling on the string and opening the autosparge valve.
The mash tun slides nicely inside the kettle, and hot water can be pumped into it for mash in.
Grains are added to start the mash, and everything is thoroughly mixed. I'm making an oatmeal stout here, so you can see the pale malt, roasted barley and rolled oats.
The shower screen/float is put on top. The string connected to the autosparge valve is threaded through it and a stop knot is tied.
The beginning of recirculation. I've put the temperature probe in the mash to monitor it, and put the lid on the mash tun.
This is a speed controller I built for the pump. It is a 12V pump currently running at 6.3 V. That gives me about 2L/min recirculation rate.