j-dunn
Well-Known Member
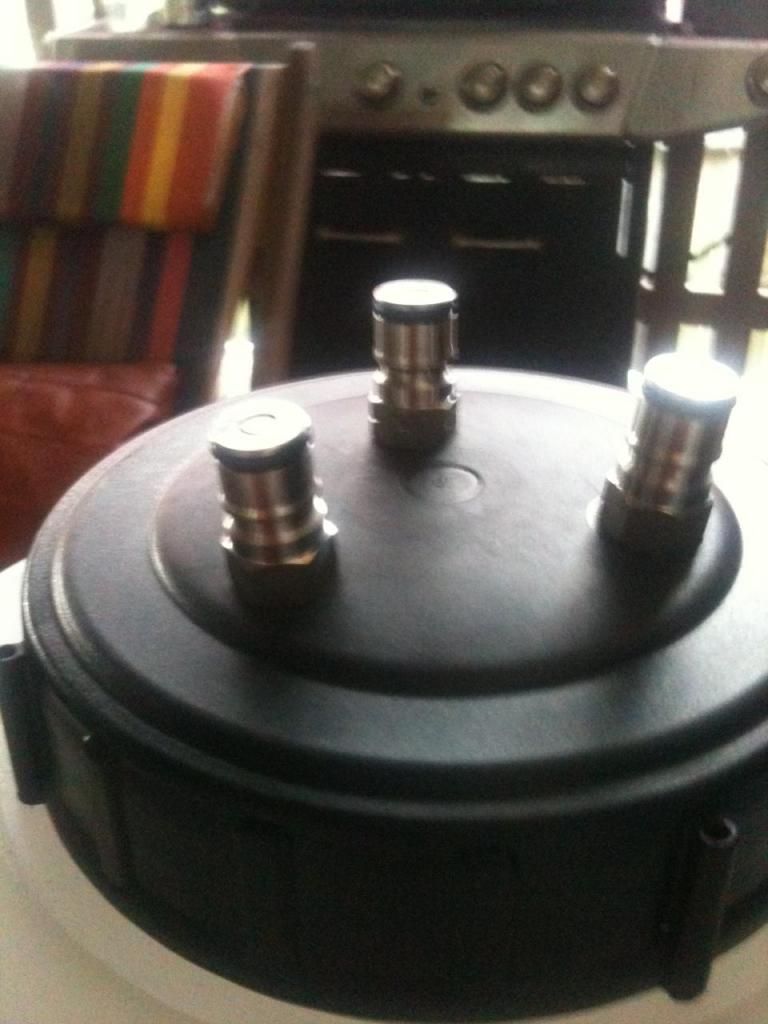
Thought that I would share my build of a 30 lt conical fermenter.
I purchased a 30 lt cone bottom tank from Rotamold WA. It has 4 x mounting bolts, a sealed lid, a 25mm threaded hole in the base and can be pressuriseed to aprox 10 PSI.
The goal was to have as few penetrations to the fermenter as possible. To achieve this I have fitted a 1" Ball cock to the bottom of the tank. All other penetrations are in the lid of the fermenter.
I fitted 1 x gas post , 1 x liquid post with a long dip tube , and 1 x liquid post with a short dip tube.
I assembled it and filled it to the 30lt make, gassed it up to 10PSI and presto, no leaks!!
The frame was some recycled shelving frames that I cleaned up and painted with kill rust.
The idea is to ferment under pressure (after 3 /4 days through air lock bubbler). hydrometer samples are drawn from the short tube by simply clicking on the liquid post a quicklock fitting with a hose and tap. The pressure from the ferment is enough to push out the sample. The reason for the short sample tube is to not draw any of the sediment.
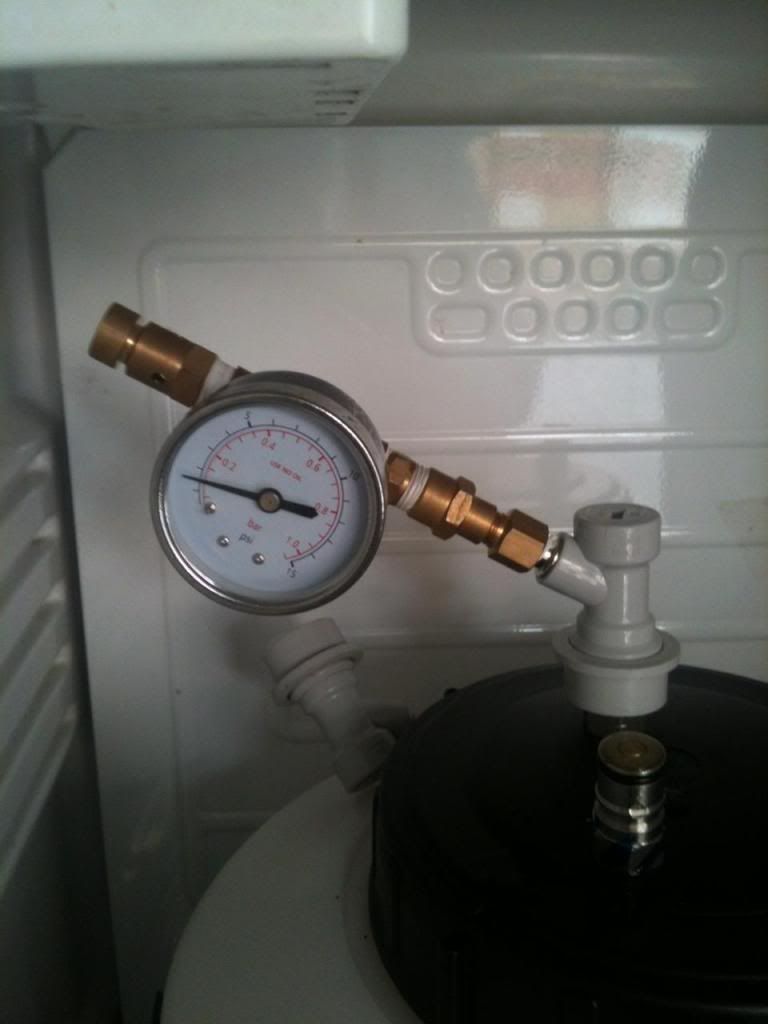
The pressure of the fermenter is regulated with a pressure relief valve that is adjustable. A mate of mine who was a chemist/brewer at one of the big commercial breweries suggested between 5 to 7 psi after 3/4 days of "open" fermenting should be the go. (He then started to explain why but I get confused with words that contain an alphabet!
Secondary fermentation is simply open the ballvalve and remove the gunk.
Transfer to the keg is just as easy, first I purge the keg with CO2. The pressure reliefe valve is then snapped onto the kegs gas post. The liqid post with the long dip tube is connected to the kegs liquid post. Adjust the pressure reliefe valve and the golden juices will flow. All done without seeing the light of day!
I have my first brew in the beast and she is churning away nicely.
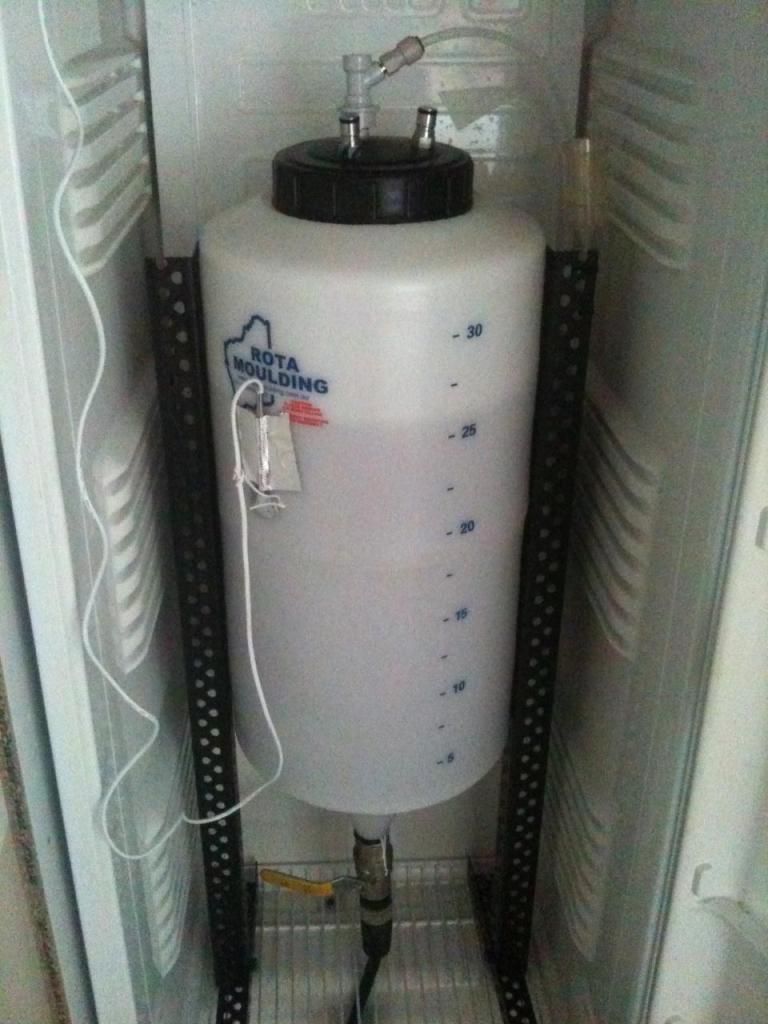
I purchased a 30 lt cone bottom tank from Rotamold WA. It has 4 x mounting bolts, a sealed lid, a 25mm threaded hole in the base and can be pressuriseed to aprox 10 PSI.
The goal was to have as few penetrations to the fermenter as possible. To achieve this I have fitted a 1" Ball cock to the bottom of the tank. All other penetrations are in the lid of the fermenter.
I fitted 1 x gas post , 1 x liquid post with a long dip tube , and 1 x liquid post with a short dip tube.
I assembled it and filled it to the 30lt make, gassed it up to 10PSI and presto, no leaks!!
The frame was some recycled shelving frames that I cleaned up and painted with kill rust.
The idea is to ferment under pressure (after 3 /4 days through air lock bubbler). hydrometer samples are drawn from the short tube by simply clicking on the liquid post a quicklock fitting with a hose and tap. The pressure from the ferment is enough to push out the sample. The reason for the short sample tube is to not draw any of the sediment.
The pressure of the fermenter is regulated with a pressure relief valve that is adjustable. A mate of mine who was a chemist/brewer at one of the big commercial breweries suggested between 5 to 7 psi after 3/4 days of "open" fermenting should be the go. (He then started to explain why but I get confused with words that contain an alphabet!
Secondary fermentation is simply open the ballvalve and remove the gunk.
Transfer to the keg is just as easy, first I purge the keg with CO2. The pressure reliefe valve is then snapped onto the kegs gas post. The liqid post with the long dip tube is connected to the kegs liquid post. Adjust the pressure reliefe valve and the golden juices will flow. All done without seeing the light of day!
I have my first brew in the beast and she is churning away nicely.