Mill Motors

Australia & New Zealand Homebrewing Forum

Help Support Australia & New Zealand Homebrewing Forum:

This site may earn a commission from merchant affiliate links, including eBay, Amazon, and others.
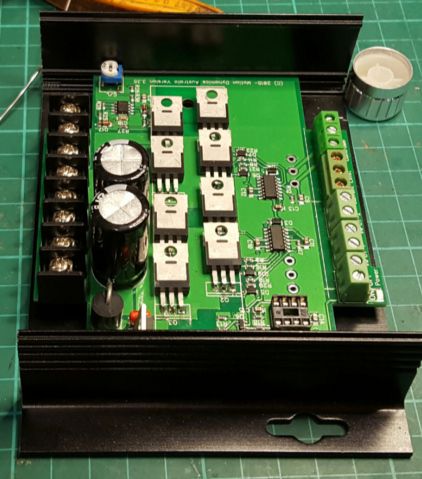
Got my workshop electrical guys checking it over now from work/pretty much finished and decided to put a computer fan in it to ensure good air circulation with an external grill .. will post the electrical diagrams when finished - Managed to find a large electrical box second hand to fit it all in.. got round led switches/AMP/VOLT meter blah blah and picked up a good adjustable table for it they workshop was throwing out that I will convert for the frame.

cheers
 
Finally have got this up and running and will brew with this for the first time today. Not being especially handy about year things it took me a while to figure it all out and then with kids it took even longer to find the time to piece it all together.

I found there was a fair bit to figure out in terms of mounting and wiring everything correctly but enjoyed the process of figuring it all out. I'm sure the more technically minded would knock it up in an afternoon!

I ended up using a wheeled set of office drawers to mount it all which I think will work well ImageUploadedByAussie Home Brewer1443128174.048857.jpgImageUploadedByAussie Home Brewer1443128200.202095.jpgImageUploadedByAussie Home Brewer1443128228.662113.jpg
 
Ive decided to end my mill motor woes and sell some spare kegs to get a MD motor pack. I knew there was a reason why I had 11 kegs :D
 
Jibba02 - Firmware update will be really simple. On the new sensing boards its just a matter of swapping out the existing IC with a new one with more up to date firmware. At the moment, it's still on the original 1.0 because while there's been some decent suggestions, if I update a small piece at a time it would be frustrating to those that HAVE to have the latest firmware all the time! But the IC and post will only cost about $3.00 which is $2.6 for the IC cost and $0.60 post.

Fat ******* - ironically, the new controller was never designed to be a standalone PCB model, it was ALWAYS meant to be in a case!
That's why it has that additional PCB underneath which provides both a rigid mounting for the heat-sink and provides you a mounting point. If you look at the main board you'll see that there's no screw holes!

When we first started selling the kit, nobody EVER bought the case model even though it was available for only $8 more back then! It was a quality metal case it wasn't a cheap plastic jiffy box :)

So, we figured that people must be really keen to save the $11 that the aluminium case costs (and I mean costs... that's what that small alloy metal case now costs us) and be happier because they saved some money
I guess we can start offering it again

error3_zps5mxx2jye.jpg
 
Howdy all. So getting the last pieces of my build together for this motor. The shaft from the motor have people put a key way on this or just left it blank?
 
I haven't used a key way, between the screw that tightens the coupling and the grub screw it seems to be holding fine.
 
I like milling my grain with the standard handle that came with the mill. Milled about 6kg the other day in 15 minutes at most. My mill chomped through it.
 
Will the MD motor fit directly onto a 12.7mm drive shaft on the mini mill or will i need a coupler?
 
Should fit the shaft, 12mm I pretty loose in the gearbox. However, unless you can mount the gearmotor in perfect alignment with the mill shaft, you'll end up flogging out the bearings in both the mill and the gearbox. I suppose you could rubber mount the gearmotor an achieve much the same thing if you wanted to, but a flexible coupling of some sort is far easier and probably cheaper.
 
You can get a half decent coupler for about $10 delivered on ebay too.
 
Camo6 said:
You can get a half decent coupler for about $10 delivered on ebay too.
I have a nice collection of couplers from trying to get the bread machine motor going.
 
Fat ******* said:
Should fit the shaft, 12mm I pretty loose in the gearbox. However, unless you can mount the gearmotor in perfect alignment with the mill shaft, you'll end up flogging out the bearings in both the mill and the gearbox. I suppose you could rubber mount the gearmotor an achieve much the same thing if you wanted to, but a flexible coupling of some sort is far easier and probably cheaper.
If 12mm is a bit loose then maybe its 12.7mm?
 
If its a mash master minimill the shaft from the mill is 1/2 inch and the shaft to the motor is 12mm
 
Does it matter what way the motor is mounted as I've seen people mount it both ways?
 
Doesnt matter so long as its turning the rollers the right way
 
Got my unit set up .. here it is .. next for the mounting.. fully electrically isolated.. just got to get it electrically tested and tagged.. I am Mr SAFETY of course... SOOOOO SEXY !! :p Full AMP/Volt meter and internal fan for cooling the relay and heat sink and with external potentiometer. Just couldn't do the LED brake/reset cause of the additional relays required and space/time consideration in the box.

My work electrical team helped with it.. I am getting some schematics too that may help the electrically minded too...Just PM if your interested.

Grainer

20151009_151316.jpg
 
Just out of curiosity if I do get the sensing motor what happens if I get a stone caught in the mill? Do you scoop out all the grain from the hopper and then fish out the stone?
 
nosco said:
Just out of curiosity if I do get the sensing motor what happens if I get a stone caught in the mill? Do you scoop out all the grain from the hopper and then fish out the stone?
no there is a button that you have to push. It will automatically remove the grain, bag it and even heat seal the bag. The stone will automatically be removed and placed in your garden or bin. Whatever you program it to do. It's a very cleaver piece of kit!
 

Latest posts

Back
Top