100L 1V BIAB recirc build - The BREWT

Australia & New Zealand Homebrewing Forum

Help Support Australia & New Zealand Homebrewing Forum:

This site may earn a commission from merchant affiliate links, including eBay, Amazon, and others.
Its a BIAB setup. The lid factor was considered, deemed a non issue. Can be moved to the bottom return if required.

Will get some pics tomorrow, maiden brew day.

edit: I should add, those pots are quite nice for the price. Solid lid on it too
 
The slippery slope! Thinking long and hard about now going a malt pipe with 2nd return!

Here's some very tidy work by pugwash:

Link to Pugwash's gallery: http://aussiehomebrewer.com/gallery/album/1267-1-vessel-system/

Malt pipe: better flow & temp distribution through grainbed, easier sparging
As a decent false bottom (44cm+ diamater) and a custom BIAB bag is getting close to the price of a 2nd inner pot, the malt pipe idea becomes more attractive.

2nd return: for low temp mashes, whirlpooling, temp distribution around element.

The question remains - without these additions will I still make decent beer?!
 
Dont think that would work too well, the flow wouldnt go 'through' the grain too much (hydraulic pressure and all that). Thats the beauty of a malt pipe, the flow has to go through it, and if you get a stuck mash etc you can see that it isnt flowing through it so you can do something about it........

If you have a bag setup, you really want it to fill the diameter of the pot - for flow reasons.

You could have a false bottom on the bottom, with a hose connecting to the outlet, then the bag on top of that, but it sorta defeats the purpose and you would probably have to remove it for the boil (gas anyway certainly).
 
pot for the malt pipe arrived today, well, it's thin so should make easy cutting! There isn't much room left over with a 56L pot in a 100L pot!

Only 65mm shorter than the outer pot, which means I don't have a hole lot of room for the elements, but enough.

 
Nice work, I'll continue to follow this build for sure
 
grinder power button stops working 3/4 way through the grind - not going to use a tool like that can only be turned off at the switch! Ordered myself a nice makita brushless 18v grinder skin, looking forward to loads of *** disk action once it arrives. so many burrs!

WD-40 and a constant trickle of water over the pot appeared to make the cutting easier.

 
thinking about using silicone tubing and camlocks for the two returns. idea being it'll be easier to make, less 'hard' plumbing, easier to clean, keep dry between brews and hopefully less chance of leaks. opinions on this welcome.

 
slightly modified bottom return for better clearance and tube layout to pump.

 
Last edited by a moderator:
Have you given much thought as to how to mount and earth the element?

I wasn't 100% happy with the way I did mine... but it works...
 
got my sparky mate coming this week to wire up the shed with some serious ampage. Will ask about the element mounting/earthing and report back!
 
You could use that tool to pull through a BSP coupler, you'd have to waste one to do it. Grind one end of a coupler to a tapper pull it through so it's just onto the original surface, knock it out with a hammer, put new coupler in the puller and pull into place and Bob's your fathers brother.
 
Thanks fellas. The idea was to minimise leaks and provide a solid fitting onto the pot. If I can get away with NPT to BSP I'l give it a go!
 
Most of my fittings are a mixture of BSP and NPT. Works fine. Brewhardware come out with some pretty good stuff every now and then.
 
indeed! brewhardware do have some very nice stuff.

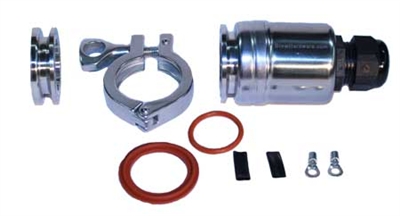
after getting some alloy boxes for my element guards, I've now changed my mind and gonna wait until these are back in stock. Makes cleaning really easy, leaks shouldn't be an issue and good value - https://www.brewhardware.com/product_p/etc4s.htm:

ETC4S-2.jpg
 
Back
Top